As I recently found with my FS100 Macs really seem to hurt your AVCHD footage from Sony cameras and the Panasonic GH2… But especially the Sony FS100.
It is no wonder these cameras often get a bad reputation for limited dynamic range, crushed shadows and blown highlights – when you are only seeing the middle part of the full 8bit range of luma.
This Rec.709 portion of a 601 space (16-235 instead of the full 0-255 the FS100 shoots in) is incorrectly remapped to 0-255 by Quicktime. Therefore apps that use Quicktime at their core like Premiere, trip up. This makes a huge difference to the image. When fixed, you recover over 10% of your dynamic range, highlight and shadow detail, along with a much smoother roll off to whites and blacks.
Unfortunately until now, fixing it involved a lot of wasted drive space and a very time consuming transcoding session to ProRes with 5DToRGB. One of the things I love above Adobe Premiere is that you can edit AVCHD natively as if it was recording in ProRes in-camera so to go back to transcoding again was a real pain.
Apple’s new Mountain Lion, I found yesterday does not fix the problem although it does add AVCHD playback support to Quicktime X (finally)! The latest Premiere CS6 does not fix the issue either. The problem also occurs on other cameras that record in AVCHD such as the Sony NEX series and Panasonic GH2.
Here’s my solution and best of all it is simple, free and doesn’t involve 5DToRGB any more.
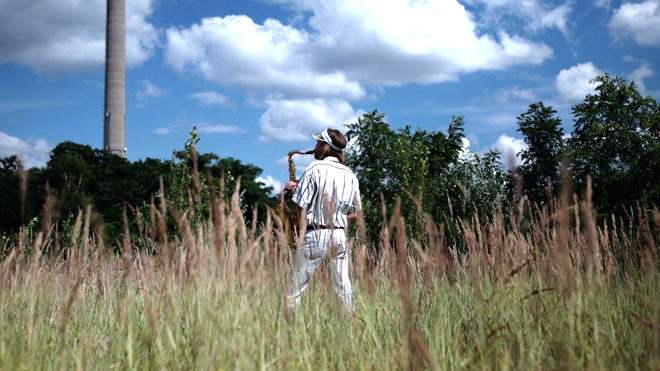
GRADED NATIVE AVCHD
The highlights on the player’s shirt and on the large cloud are blown out, lending the footage a flawed digital look. There’s also a sudden drop at the transition between light grey and white, because light grey is 235 and the remaining 16 steps of transition to white is not there any more. As a result the cloud looks like it was shot on an iPhone. I’ve graded this footage but the grade has nothing to do with the blow highlights. This flaw is visible whether editing the native AVCHD MTS file in Premiere CS5.5 or gimping at them in Quicktime X and VLC Player.
GRADED, FIXED NATIVE AVCHD
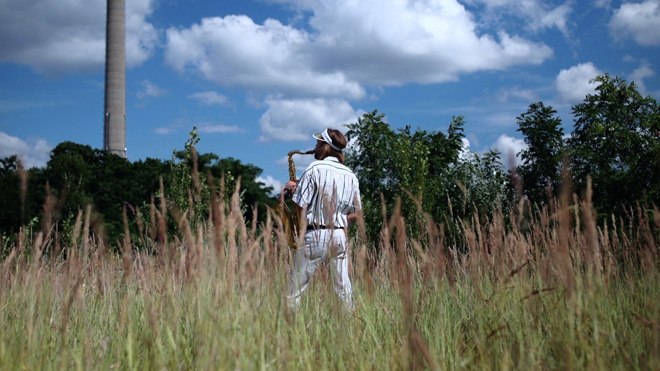
The final image. This maintains the punchy grade I did in Premiere but bringing the output levels down whilst keeping the input levels at 0-255 fixes the problem and brings all the detail present in the AVCHD back into the image, such as the shirt and cloud detail. It does the same in the shadows too although you can’t notice from my grade which brings the exposure down a notch from the original.
Here is the original ungraded clip transcoded to ProRes with 5DToRGB.

And here is how that native AVCHD clip looked in Quicktime X, screwed…

So if you want to avoid a digital look on your FS100 footage here’s the fix…
The fix
In Premiere Pro, the specific part of the Fast Color Corrector you need to apply the fix with is the Output Levels.
Keep the Input Levels at 0-255 but change the Output Levels to 15-235.
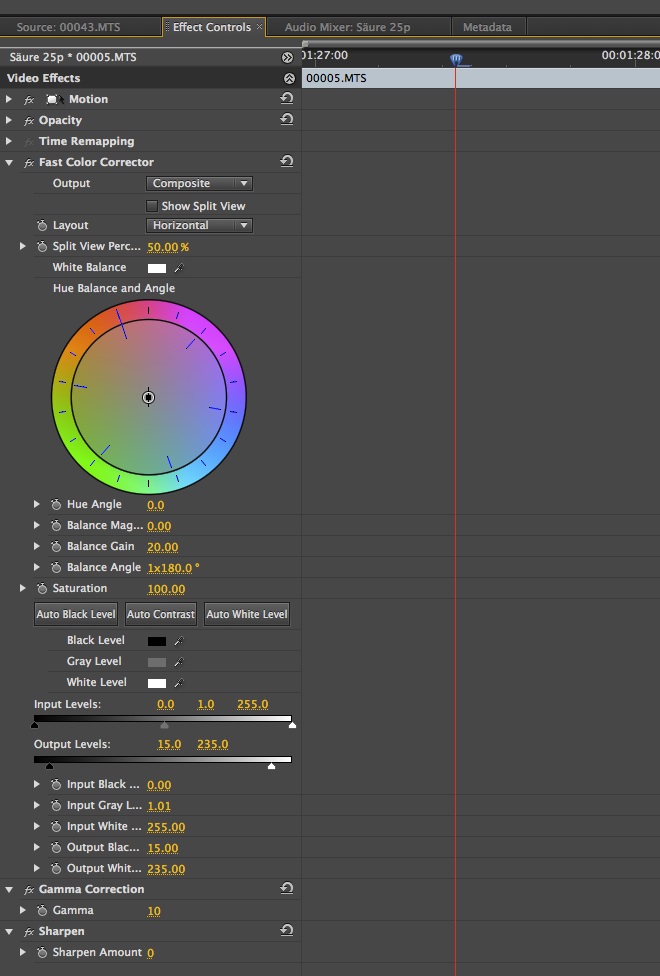
If you feel gamma differs from how the clip was shot you can then apply a Gamma Correction. To leave gamma unchanged this should be at 10.
You will need to do this as a minimum in your grade on every clip, unless you want blown highlights and dodgy crushed blacks.
Happy grading!
The reason why Apple, Sony and Panasonic have let this occur on such mature, shipped products with still no fix or no acknowledgement of the issue is unclear. But it certainly exists. So remember the Output Levels in your grade, and your FS100 footage won’t look like iPhone footage!
