Get the EOSHD Anamorphic Shooter’s Guide for a comprehensive guide to anamorphic lenses, which ones to use, how to get them and how to shoot
Download the 2.5k 2560×1280 Vimeo file and playback on a 2.5K or 4K display for best results
Download a pack of DNG frames from the original raw files to judge quality
The spec sheet is impressive. 14bit linear bayer raw is sub-sampled from a 6K sensor, giving 1280 lines of extremely clean resolution with an anamorphic compliant 4:3 aspect ratio.
This is in a similar league to the image quality of the Sony F35 (Superman Returns, Tim Burton’s Alice In Wonderland) which cost $250,000 just 5 years ago.
With 2560 x 1280 anamorphic in raw on the 5D Mark III it feels like a completely new camera.
I prefer the image and the creativity in post offered by raw over 4K MJPEG on the Canon 1D C. The 5D Mark III is capable of using all of the full frame sensor if shooting 1920×1280 (3:2), it isn’t a crop to APS-H like the 1D C in 4K.
Why anamorphic? It gets me away from 16:9. The cinema aspect ratio is wider. In the old days of Super 35mm film (remember that!?) the imaging area was approximately 4:3 and part of the audio track was on the film negative. To get CinemaScope, filmmakers used anamorphic lenses to compress more width into the frame. As the anamorphic only makes the FOV wider horizontally, it doesn’t reduce your ability to get a shallow DOF and a close up like a normal wide angle lens does. Furthermore when you are panning to track an actor with an anamorphic, you have far more leeway either side of the subject making for more graceful sweeping pans.
You can crop of course in post but it isn’t the same. You lose vertical resolution and you lose the cinematic character and flare of the anamorphic lens.
[vimeo]http://vimeo.com/62177101[/vimeo]Above is a very wide aspect ratio I shot with recently with the Nikon V1 at 400fps, and I was forced to shoot in this aspect ratio due to the slow-mo mode being such low resolution. With the 5D Mark III in raw, you can choose not to crop and use all 1280 lines of resolution, almost at the 1350 mark of the Blackmagic in 2.5K!
What is more it allows you to upscale horizontally to achieve 2.5K without also needing to upscale the vertical res. As a result it really does look like 2.5K and that is the resolution gain anamorphic lenses were designed for, back in the day. Of course anamorphic lenses are still in widespread use today, with Quentin Tarantino shooting Django Unchained with Panavision glass as covered at EOSHD here. There’s more on what lens I used for this shoot further down the article.
Workflow
Raw makes the actual shoot more straight forward as all you really have to control is the lens – aperture, focus – and forget about the picture making box. You cannot really get the full scope of the image from H.264 on Vimeo, so please do download the original DNG files here and open them in Photoshop. You can do most of your exposure in post like you can with a 35mm film negative in a dark room. Bear in mind these are in 4:3 format and shot with the Iscorama 1.5x anamorphic so you should scale them to 2560 x 1280 or 1920 x 953 for the correct aspect ratio.
In-camera with Magic Lantern I used the 4:3 aspect ratio of 1720 x 1280, then a stretch in post to 2:1 anamorphic 2.5K.
UPDATE: With the Iscorama 1.5x lens 4:3 actually becomes 2:1 anamorphic not 2.39:1 3K as originally stated. With a 2x lens in 4:3 or with a 1.5x lens in 3:2 (1920×1280) you will get the slightly wider 2.35:1. I have corrected the video and re-uploaded it in the correct 2560 x 1280 resolution instead of the original 2:39: 1 (3000 x 1280).
This way I get pin sharp and detailed 2.5K footage. This is a formality with an anamorphic lens and great to finally get away from 16:9 thanks to the custom resolutions offered by Magic Lantern. That 14bit 12 stop dynamic range raw workflow is a beautiful thing indeed.
In full frame the camera can go as high as 1920×1280 for a still anamorphic friendly 3:2 aspect ratio giving 2.39: from a 1.5x lens and 2.66:1 from a 2x lens – this will be lovely but at this early stage it isn’t quite reliable on my fastest 1000x speed compact flash card, dropping frames after around the 20 second mark. 1770×1280 maintains the same number of lines of resolution but makes continuous takes reliable and gives you true 2.39:1 with the more common 2x anamorphic lenses making for a less extremely wide image than a 16:9 sensor delivers from anamorphic.
I’m really glad I have found my paintbrush. The Blackmagic Cinema Camera EF mount much as I love it is not full frame and there’s no other aspect ratio apart from 16:9 which doesn’t help my anamorphic work at all. The Sony FS100’s image just doesn’t match raw and again no anamorphic concessions to aspect ratios are present. I am going to sell the FS100 and replace the BMCC EF with the Micro Four Thirds mount version to use as a B-camera.
Initially I had concerns about losing the stella low light performance of the FS100 but the 5D Mark III is utterly amazing in low light with raw. My initial low light test it turns out did not exploit the full performance as I was handling it the same as the Blackmagic footage by changing the exposure in post from the native ISO of the sensor (800). What I later found was that if I shot at the desired ISO in-camera the image is cleaner than shooting at what I assumed to be the native ISO and adjusting the exposure in post, so it is likely the native ISO is more like 2500 than 800!
The raw workflow doesn’t phase me as I can efficiently work to deadlines armed with the right knowledge of raw in post, the right software and the right hardware. Admittedly when you don’t have this experience and the right tools, raw becomes very frustrating and time consuming in post.
When not on a quick turn-around and just painting with light, even going slowly isn’t a concern to me, because I enjoy spending a lot of time working through these challenges and certainly a lot of time grading, whilst with DSLRs prior I never really graded at all – I felt it hurt the image too much.
I think the anti-raw arguments are exactly the same as when DSLRs and 1080p first came onto the market. People complained 1080p was too slow to edit and demanding on their time – but mainly that they just didn’t need it at that point.
1080p became the standard very quickly though and some were ill prepared at that point as they hadn’t embraced it earlier! Don’t lose valuable time listening to the negative nellys telling you how much of a pain raw is. A gigabyte is the new megabyte and tomorrow terabytes will be the new megabytes. You have to move with it as the IT side just gets better and better, cheaper and cheaper with every passing day. Technical knowledge has never been more important in the armoury of a filmmaker. In the film days you had to have technical knowledge but it was of a different kind and it served you for longer. Today it is easy with digital to get quick and easy results but to really push you need that IT ability in spades and to not be intimidated by the fast pace of digital technology.
Raw2DNG from Magic Lantern even in such a rudimentary early stage crunches through Canon DSLR raw files faster than real-time (24fps) on my €1000 Hackintosh with RAID 0 array of 3 standard hard disk drives. The main operating system is on an SSD. There’s no recording limit as the 4GB file size limit of FAT has been broken and the camera uses ExFat formatted cards. You can also record ProRes via HDMI whilst simultaneously recording raw internally to compact flash card, which is handy for generating on the fly proxy files and playback. During this shoot I had no problems using my SmallHD DP6 for monitoring in the correct anamorphic aspect ratio via HDMI whilst recording raw, quite an incredible feat for a $3000 DSLR. Despite this being dev code I had no crashes or corruptions either! Quite incredible progress in just a week.
Partly thanks to Red, raw (at-least compressed raw) is already a cinema standard and I think we will be seeing more of it in other realms of production where image quality is a priority too. People complained there were a lot of amateurish hacks and workarounds with DSLRs when they first appeared but that didn’t stop a lot of very high end professional productions being shot on them because the image was lovely at the time.
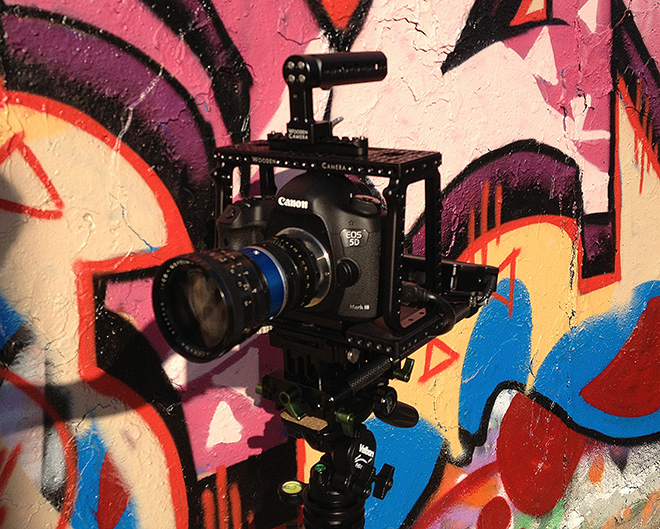
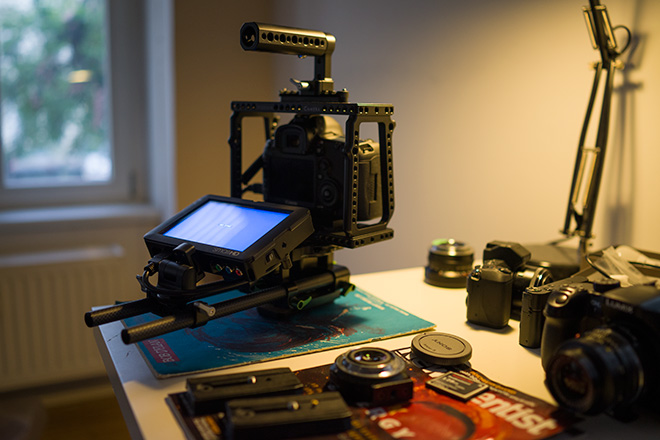
Now it is again and you just need to rig them properly for them to be usable professionally. I don’t like overly complex and spidery rigs so I’m very happy with the rig which I came up for with the anamorphic shoot which is simply a Wooden Camera cage, Lanparte quick release with carbon rods and a SmallHD DP6…
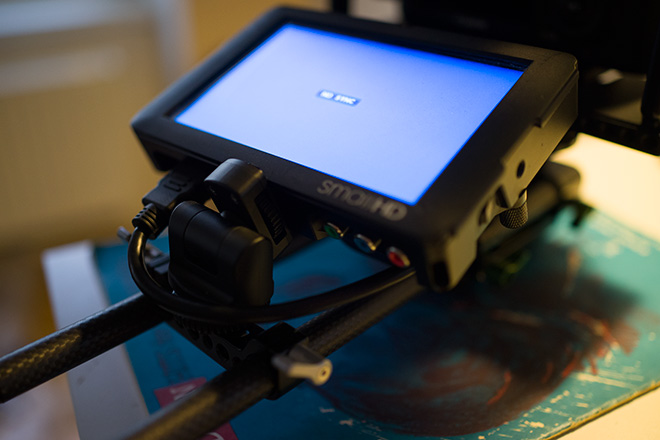
Because I wanted a top handle as well I put the 5D Mark III into the Wooden Camera Blackmagic Cinema Camera cage – yes it fits! Though I had to use a very thin secondary adapter plate designed for something else. As you can see the monitor is mounted on the back of the rails for tripod use, but what is great is that it is on an articulated Sony hinge mounted directly on the rails and not one of those annoying spidery arms up high which puts the whole rig off balance.
The monitor is very light and takes the same batteries as the camera but also acts as a good counterweight for the weight of the lens. I can look down at the screen when shooting on a tripod at waist or chest height. This is much better than having to hunch over constantly to see the tiny non-articulated LCD on the back of the camera.
I found battery life to be excellent on the camera whilst shooting raw, better than Blackmagic’s internal battery by far – though an external battery is still preferable for longer shoots than a few hours.
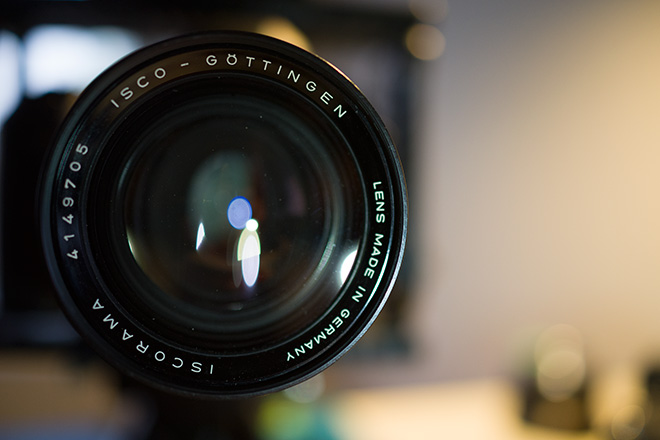
I have a love affair with anamorphic glass especially Iscoramas, and currently have the 36, 54 and smaller 30. I’ve dubbed it the ’30’ because the rear element is 30mm compared to 36mm on the later Iscorama 36. If you are considering an anamorphic lens yourself or just interested in the advantages of using one you should grab my book on the subject here.
The ’30’ is the first generation Iscorama from the late 1960’s which was bundled with a SLR mount prime set to infinity. Focus is on the anamorphic. It flares more thanks to being single coated instead of multicoated and the smaller rear element helps introduce a more characterful vignette. When I want to tone these properties down (sometimes I do) and not go all out for J.J. Abrams flare, I use the multicoated Iscorama 36, which is even a bit sharper.
My favourite lenses to use with the Iscorama 30 are the Helios 44M and the Helios 44M 🙂 OK better explain that the original Helios 44M is a single coated 58mm F2.0 lens from Russia, very sharp wide open with an Iscorama. Though not as sharp or as contrasty as my Contax Zeiss 50mm F1.4 or Leica R 50mm F2.0 with the Iscorama, it does have heaps of character. It also goes well with my very rare Iscorama CentaVision 2x single focussing anamorphic and is the prime lens I used to shoot Zen in Shanghai shot on the GH2. With the GH2 you get much sharper corners especially stopped down. On the 5D Mark III the corners are shall we say ‘characterful’!
[vimeo]http://vimeo.com/33047750[/vimeo]The second Helios 44M I have is of course the amazing modded Flare Factory 58 from Richard Gale’s Dog Schidt Optiks. Richard is an engineering genius as well as someone with a wonderful eye who I can trust to come up with character by the bucketload. The reason I used my bog standard Helios for this shoot is that I had the faux-anamorphic aperture insert in the FF58 and no time to disassemble the lens to take it out. I will be shooting with the Flare Factory 58 as the orange tint compliments the single coating flare on the Iscorama making it even more dramatic and even adding a hazy, glowing vignette which fully utilises the smooth gradation of 14bit raw. None of the flare or vignetting you can add in post digitally is this organic or dynamically shifting due to real ambient light sources.
Conclusion
Am I over the moon about the image quality of raw on the 5D Mark III?
Well before we were shooting 8bit, with all that banding and lack of flexibility in post. Now we have 14bit colour and can debayer the raw to 4:4:4 EXR using the full power and sophistication of an ILM workstation. That’s a bit of a step up from DIGIC 5. Effectively the image processor of the camera has been moved out of the DSLR and into the realm of Resolve, Intel and NVidia. That is a big thing. No more DIGIC debayer or mushy H.264 encoder.
Dynamic range and overall quality is pretty much identical to the 22MP raw stills on the 5D Mark III so you can imagine what a step up this is for any league of video camera, let alone one costing $3000. That Canon sensor is doing a very good job indeed and I am amazed.
One of the biggest improvements I’ve noticed, especially when watching the footage on my Dell 27″ 2.5K display which rivals the Apple Cinema Display for colour and contrast is the HUGE improvement to the look of colour on the 5D Mark III. All I can say is hello colour, hello blue skies, hello subtle shades where have you been all this time!? I’m amazed we put up with not having this kind of colour and tonal precision for so long.
Resolution in 1080p is very close to the full 1080 lines so clearly the sensor is doing a superb job of sampling the full 6K chip. The exact method is proprietary Canon knowledge but I’d be very surprised if there’s any line-skipping at all like there is on the 5D Mark II. I’ve not had a single incident of moire or aliasing yet. The only artefacts I’ve seen are when I’ve done something in post I shouldn’t have like pushing highlight recovery all the way to the right, which hurts the roll off. Better to let some highlights go to super-white than to hurt highlight roll off in my view.
Resolution in 1280p for anamorphic is of course even better and exceeds what the best 1080p broadcast cameras do, such as the Canon C300. It is a moving 14bit raw photo oversampled from a 6K sensor and stored in raw format ready for 4:4:4 sampling whilst the C300 is a moving 8bit JPEG image oversampled from 4K and heavily compressed in 4:2:2 MPEG, so I am not very surprised that the 5D Mark III looks a lot nicer.
