Leaderboard
Popular Content
Showing content with the highest reputation on 01/19/2023 in all areas
-
Fuji X-H2S
Juank and one other reacted to Attila Bakos for a topic
To anyone who is interested in recording ProRes RAW with the X-H2s, I just got confirmation from Fuji that they convert X-Trans to Bayer in the camera, as I suspected. Because the two patterns are different, you have to calculate what's not there. So let's say at a given pixel X-Trans stores red but for Bayer we need blue. I asked Fuji if they interpolate this blue using the surrounding blue values in the X-Trans pattern or they just copy the value of a blue neighboring pixel. The latter is faster but more prone to artifacts. Unfortunately I received an one-liner that this is proprietary info. I'll know more when I test this out myself, I'll receive a Ninja V+ in the following days.2 points -

How are you converting V-Log to "normal" colour?
Walter H reacted to hyalinejim for a topic
As I was watching the S5II reviews I realised that people are taking the same V-Log files and ending up with very different colour results. I guess there are four main approaches - use the colour in the file untouched, use Panny's LUT, use Resolve's Rec709 conversion, or use a third party LUT. This post compares the accuracy of each and discusses the trade-offs that might be made. This applies to the GH6 and any other Panasonic cameras that share a similar color palette. I'll be using extracted colour patches from a colour target. This is how the chart looks in reality: Below, I match the gamma of a GH6 V-Log shot of this chart and then look at the results. Open in paired tabs on a monitor and flick back and forth to compare. 1. Don't transform the colour, just add contrast: You can see here by comparing with the original that overall saturation is way down, cyan magenta and yellow are too bright, reds are too orange, greens are too yellow and blues are too bright. Skintones are too green. I guess some people grade like this. However the colours are still in V-gamut and ideally should be transformed to Rec709. Even when I manually colour grade in Resolve so that some patches are accurate, then others are still totally off. Not recommended. 2. Use Panasonic's VLog to V709 LUT This official LUT comes with a half-assed curve as part of it. But you can separate the components using LutCalc and just get a LUT that is the colour transform only. The colour LUT must come first, before the curve, or things will go wonky. Cyans are too bright, magentas too pale, yellows too dark and orangey, reds a smidgen too bright and orangey, greens too pale and light, and blues are absolutely far too light and cyan. Skintones are slightly too pink. Despite these colour inaccuracies this is actually a good colour transform in the sense that as far as I have looked I have never spotted any colour weirdness in the image like banding or colour clipping. It's a slightly muted look though, and not good for landscapes - foliage, sea and sky will suffer a washed out fate here. 3. Use Resolve's Color Space Transform to convert to Rec709 colour Note that Panasonic's official LUT is available in Resolve under the LUT menu. However, you will get different colour results using the Color Space Transform effect to convert V-gamut to Rec709. I was a little bit excited when I saw these results at first. It looked off-hand to be a bit better than Panny's conversion, especially in terms of the lightness of the blues. However closer inspection reveals that although cyans are just about right, magentas are too bright and saturated, yellows too orange, reds too bright and saturated, greens are close but deep blues are oversaturated. This colour conversion differs from the Panny insofar as it has to be applied after the curve conversion, not before. When you do this I noticed some weird colour artifacts in footage I'd shot at an aquarium. So yes, the blues are more accurate but the inaccurate Panny conversion gave an image with integrity whereas blues began to clip and go weird (even with saturation mapping). Overall, this gives more accurate and I think nicer colour than Panny. However, if I was a wedding or nightclub shooter I'd be wary of colour artifacting in strong coloured lighting scenarios. 4. Third party LUT I was interested to see if I could make a colour accurate LUT for the GH6. I gave it a go and you can check out the LUT here. The LUT must go after the contrast curve, not before! Yes, it's very accurate compared to the other approaches. When contrast is relatively moderate and the range of colours is not so saturated it looks a bit similar to the Resolve transform. However, there is much better hue accuracy and saturation control in all tonal areas, which you really notice if you crank up the contrast or have very saturated. However, I did still notice some of that colour weirdness in the aquarium shots. So it looks like Panasonic know what they're doing in terms of sacrificing colour accuracy to preserve image integrity. And I guess if total colour accuracy is what you're after you need to shoot RAW! Finally, here's a comparison on a real world image: Vgamut Panasonic Vgamut to V709 Resolve Vgamut to Rec709 (skintones are nice but note the oversaturated reds on the skirt) Custom LUT1 point -
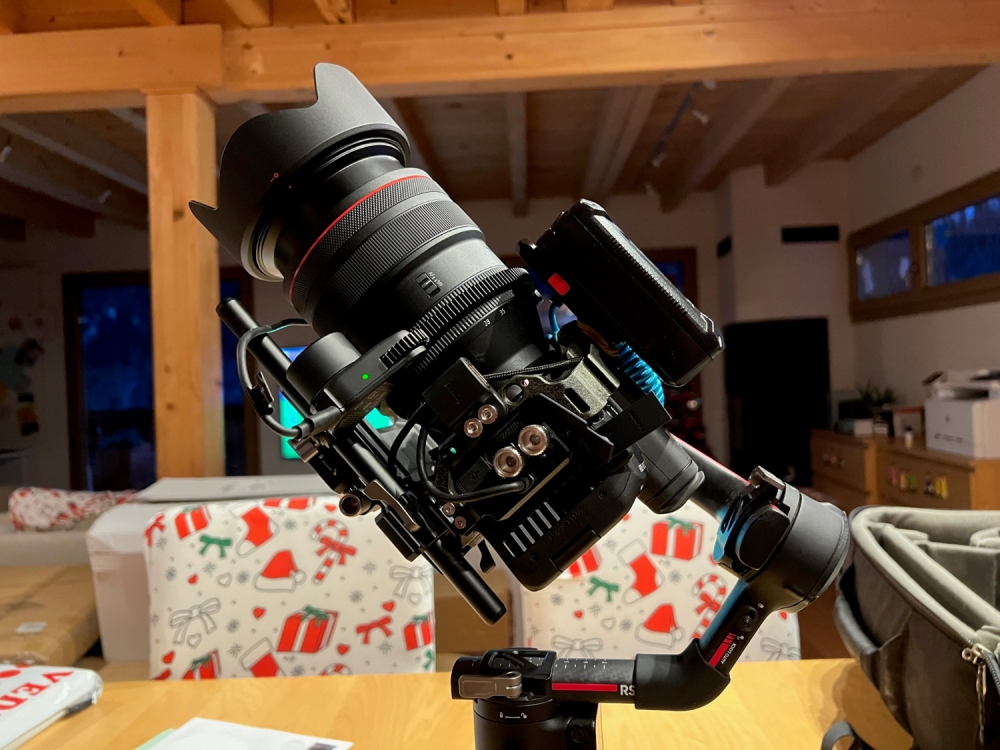
I have this https://www.smallrig.com/smallrig-eos-r5-r5c-r6-black-mamba-camera-cage-3233b.html (there is also this one https://www.smallrig.com/smallrig-black-mamba-camera-cage-for-canon-eos-r5-c-3890.html for the R5c version but covers the remote terminal and I need that for remotes ) this smaller one also would work https://www.smallrig.com/smallrig-black-mamba-camera-half-cage-cable-clamp-for-canon-eos-r5-r5-c-r6-3656.html And this to mount the battery on top of the cage: https://www.smallrig.com/smallrig-mini-v-mount-battery-plate-2987.html The setup is clumsy but very solid. The grip here in CH went down to around 300 euro and you need 3 battery as one comes with the camera so around 600 euro. The R3 you would also need 1 more battery too. The anton bauer is also an option, it is bigger and is heavier at 700g vs 300g of the FXLion Nano One (although if you add the cage ca 300g and the mount were are basically the same) but it does not have USB PD so for me is a no go. The FXLion Nano Two is 98wh and 520g will run for 5-6h. The Nano can be charged with any USB-C charger make it very practical. Would the anton bauer have USB-PD I would have probably gone that route. New there is this option too that Kondor blue offer that would make the anton bauer also PD enabled but the cable seems quite clumsy : https://kondorblue.com/products/16-d-tap-to-usb-c-9v-3a-regulated-blue-braided-straight A small anton bauer base + 9v dummy battery to dtap would be also a great solution but does not exist. If you want to risk you could mount a 45w battery pack on the hotshoe and run the USB-C probably with 100 euro you cover all but for what I do is way too risky. As you can see I did a lot of research, my solution works for me but is not great. I still feel that a battery grip is the best option if no use of 8k 50/60. You can research a bit and some people have good luck with non oem LPE6 that are cheaper than the original.1 point
-
The LPN6NH would give you around 50 min of continuous recording or 60 min standby and this is the real issue. No matter what it chews battery, one trick is that if you hit play then it does not chew battery in standby. Two LPE6NH in the battery grip it will give you around 100+ min continuous recording. So for 4-5h you probably need at least 4 LPE6NH battery. If you don't care about 8k 50/60 one solution is kondor blue dummy battery https://kondorblue.com/products/d-tap-to-canon-lpe6-dummy-battery-cable and if you have V Mount battery already you are set to go. A FXLion Nano One (one of the smaller V Mount battery around) gives me around 3h or recording a normal V Mount probably 6h+. The advantage of the dummy battery you don't risk to break any ports. I use this setup but with the FXLion that has a USB-C port too so when I use 8k 50/60 I simply plug the USB-C cable. USB-C you need a power bank that is 45w and there are now very common and quite cheap, smallrig has some mounting solutions https://www.smallrig.com/smallrig-holder-for-portable-power-banks-bub2336.html . The big issue is the fragility of the USB-C port so either you use the supplied cable protector (piece of crap) or at least an half cage and the small rig cable protector (more solid + you can have a full HDMI too). A 45w power bank will also charge the batteries while plugged in to the camera. Bottom-line the more elegant solution is the battery grip, no need for a cage, no dangling cables, no ports to be broken. But no 8k50/60. So my solution is no LPE6 at all, cage + dummy battery + FX Lion One Nano + USB C when needed. But ugly and expensive... I wish they would do a battery grip that would supply enough power for 8k 50/60 then all this frankenmonster would be over...1 point
-
@Django consider buying the grip (which also gives you better overall cam balance imo) and make sure you have 6-8 LPE6NH batteries, a dual LPE6NH portable charger with USB chargeability + some kind of powerbank that will allow you to charge batteries in the field. The grip gives you 2 hours and with all the aforementioned stuff you should be good for a 6-8 hour shoot - particularly one with no access to a power outlet.1 point
-
R5c 4k60 is oversampled from 8k so same quality as the 4k 30HQ. Yes R3 has only RAW in 6k while R5c and R5 have also 8k h265. But RAW in general is easier to edit but it really depends on the software and the machine, of course it takes more storage. R5 4k 60 and 120 are not the best in class but I do agree with @herein2020 that are more than usable. As pointed out by herein2020 R5 does not have the new hotshoe so you cannot use the Tascam xlr thingy.... not sure is a topic for you or not.1 point
-
I shot with it all day on Sunday with no problem. Used a little over 500gb on a 1tb drive. That was all short clips though, I think the longest was about 5 minutes, but that was the last clip I recorded. I'm now running a long test with the camera rolling next to me. So far it's gone for 20 minutes with 34 left on the SSD. I'll see if it goes all the way to the end and then report back. If all goes well, I'll record in 15 minute chunks until it gives issues or fills the card... Watch this space.1 point
-
S5 II vlog audio options
Kisaha reacted to herein2020 for a topic
When I used the S5 with audio I swore by the DMW-XLR1; but that was mainly because my highest quality mics were all XLR. In your situation, I would just test out the Sennheiser straight into the mic port. The quality of the audio will mainly be affected by the lav mic more so than what port you use on the S5II. For the cost of the DMW-XLR1 you could get a pretty nice lav mic. The trick with the mic port is to turn down the gain within the S5II to almost as low as possible, then use the Sennheiser G4 setup to bring the levels within the -6dB range. On the transmitter side set the peaks to -12dB, on the receiver side use the receiver to boost the signal until it just taps on -6dB at its peaks within the camera. That will nearly eliminate the camera's noisy pre-amps and rely on the Sennheiser which is going to be cleaner. If you are worried about clipping then turn the transmitter down to -12dB peaks as well. Personally, I hate post synching audio so whenever possible I keep things simple. I've also found that Davinci Resolve isn't always that great at syncing audio tracks later which is an even bigger PITA when I need to do it manually. I am not an audio guy, in fact I hate most things audio, but I do need to record it quite often so when I do I keep it as simple as possible. Shotgun camera mounted mic whenever possible, lav mic to Sennheiser G4 whenever a lav is needed, or straight XLR wired into a MixPre6 with the stereo mix sent to the camera via Sennheiser G4. None of those setups need a post audio sync. Shotgun camera mounted mics into the mic port of the camera works surprisingly well if you can get close enough to the talent, as long as they face the camera, and there isn't too much background noise. I've been using them more often lately to do quick run and gun interviews for events vs handing them a mic or fiddling with a lav mic. BTW, an absolute lifesaver for me in Davinci Resolve is the Carity Vx plugin. I actually can use my shotgun mic more often and can make it sound like a lav mic with that plugin because it cleans up the background noise so well. It has literally saved some bad audio more than a few times for me.1 point -
Canon EOS R5C
Django reacted to herein2020 for a topic
I really don't think the line skipped 4K60p is that big of a deal; its not like its obvious within the video. IMO only during side-by-side comparisons and even then only when you zoom into a scene which has fine detail is the differences even visible. Obviously, yes on paper non-line skipped is better, but in practice I personally don't see a difference. Of course if you are shooting at the TV commercial level with perfect lighting, full rigging, and fine details, then yes in those scenarios 4K60 line skipped might be noticeable, but at least for my projects its perfectly fine. I know you can't wait that long, but I get the feeling the R5II is going to come along and really set the bar to another level, maybe the R6II would be a good stopgap until then since you consider the R7 a downgrade. I think if I had to do it all over again I would get the C70, R7, and wait for the R5II. This video is a mixture of 4K60FPS (line skipped) and 4K30FPS HQ (down sampled from 7K), using the R7 and I don't even remember which was which without looking at the source project. I would imagine the R5's line skipped 60FPS is even better but in most side-by-side comparisons, the IQ out of the R7 is nearly identical to the R5 at ISO800.1 point -

All music at soundimage.org is now free for commercial use
Kisaha reacted to Eric Matyas for a topic
Hey Mark, you're very welcome...I'm glad some of my music was helpful! Feel free to send me a link to your game if you wish...I'd love to check it out! 🙂 In the meantime... This week's brand new free-to-use-with-attribution music tracks are: On my Fantasy 12 page: "DUNGEONS AND TUNNELS" https://soundimage.org/fantasy-12/ And on my Technology 2 page: "CHATTER ON THE GRID" https://soundimage.org/technology-2/ Enjoy! 🙂1 point






.jpg.1a7fef60ecaa63f71d378ea1fdcac4be.jpg)
_3.jpg.4e0fa0280e6a30b0ba92e2140167d203.jpg)
_2.jpg.fd2e474134ade4a5d1c08fd45c561afd.jpg)
_1.jpg.7e18c1343dfea5bd01430c9ae10356f9.jpg)
