-
Posts
219 -
Joined
-
Last visited
Content Type
Profiles
Forums
Articles
Everything posted by Bold
-
Email sent
-
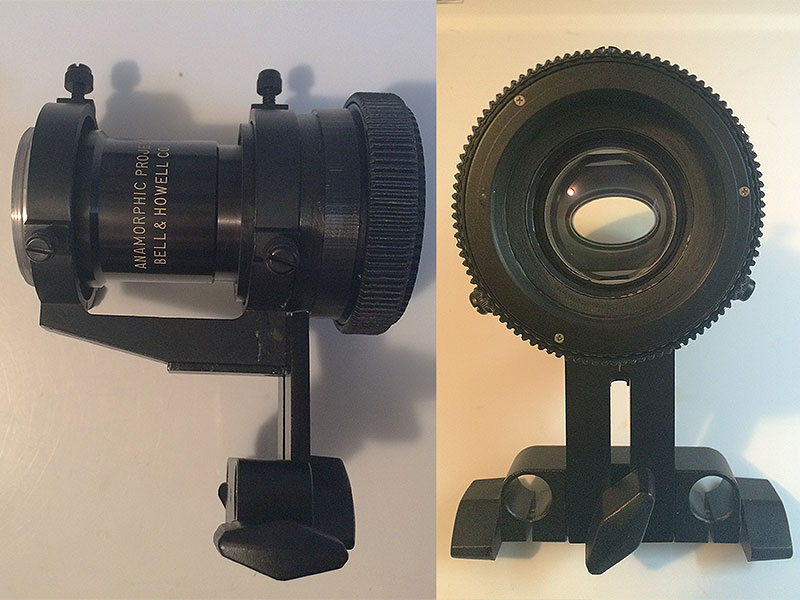
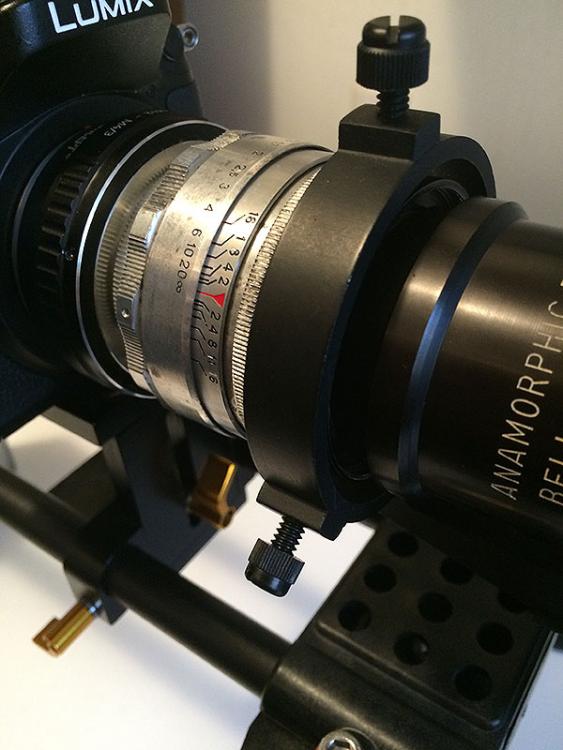
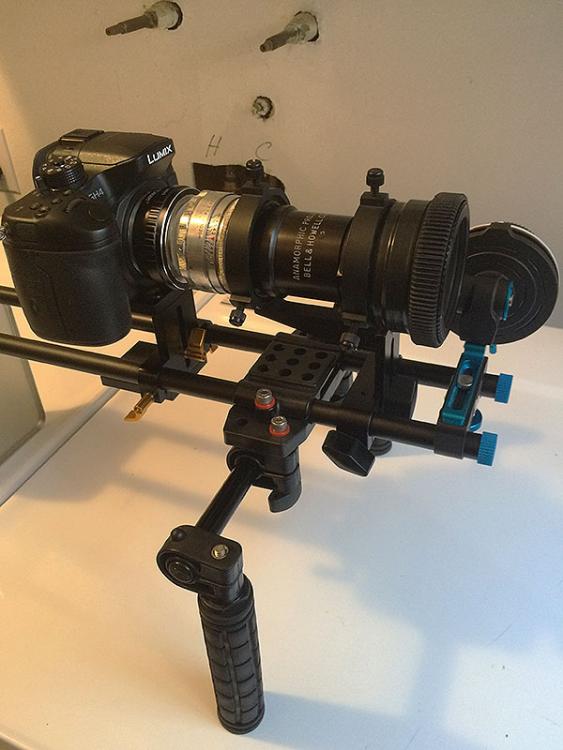
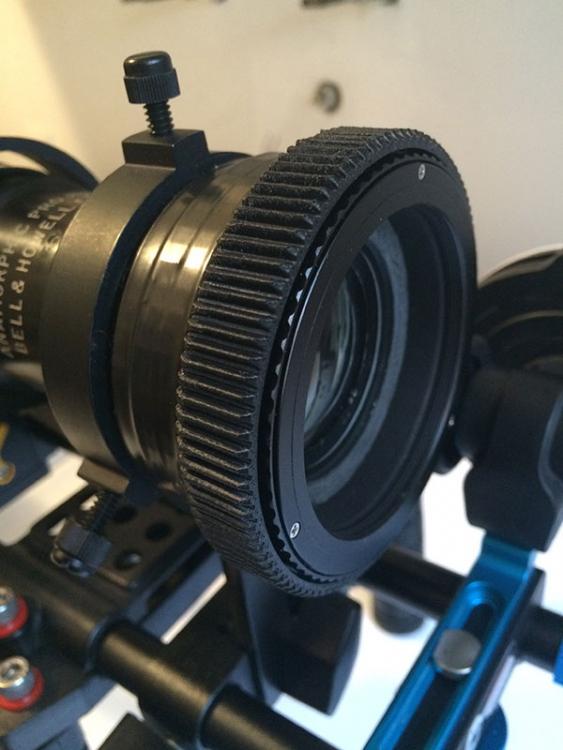
I don't know of anyone who has done this... I think most filmmakers want the flexibility to switch lenses quickly and easily. A single-bodied anamorphic solution that integrates the taking lens would prevent that. But if you only ever wanted to use one taking lens, an "all-in-one" solution could be done. If you want it to be single-focus (where the taking lens is set to infinity, and you focus with the anamorphic), this limits your options. You would probably need an SLR Magic Rangefinder or Rectilux DNA. Many people have made housings where anamorphic alignment is set once, then all they have to do is swap taking lenses. Here's mine: Fabrication can be tricky depending on the the size & weight of your anamorphic, and whether your anamorphic already has filter threads on the front & back. But once you are done, shooting becomes a lot easier. If you do a search (especially in this forum), you will find a lot of different setups that users have created to accomplish this.
-
Aaron, if you plan on doing any modding/adapting, it's worth getting yourself an affordable digital caliper off eBay.
-
The B&H is a fantastic lens but requires some gymnastics to really get the most out of it. I'm pretty proud of the mod and I believe it optimizes the B&H to its fullest potential. Tito will be posting a review of it tomorrow. In summary, to duplicate my lens modification, read through this entire thread carefully before starting. You should have the following items: B&H 16mm 2x Anamorphic Lens 58mm Helicoid. You can use a 52mm but the 58mm diameter allows a closer fit, The downside is you'll need to fabricate a retainer ring for the front glass element. Telescope Finderscope Clamp Lens Support Bracket Tap & Die Kit Cyanoacrylate adhesive Drill or Drill Press, and Table Vice 3D Printer ABS Filament Materials for making the polyurethane mold Silicone & Polyurethane Casting Material. I recommend polyurethane Shore D Hardness; 75 (about the same durability as a construction hard hat) 58mm Lens Cap, and cap to fit over the silver Series VII Ring Matte Black Paint, Brush, and Thinner Degreaser and Lithium Grease Sandpaper / Cloth / Finishing Materials Gorilla Tape. Not necessary but a little added protection around the polyurethane Epoxy NAPHTHA and Lens Tissue Micro Tools / Micro Screwdriver Set Digital Caliper with 0.01mm tolerance Expect to replace some parts during fabrication, like iterating the custom mold for the front housing, or breaking a helicoid, or throwing out a lot of failed 3D printing attempts. Here is a breakdown of the labor steps required to produce the finished product: Disassembling, re-greasing, and reassembling the heiicoid (helicoids bought off eBay come with poor quality, low viscosity grease). Removing the original front housing and front glass element. Thinning the matte black paint and painting the edge of the front glass element. If you are lucky, your B&H's front element may already be painted. Combining the lens support with the telescope bracket. The Cyanoacrylate creates a temporary bond between the bracket & clamp, allowing to you drill & tap the hole for the screw that will hold them together permanently Making the mold for the front housing. Lots of trial-and-error here, make sure to read a lot about how to make molds. This is where your McGuyver skills and a trip to Home Depot comes in. Casting the polyurethane for the front housing. Again, some homework is required here, planning, and a tightly sealed mold! 3d Printing an alignment collar for the helicoid to fit on the polyurethane front housing, the retaining ring to hold the glass element in the helicoid, and the follow focus gear. Assembling and gluing all the fabricated parts. Make sure everything fits properly before applying that epoxy! Fit & finish (sanding, polishing, cleaning, etc.) Adjusting the bracket height, the anamorphic alignment and calibrating infinity focus Reviewing test footage to confirm the lens is ready for shooting If you’re doing this for the first time, expect to spend at least 1-2 weeks putting this together. Honestly, even with all the information in this thread I think it will take longer than that. If you have a full time job, expect the process to take a few months. This is not a short-term project, it requires immense patience, but the rewards are excellent! When finished, what you achieve — and I’m typing it again, because it bears repeating — are the following features: Single-focus Infinity focus Follow focus gear for rack-focusing, with a generous throw that allows for precise focus Re-greased helicoid for smooth focus action Minimum focus of just under 1m for the 14mm helicoid version, and just under 30cm for the 30mm helicoid version (that is the closest focus of ANY anamorphic I know of). Beautiful 2x bokeh Superb, stable 15mm rail support that locks in alignment and reduces the time between switching taking lenses Nylon alignment screws that won’t scratch the anamorphic Compact and lightweight (the modded B&H + custom bracket = 866g. In comparison, a 16H + Rangefinder is 880g without the lens clamp, filter clamp, and rail support) 58mm front thread for diopters or ND filters, and a Series VII rear thread The side of the front element is painted matte black to reduce internal barrel reflection and preserve the amazing flares Reversibility: The custom front housing can be removed and replaced with the original housing An ideal anamorphic for micro four-thirds filmmakers I encourage any B&H owner to do this mod. The question you must ask yourself is how much time and money you’re willing to spend to get to a final, usable product. If you have a lot of the equipment already (especially the 3D printer, tap & die kit, etc.) or your own workshop, you will save some money. But for those who don’t have the time or resources, I will be selling my mods for around $1000 (depending on the quality of the original glass, and whether it’s a 14mm or 30mm helicoid). Some of you may think this is expensive, but considering all the work that goes into it, and the value of all the features listed above, I believe this is a fair price. This is a complete, turnkey anamorphic solution: You put the B&H mod on rails with your camera, and start shooting. No other purchases are necessary. If you are interested please message me, I will be be putting the mods up on eBay once Tito has sold his, Some of the proceeds will help me recoup the parts & materials I went through during R&D. Some will go to purchasing a lens from Tito (which will help fund his efforts). Some of it will go towards my next project: modifying the Bausch & Lomb Projection lens. I will add the same level of detail and information to that thread as I've done here. I'm not trying to turn this thread into an advertisement for my mod. I’d love to see other B&H owners continue innovating, modifying, testing, shooting, and posting to this thread to find new ways to get the most out of this great piece of glass! I will continue to answer questions where I can, but I expect my participation on this thread will wane as I turn my eye towards my next projection lens project Keep on modding!
-
Hi froboy88, thanks! I can't say for certain about s35 since I only have an m43 camera. You can use Tito's calculator or maybe this one to help you figure it out. My best guess is that cropping or using 4:3 mode to get a 2:66:1 ratio on the B&H, you would not get vignetting with a 75mm lens on an s35 sensor.
-
I'm not sure where you're interpreting this from. It can't be done in a weekend for 130€. Not even close It's not unreasonable to ask 1000 CAD for: Single-focus Rack-focus Infinity focus Minimum focus under 1m 2x bokeh Fantastic flares Excellent 15mm rail support / alignment Compact and lightweight Considering the great condition of Tito’s B&H glass, I think he should be asking $1000 USD. It is a turnkey solution. Tito, did you adjust the front by (un)screwing slightly? I was able to get much better results after that calibration. It took a little trial-and-error, but if you have the camera connected to a monitor, you can fine-tune it fairly quickly.
-
No worries...I think maybe we’re both talking about two different goals / approaches? It sounds like you’re seeking a single-focus solution for your Baby H and Sankyoscope? Whereas my goal was to find ways to make the B&H user-friendly for filmmaking. When modified according to the information found throughout this thread, you can turn the B&H into a single-focus, close-focus, rack-focus, sharp-focus, lightweight, 2x anamorphic solution with fantastic flares and a warm, organic cinematic feel. On a micro four-thirds camera, the B&H will accept a 55mm or 58mm taking lens with little or no vignetting (or a slightly wider taking lens if you’re shooting in 4:3 mode). I could have bought a 'proper' single-focus module, but where’s the fun in that? One advantage is my modification is compact and lighter than a B&H with a SF module attached to it. I definitely didn’t save any money doing the modification...at first. But now that I have modified several B&H’s, I can make them more quickly and efficiently. But the biggest advantage I gained was the amount I learned over the course of the prototyping - I look forward to hearing about what you learn in your pursuits! Excellent! I've been so focused on my goals that it didn't occur to me about other potential uses for the B&H. It's great that you're thinking about other ways to get utility out of this anamorphic... definitely post back here with your findings! Best, |. . | .|
-
Guillaume, good luck with your experiments - although I don't think kitbashing parts of the B&H with other scopes will get desirable results. The B&H is not meant as an alternative to the FM module, SLR Magic Rangefinder, or the Rectilux Core DNA. The B&H 16mm anamorphic 2x projection lens is a complete anamorphic in itself, ideally suited as a single-focus solution for micro four-thirds cameras.
-
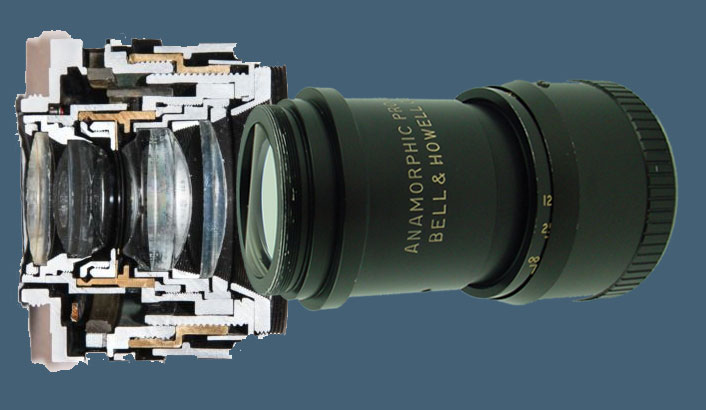
Here's my badly photoshopped cross-section of what I mentioned above. The narrowing inner cone of the Helios prevents the B&H from touching the glass of the taking lens. You just have to slide them together with caution and care, to avoid scraping inner section of the taking lens. Me too! I picked up a couple 44-2's for cheap last year, but I haven't used them much because I love love love the image quality of the original 44. I'm probably going to take one of the 44-2's and do this since I have the Kowa glass as well. Thanks Tito! Can't wait to see the video... so glad you had fun with the mod !!!
-
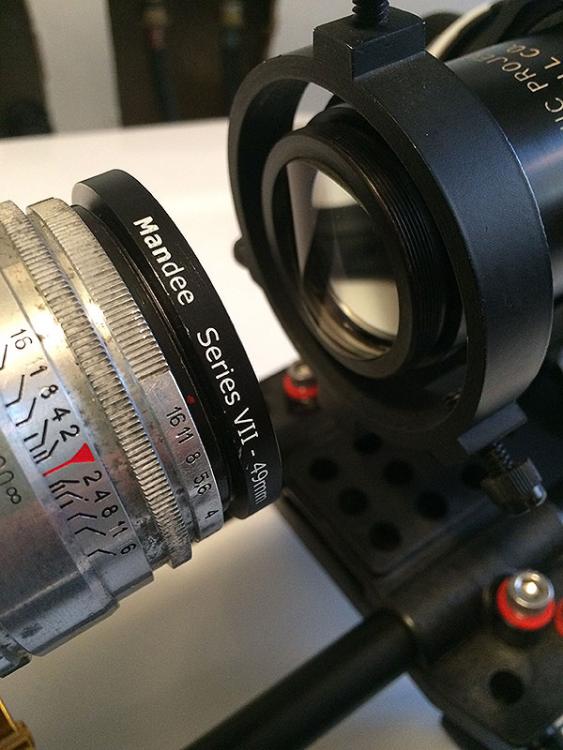
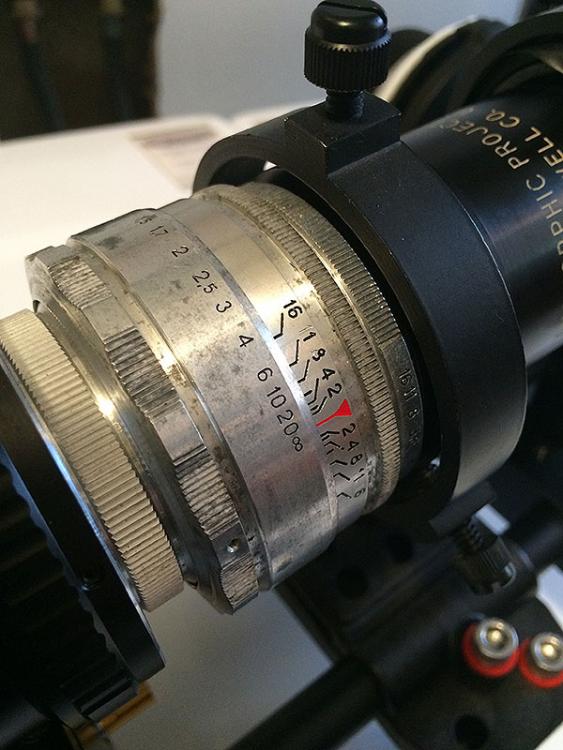
A small update to B&H modding: I’ve been using the silver Series VII ring that comes on the back of most B&H’s found on eBay. I made a polyurethane version for Tito since his did not come with one. The ring is great for adapting to whatever taking lens you’re using. On a whim I decided to take off the silver ring to see if I could get my Helios any closer to the back of the anamorphic. Here’s the back of the B&H without the silver ring. Since my Helios has a diameter of less than 61mm (which is the inner diameter of my support bracket), I was able to slide it closer so that the back of the B&H is actually sitting inside the taking lens. So the series VII ring isn’t necessarily needed in all situations. It doesn’t necessarily improve the resulting image either, but it is a snug fit. In other cases, like if you have a taking lens with a 72mm thread, I would definitely recommend a 72mm-to-S7 adapter to ensure that your lenses are locked, light-sealed, and centered. On Tito’s advice, I also took a 3D file for a follow focus ring, altered it, and fit it around the helicoid of my B&H mods. It’s a much easier process than hand-gluing focus strips, and the results are a little nicer looking too. Cheers, |. . | .|
-
I also want to thank Tito for all his amazing posts & work - I wouldn't have gotten nearly as far with my work without it. Thanks!!!
-
Guillaume, I have mods with both sizes, and they both work fine. If focusing closer than 1m is not that important to you, the 17-31mm will fit your needs. But the 25-55mm helicoid is only a little more expensive than the 17-31mm, so I think it's worth getting the 25-55mm to get that extra close focus. Cheers, |. . | .|
-
I applaud your determination and inventiveness!
-
If the fungus is on the front/outside surface of the glass, it can probably be removed easily. If the fungus is on the inside, it should probably be disassembled and cleaned. If you have a trusted camera store in your area they may be able to do it for you. But I think most camera stores won't clean (or will charge more to clean) a lens they are unfamiliar with. For example, the camera shop I go to won't touch some of the obscure and vintage lenses I've brought to them. I'm not familiar with the Bolex 16/32 so don't know if $1500 USD is a fair price. You may want to check around to see what it would cost to have the lens serviced - then subtract that cost from the asking price, and make an offer to the seller. Or, wait until another Bolex comes up on eBay that doesn't have any issues. They don't appear often, but they do appear. Good luck in your search!
-
MattRozier, try this link
-
A large follow focus design like this would reduce the throw. There's a lot more info on the B&H in this thread. The short version of my mod (based on QuickHitRecord and Rich101's great work), uses a helicoid with 14mm travel distance, resulting in a throw of about 135 degrees. My long version, a helicoid with 31mm travel, is somewhere in the neighborhood of 330 degrees. Have you watched Tito Ferradans' review of this lens? He talks about full frame coverage. As Rich101 has said, this lens is best suited for camera MFT sensors. Cheers, |. . | .|
-
magellan, welcome! There's really no one piece of advice that's going to fit everyone's needs. The best way to decide on your first anamorphic is to research, research, research. Tito's Anamorphic blog is one of the best starting points. And you won't find a larger collected body of anamorphic knowledge than this forum. Search it deeply! Also look at test footage on Youtube and Vimeo of various lenses to see if a particular brand of lens produces an aesthetic that really appeals to you. Ultimately there is no perfect anamorphic solution. Every choice has benefits and drawbacks. The only way to know the best choice for your is to list our your needs, search through the options, and find the type of lens that most closely matches your needs. Once you find a lens or two that falls within your budget, search EOSHD and other forums to see what others have built to get the most out of those lenses. You'll find that there are different strategies to mounting them... from 'bailing wire & bubble gum,' to buying specialty parts, to custom-fabricating parts on your own, and many options in between. Here are some other thoughts, in no particular order: 1.33x adapters don't have the sharpest image quality and don't do well in low light, but are often the easiest to use. They tend to be lightweight and adapt easily to taking lenses. Usually good flares but less oval bokeh. They are relatively easy to acquire and will run you between $500-800. Not a bad choice for starting anamorphic. Big projector lenses will give you that nice 2x oval bokeh, but vary wildly in terms of flare and image quality. They are invariably heavy so they require a certain amount of adaptation and support (which adds even mre weight). Although I don't have one, there are some dual-focus lenses that appear to deliver great images. But dual focus seems to present another set of headaches if you're shooting something with lots of movement. Probably not something you want to take on as a beginner. Dual focus owners can speak better to the learning curve and the time involved to get good focus during dynamic/complicated shots. Watch some films shot with anamorphic. I just rewatched the original Mad Max, and realized there are some shots with horrible aberrations at the edges, and the film has barrel distortion throughout. But you know what? It doesn't matter. What matters is how the images made me feel, not how razor sharp or technically precise they were. What Bioskop said. It is okay if your anamorphic images aren't perfect - they aren't meant to be. Most importantly, MONEY = TIME. If you save money buying a cheap anamorphic, the more time you'll have to spend getting it to work. So they key the questions are: what's your total budget, and how much spare time are you willing to spend building your rig? I saved money buying some B&H's, but the time it took me to get them to where I needed was enormous. If I had to do it over again, I might have chosen a different route. Then again, I learned a LOT in the process. I hope this helps!
-

Century Optics 1.33x (or optex, soligor, etc) locking screw replacement
Bold replied to Tito Ferradans's topic in Cameras
Maybe someone at Schneider/Century has the old specs/data sheets on these? -
Other sets of eyes is always good. My other recommendation is to add time to whatever your doing. That is, try to finish ahead of your deadline as best you can, and let the work cool down for a while (longer is better) then re-visit it with fresh eyes to spot the things that need correcting. This is not always realistic or practical in real-world situations, but even couple days away from the material can give enough distance to come back with a more objective eye. Not at all. (or, if it is, I've got it too)
-
As Rich correctly pointed out, if some polish accidentally gets on your glass it could degrade the coating. The right kind of buff pad might restore some shine.
-
Turtle Wax maybe?
-
More importantly, where's the Dramamine?
- 2 replies
-
- stabilizer
- gimbal
-
(and 7 more)
Tagged with:
-
The body count for the opening scene of Hardboiled : 44. Woo's early work like The Killer, Bullet in the Head, and Hardboiled, are amazing.
-
Kung Fury is 31 flavors of awesome!


