-
Posts
5,964 -
Joined
-
Last visited
Content Type
Profiles
Forums
Articles
Everything posted by BTM_Pix
-
Haha You never know.
-
OK Use this new html file. Instigate the record using the commands from the page rather than the record button on the camera. Then change ISO, shutter, f stop, colour profile and exposure comp using the commands from the page and see what happens. Its a longish shot that it will be different when record is instigated remotely but its worth a go. Toggle between Cinelike D and V too as if there is a change it will be pretty apparent. GX800 TESTER.html
-
And for it to be powered by a commercially viable nuclear fusion reactor of course.
-
OK I have an idea about something else to try but it will have to wait until I get back on Monday when I've got access to my development stuff.
-
Use the original HTML file that I put up at the start of the thread to connect the camera over WiFi and do the handshake. Then change the colour mode on the camera to black and white. Start a recording and then click the Deploy or Restore. If the camera changes to colour then that will confirm it can receive and action changes whilst recording. Next, start a new recording and whilst its recording paste the following line into a browser tab and hit return. http://192.168.54.1/cam.cgi?mode=setsetting&type=shtrspeed&value=2560/256 This should change the shutter speed to 1/1000 and if the camera actions it then you should see it go very dark! Thats all I can do for now until I get back on Monday but give it a go and see what happens as it'll let me know if there is something to go on. Those are for their camcorders (though the shutter angle is also applicable on the GH5 and FZ2000) The camera will return OK to say it understands what you are telling it to do but it won't actually do it. Teenager mode would be an applicable word for it.
-
I'm just getting on a plane, i'll do a proper reply later. Might be able to do a simple webpage to prove the theory if you can't get android device
-
Can you confirm how the video mode works for me on the GX800? Is it a separate mode or is it just activated with the record button whatever mode you're in? Am I right in thinking that you have exposure compensation control? I think it might be possible to hit it with shutter/aperture/iso parameters after its been put in record mode to fake manual mode. I dont have one of the cameras to check it with but I can knock up an Android app next week when I get back to test this theory with if you're game to test it. I'm surprised about the cinelike as I've even got it to go on the consumer cams like the LX15. The only one I had an issue with was the LX100 which goes into some bizzare ultra contrast mode which is exactly he reverse of what I was after! When you try it on the GX800 I wouldnt expect it to say cinelike but would expect it to go blank. Is it not showing any visual difference at all (even a hue shift) ?
-
I'm going to harass you now like I do with anyone who has old manual glass and a Sony mirrorless and beg you to buy the TechArt AF adapter and tell us what its like They were so slow they'd have tortoise tutting and tapping his watch at them. Nope, they are still performing as well as new ones that would cost you literally 10 times the price. And are about half the size. Even if you do have to turn the turny thing yourself to focus them.
-
Thing is, I can mount all of the Nikon lenses I own to all of of the cameras I own but I can't mount all of the lenses I own to my Nikon cameras. It would be a terrible irony if Nikon themselves produced the first camera that isn't compatible with their own lenses Kidding of course, as I'm sure they wouldn't be insane enough to not offer a proper solution. Seeing as the adapter only going to be a shortish tube lets go radical and keep the same physical bayonet mount for the new lens mount but make it retractable into the body. It would still keep the depth of the camera shallow enough to feel the benefit of it being mirrorless and you just extend it from the inside out for the extra flange difference when you were using the older lenses. Time for a lie down I think.
-
To be honest, I was nodding along appreciatively thinking "yep, that could work"
-
I decided to use it to shoot a press conference the other day. Suffice to say there was a fair degree of incredulity amongst my younger fellow shooters at the sight of someone using a manual lens thats older than they are!
-
-
Its unfortunately very common and is actually at its most prevalent on what you would think was the safe side of the fence which is in the accredited areas themselves. Its only happened to me once (touch wood) at a final in Berlin a couple of years ago when one of the stewards stole my iPhone off the top of my peli case while I was shooting the trophy lift over the other side of the pitch. Funnily enough, it caused me far more of a problem than if he'd took a camera because it had my boarding pass for my flight home on it, it was the GPS for me to drive back to Leipzig because that's where I'd flown in from etc etc I have quite a few of those dividers and use them for turning an Ikea rucksack into a camera bag but also for quickly packing real camera bags as I swap between different capacity ones so its easier to keep certain lens combos in the dividers all the time and transfer them in one go.
-
In the accreditation queue outside the stadium on Tuesday we had the most audacious theft attempt when someone mingled into the queue and casually strolled off with a peli case (with 2 D5's, a 70-200 and a 400 f2.8 in it) and an attached laptop bag. Fortunately, he only got about 20 yards away with it before he was spotted because he stuck out like a sore thumb. And the reason he immediately aroused suspicion? Ironically, far from it being because hr looked like a dodgy scruff, it was because he was WAY too smartly dressed to have ever passed for one of us !
-
Nah, we'll have had the Photokina show by then. (At least one Photokina cos, well, you never know with BM) That will give us a whole load of new fuel to shovel into the speculation boiler. This will be the good ship RMS EosHD after Photokina if Canon and Nikon make their mirrorless announcement s
-
Mmmm...looking at how far it could be pushed and how smooth the workflow was on a 4 year old MacBook (ie the same as mine!)....well... I've got to say that a used FS5 (as the prices get pushed down even further by he mark ii) and the Ninja V isn't the worst proposition in the world as a very flexible system. In a few months, the total cost of that will probably be hovering around £3.5K.
-
Would I complain about having to use an adapter? I'd be a bit of a hypocrite I suppose if I did as I routinely use Nikon's teleconverters for work without any issues. They lock tight and any balance issues they cause are offset by them mainly in my case being used on lenses that need monopod support anyway. Would I be thrilled in having to do that on ALL my lenses ? Probably not but I'd be FAR less thrilled having to rebuy the rest of my core lens set in this speculated new mount, especially as I'd have to take a hit on selling lenses that were now part of a 'dead' system. Canon FD lenses are not cheap because of their optical quality and this would be the same situation. The price of the "upgrade" to a Nikon mirrorless system with a new mount and to remain native would be prohibitively expensive. The f2.8 zooms and long primes are not suddenly going to get significantly smaller and cheaper because they are in this new mount. So, if they do a mirrorless that doesn't have an adapter that has "as native" performance for existing lenses then they will have a problem retaining existing users when their current DSLRs are ready to be replaced. And the issue that they also face is that with cameras like the D5, the D500 and the D850 etc the rabid upgrade cycle isn't exactly what it was 10 years ago. We are at a point with those cameras where its only going to be wear and tear - not performance - that prompts you to upgrade. The double edged sword there for Nikon is they have not only produced cameras with great image quality but also some serious robustness! With every week that passes, the other systems seem to be getting more and more lens options. There will come a point where all Nikon have left to bargain with are the fast long primes and the legacy stuff. In the case of the former that's just a niche within a niche and I believe Sigma will step into the breach there and in the latter, well, lenses you've already sold won't pay the bills. Having said all that..... There is a couple of opportunities here for Nikon to make things both smoother for existing owners and actually make it very appealing. The first is to have the option for the mount to be user interchangeable as per RED, Ursa, Kinefinity etc so that we wouldn't have the two points of failure potential and the wear issue using an adapter. If its actually connected to the body rather than the new mount then that will keep everyone happy. For my, and I suspect many others, usage I think we'll be going out to shoot with lenses that are in one mount or the other. For anyone who would want the flexibility of quick change as they will be going out with 3 new mount and 1 old mount lens then Nikon can still do a regular tube type converter. The second thing they can do is make one of those mount options also encompass a speed booster. The option of shooting video in Super35 with fast primes that are now even faster and still have full AF? Yes please. Ditto they could also utilise the extra space to produce an electronic ND version of the mount. If they see supporting the old mount in terms of it being an opportunity rather than a duty/hindrance then they could have a monster on their hands. It could be the true hybrid that, thus far has eluded everyone. Obviously if they come out with something that's 5 grand with two plastic kit lenses and 3 slow primes with an adapter for legacy lenses that weighs more than an anvil and offers just enough AF to not be sued under the trade descriptions act then they can fuck right off
-
-
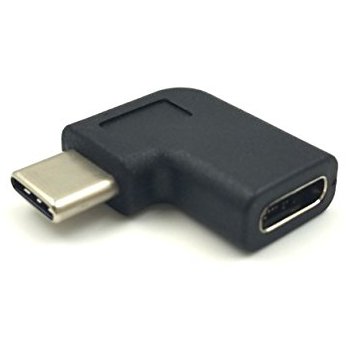
https://www.amazon.co.uk/aceyoon-Extension-Converter-Connector-ChromeBook/dp/B0772HVP1R/ref=mp_s_a_1_3?ie=UTF8&qid=1525285986&sr=8-3&pi=AC_SX236_SY340_FMwebp_QL65&keywords=usb+c+right+angle+adapter&dpPl=1&dpID=41madGjpWxL&ref=plSrch That's £7 for two. Plus another few pounds for the epoxy which I shall of course be affixing it to my camera with.
-
Look, I've found a right angle USB C adapter. So I'm not going to waste that bit of research and I'm all for getting another couple of pages out of discussing it now
-
Yeah but we're bored waiting for it already so have to fixate on something to get the page count over the 100 mark
-
It depends on your usage I suppose both in terms of frequency that you are going to use it and also how often you swap the media. If you are only going to use it infrequently then it will be OK to connect directly (though you still need to address the mounting of the media itself so its not just dangling there). At the risk of getting stuck (ho ho) with another epoxygate, I do actually think that using it to attach cold shoe or similar mounting threads to a drive like the one illustrated would be effective. Or even using one of the sliding smartphone to shoe mounts. If you were using the USB-C part every day but swapping media on it multiple times a day then you will be saving a lot of wear and, yes, just take the extender out at the start and end of the day. If you are using the USB-C part every day, swapping multiple media every day and changing locations frequently every day then I think it makes the point even more to be using an extender as your wear/damage potential is even higher and with that amount of reliance on it as your recording media then its increasing the risk even further. What I would envisage to be honest is a clamp/cage system that is providing locks for most of the cables in that part of the camera and people just having to take the hit on the size increasing. An ideal solution would channel them downwards to prevent potential knocking whilst operating from that side.
-
Except I didn't actually say to do it at the camera end but hey ho. The solution to the USB C port wear is to use a short extender cable that you do leave attached to the camera and then plug/unplug the device with its cable on the end of the extender. If you then get wear it will be at the end of an easily replaceable £2.50 cable rather than your £1200 camera.
-
I'm just contemplating being sat in front of a 43" 1000 NIT monitor on my desk. It'll be like Bikini Atoll
-
Might this be a decent choice when it arrives in a few months Jon? https://www.digitaltrends.com/computing/philips-momentum-first-displayhdr-1000-pc-monitor/


-345098.jpg.b4110248d5a4f45c464a9f6a9aef76f0.jpg)

