-
Posts
6,097 -
Joined
-
Last visited
Content Type
Profiles
Forums
Articles
Everything posted by BTM_Pix
-
I was bored enough this morning to do a comparison for you Its here
-
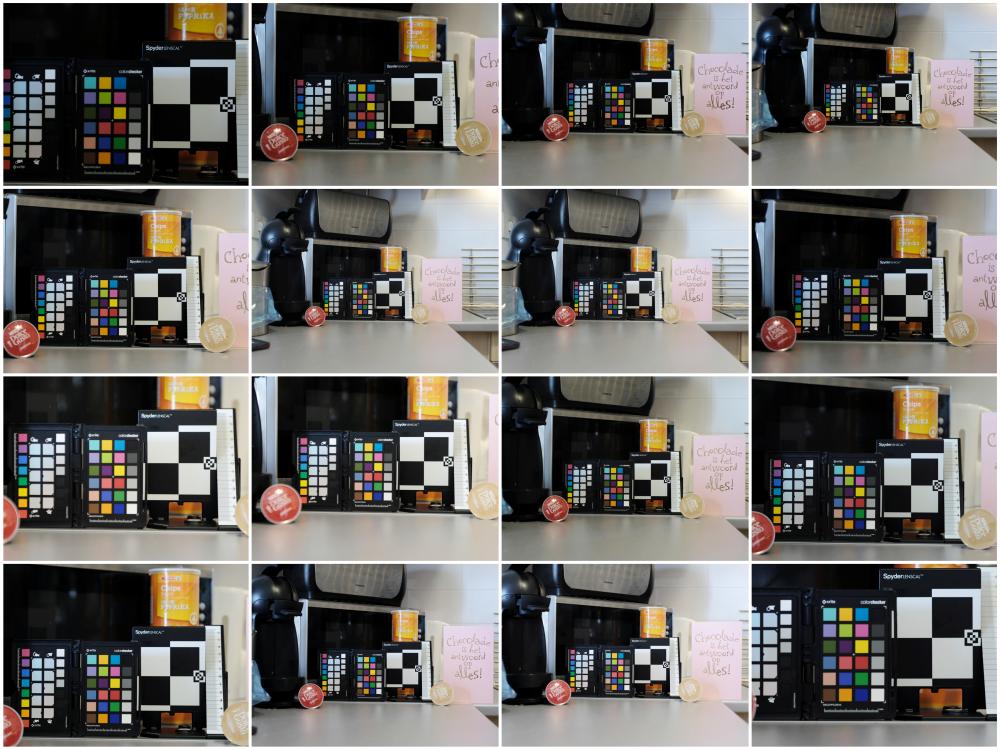
Following on from @mercer thread about mixing lenses, I thought I'd just do some quick grabs from different lenses for.....well, something to do, because its Sunday morning and I'm bored. I thought I'd do a mishmash of a few typical different types, vintages and price ranges that you might adapt and some native ones so you can see how they'd match (or not). Apologies for such a boring test scene but it seemed apt for such a boring test but it has enough elements to work with. So, here are the 12 lenses and the various adapters for our test camera which was the Fuji X-T20. We have the following in C/Y mount Contax Zeiss Vario Sonnar 28-85 f3.3-4 Contax Zeiss Distagon 28 f2.8 Contax Zeiss Planar 50 f2.8 Contax Zeiss Sonnar 135 f2.8 We have the following in Nikon mount Nikon Series E 28 f2.8 Nikon 28-105 AFD f3.5-4 Nikon 24-70 f2.8 G Sigma 35 f1.4 ART We have the following in M42 mount Helios 44 58 f2 Carl Zeiss Jena Floktagon 35 f2.8 And we have the following native lenses FujiFilm 35 f1.4 Fujifilm 60 f2.4 From this we can compare a somewhat matched set (the Contax Zeiss) with some cheap and old to expensive and new not matched set (the Nikons), some old and very cheap (the M42s) with new and native from Fuji. I have also done a couple of shots at different focal lengths from the Contax Zeiss and Nikon zoom. All shots were the same exposure at f4 based on the slowest lens in the group. All shots taken from the same position with the exception of the Contax Zeiss 135 f2.8 which, well, you can guess why that was from further away! All shots are JPEG straight out of the camera and no post matching has been done. Shot order (starting at 1 in top left and ending at 16 in the bottom right) Contax Zeiss Sonnar 28-85 @ 85mm Contax Zeiss Sonnar 28-85 @ 50mm Contax Zeiss Sonnar 28-85 @ 35mm Contax Zeiss Sonnar 28-85 @ 28mm Contax Zeiss Planar 50mm Contax Zeiss Distagon 28mm Nikon Series E 28mm Nikon 28-105 @ 50mm Nikon 24-70G @ 70mm Nikon 24-70G @ 50mm Carl Zeiss Floktagon 35mm Helios 44M 58mm FujiFilm 60mm Fujifilm 35mm Sigma 35mm ART Contax Zeiss Sonnar 135mm I can put the individual files up at some point (not now, I'm going to the beach) if anyone is still awake and interested enough.
-
I think this relates to a thread about the B&H discrimination case ?
-
You could consider an app instead like this one that does both (and focus chart too) . No shop visit required, just download and go http://www.movie-slate.com/Settings
-
I imagine it would look like someone playing thrash metal on an accordion if it was in AFC mode for video.
-
Sorry Jon, I've now got visions of you muttering 'Fuck tha Police' as you smuggle an array of Tiffen filters in through customs on your way back from Hong Kong
-
Its a bit of a torture test with the light here at that time of day in combination with those shiny spoons and reflective table top so I could've been kinder to it to avoid the cliff edge drop highlight drop off but at least you get to see a bad case scenario of it Its never going to match the DR of a number of cameras but it makes up for it in other ways and its capable of some subtlety in different conditions. *Disclaimer, these are old jpegs blown up so the quality suffers accordingly when viewed supersize on this upload.
-
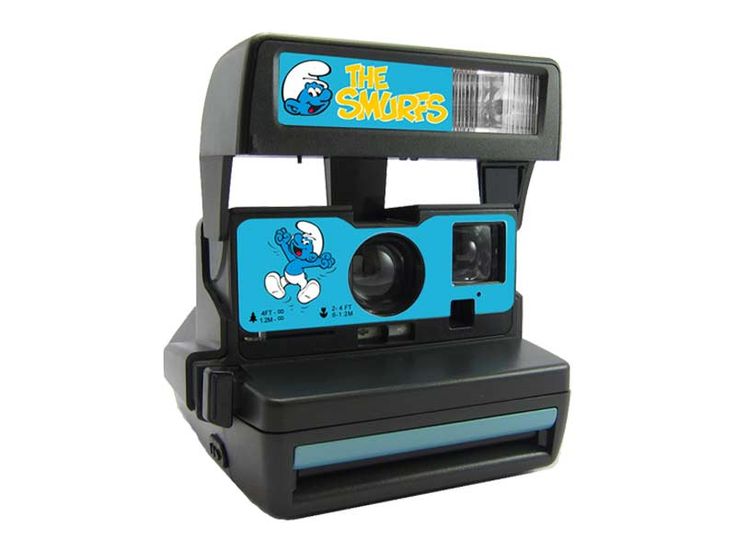
It was quite a coup for Sony to get The Smurfs on board though as the little fellas had traditionally been Polaroid ambassadors.
-
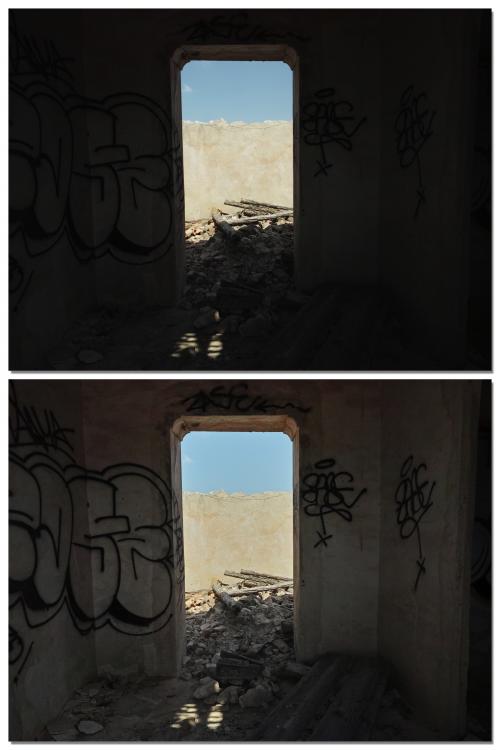
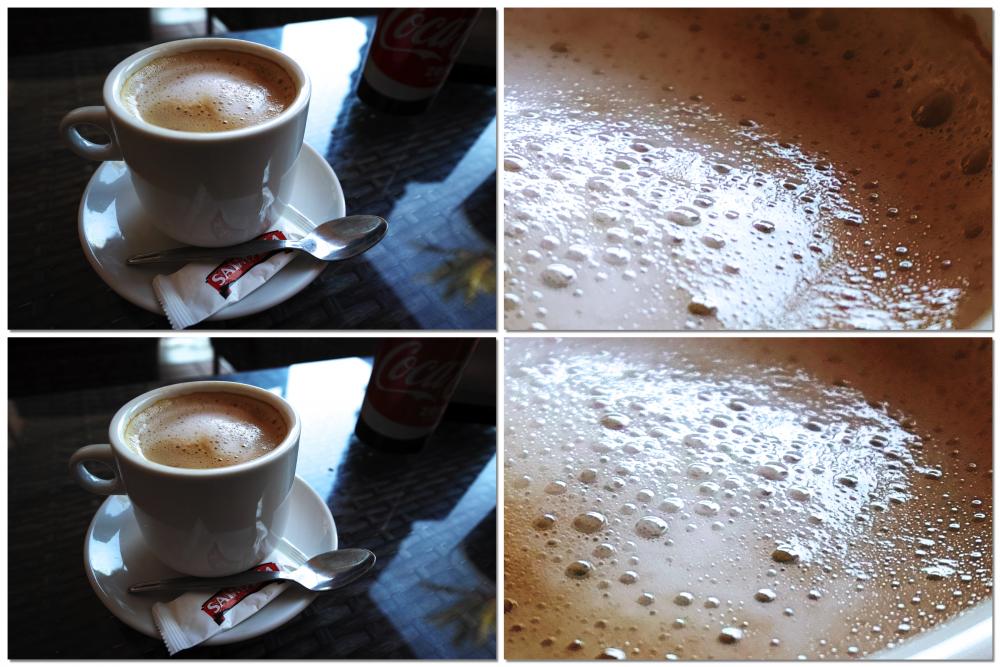
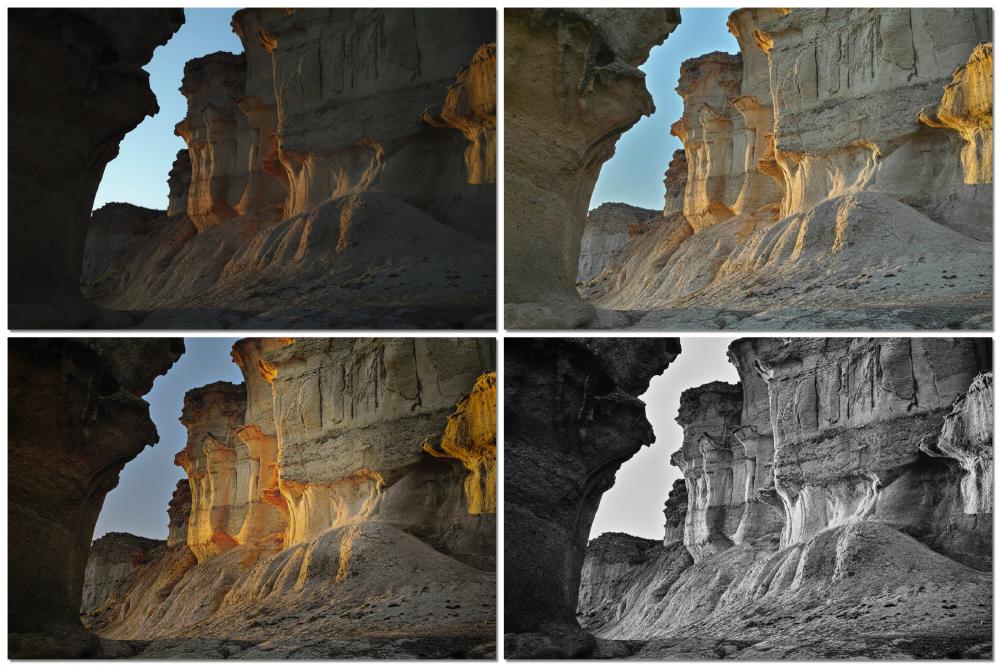
There is a 10 page argument about it (without a single photograph) here if you've got the patience for it. https://***URL removed***/forums/thread/3650127 Meanwhile.... I took a couple of shots for you at ISO400 on my DP0 which is the fixed 14mm version of the SD sensor. The DR issue (as hotly debated in parts of the DPR thread) is one that partly comes down to what can be measured and what you can use based on what you can do with it in Sigma's RAW editor. The RAW editor gets a lot of abuse (and not without foundation it has to be said when compared to stuff like Lightroom and Aperture) but its not dramatically worse than Hasselblad's Phocus app for example but at least you can open their files in something else, unlike Sigma's. Well, you have the DNG option now in the Quattro range and there is a freeware app who's name escapes me that can open the .X3F files but Sigma's open app is the key to getting the absolute best out of the files as they're the gatekeepers of the Foveon voodoo! Yes, its slow, but so is the pace of photography you will largely do with these cameras so its no big deal to me. Its not like I'm dealing with a DSLR where I've been machine gunning my way round a sports field and its more akin to film photography where you come home with a couple of rolls of 36 exposures. Anyway, so here is an illustration that I shot for you (at ISO400) to show you what's possible DR wise and the key to this is the X3 Fill Light function which will bring back a ton of shadow information so you know you can ETTR and recover usable info The top picture is the JPEG from the camera to show how it was shot and the bottom one is after using the X3 Fill Light. . Next is a comparison between ISO200 and ISO400 as I needed a coffee after looking at those old ruins (what do you mean, I see one in the mirror every day). With the Quattros, the native ISO is 100 and AFAIK there is a drop from 100 to 200 but its not so marked between 200 and 400. Basically, once you've taken the hit by moving away from 100 then you might as well take the extra shutter speed/aperture opportunities on offer by shooting at 400 Top picture is ISO200 and bottom is ISO400 with 100% crops from each to show the untreated noise in both. This final one as a way of comparison between the current and previous generations is from my DP1m which is the fixed 19mm lens compact with the Merrill sensor. The native ISO on the Merrill versions is ISO200 rather than ISO100 and as with the Quattro's you can shoot ETTR (as per the original shot top left) and the use the X3 Fill Light function to bring out the shadows (top right) and then take it from there to do more colour work or black and white conversion. If anyone wants to have a play with it themselves then I've put the original .X3F file here and you can then go over to Sigma's site and download their SPP software to edit it with. https://mega.nz/#!BiYwRCQZ!1725R1XDQlhRPliyTdnpusi3rqspEWirIvByYqvA-tI As everyone says, these cameras have as many quirks and limitations as they do different models but if you're prepared to accept them then you're getting a hell of a lot in a compact form and price. I started off with the DP2m and if I had to have just one then I think that is the sweet spot for me in terms of size, focal length (stitched comps for faux wide angle are great from it) and price. Well, price is only ok for now until @Mattias Burling does one his reviews on it
-
Cheers, I'll go and have a trawl through.
-
When I heard about this, I wasn't sure how well it would perform but from reviews I've seen there does seem to be some actual sorcery involved. Considering what you can adapt to M mount cheaply (i.e. everything !) this is pretty intriguing. Does anyone have one?
-
I know that we like to go for low cost solutions but in this case, because easy reliable chroma key is going to be so vital to what you are doing, I'm going to recommend you have a look at the Reflec system. It has been around for years (it was originally a BBC development) and has also been ridiculously overpriced for years but at the end of the day it does produce good, easy, reliable keying without you having to do anything elaborate lighting or setup wise, which is vital if you are working on your own or with a small team. You can set this up in a few minutes and if you had to then go somewhere else and set it up again and get exactly the same results. Basically, it is a piece of reflective material which fires the light from an LED ring that you mount around the lens straight back to the camera which gives you a pretty perfect key without having to worry about lighting the background and the bi-LED versions of the ring mean you can switch from green to blue background instantly. It is not absolutely perfect but it is a very easy solution to work with and it means the time and expense of lighting the backdrop can be better spent lighting you. There are a bunch of different versions of it to suit cameras from palmcorders up to broadcast ones and a lot of different sizes of the background material (including a pop-up round version like a reflector) but something like the Deskshoot Lite kit would be fine with a Panasonic GH camera. If you hunt around on eBay you can find kits for around £800 and even less. There are also a few knock off versions kicking around as the fabric itself is based on (for which you could read possibly identical) to one made by 3M for safety clothing. As I say, its not cheap but as what you are doing is solely based on chroma key then it might actually be worth putting money into this rather than say going big on a lens as for your application, my view at least, would be that your audience would spot the deficiencies in the keying long before the lens.
-
WEX has them in stock in most sizes http://www.wexphotographic.com/tiffen-62mm-black-satin-1-filter-1561521/
-
There is a flickr pool but usual rules apply with those pools in terms of separating the wheat from the chaff. https://www.flickr.com/groups/451809@N25/pool/
-
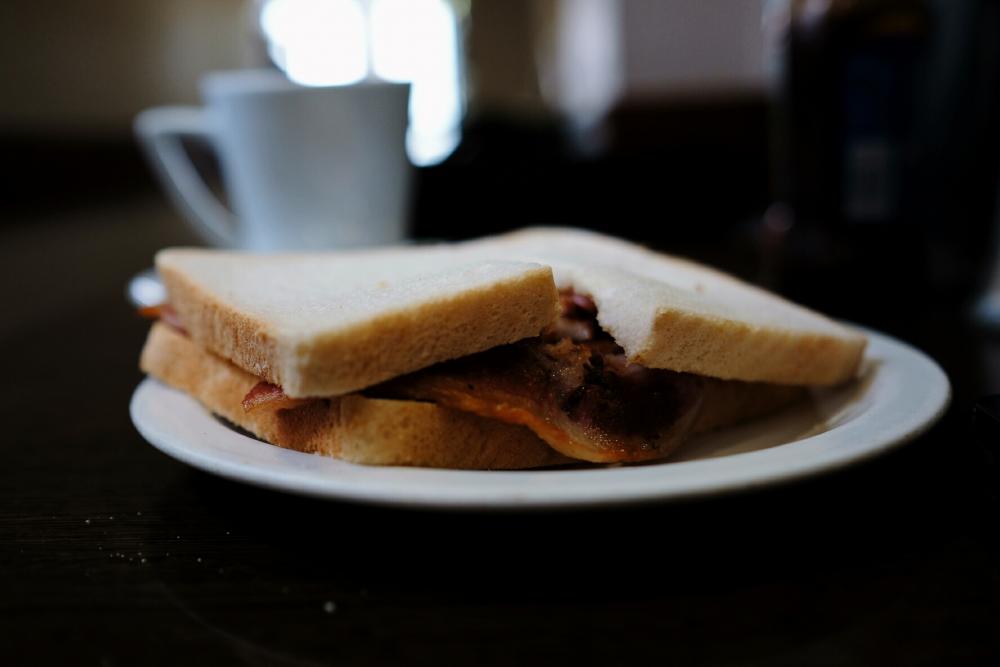
That was a close one. I walked in the shop and Satan himself was stood there with two Leica SLs at "oh hang on" prices so I had to get the Fuji quick and get out. Anyhoo, what I mainly miss about England is the ready availability of secondhand lens bargains and of bacon and sausage sarnies so it seems entirely appropriate that the first picture I took with one should be of the other.
-
Well, unless it was a circus act, the bearded receptionist means that the Contax Zeiss will have to wait.
-
I don't think you get arrested for not putting it on the pan bar its just the usual place for it There is a benefit there for not physically touching the camera to reduce shake and it gives you the option of someone else pulling focus remotely as well of course but neither of those might be applicable to how you're working.
-
This is ridiculous, it was one of those automated e-gate jobs so we still don't have a winner ! We now go on to the hotel receptionist gender then. At this rate it'll be Bruce Jenner and I'll have to buy both.
-
It will mirror whatever you have assigned to the zoom rocker on the camera. It mounts to the tripod pan bar
-
Fuck. In an aisle seat with a man on the right and a woman on the left. I'll go with the gender of whoever checks my passport at the other end. Update in 2 1/2 hours !


.thumb.jpg.e0f282fbdeb18fcfbfe8d3bf1a5274ae.jpg)

.thumb.jpg.185afb8aa288fb792d4bd4a72a86907c.jpg)
