kye
-
Posts
7,835 -
Joined
-
Last visited
Content Type
Profiles
Forums
Articles
Everything posted by kye
-
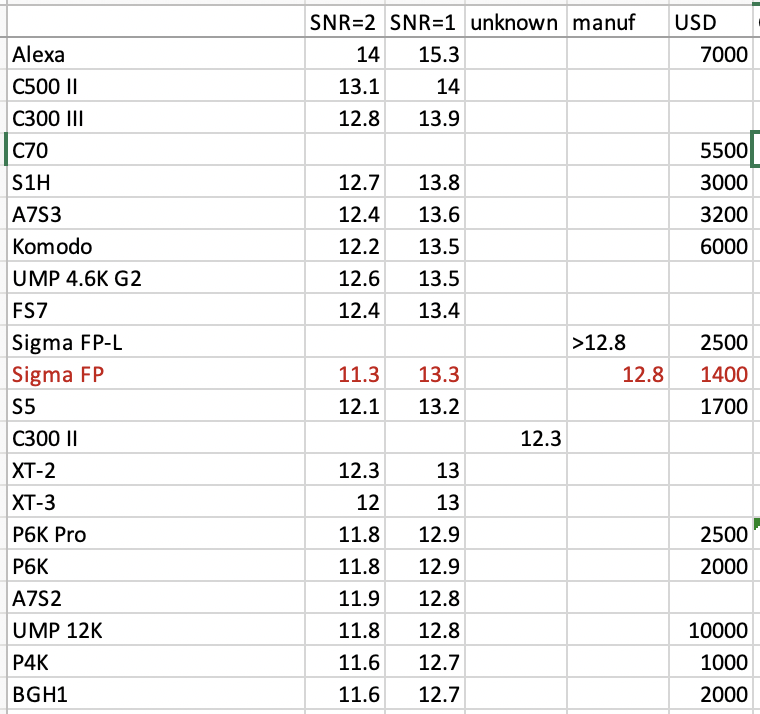
It looks quite interesting actually, if you're willing to shoot 1080p. I think in 1080p, you get: Internal RAW in 8/10/12 bit Downscaling from 8K Digital cropping from 1.0 to 5.0 which are all downscaled from the 8K That could mean you could make a tiny portable/pocketable setup, for example if you chose a 20mm lens you could use it like a 20-100mm. Could be interesting for tiny covert setups. I've been compiling a chart of DR tests and the FP seems like the cheapest and smallest way to get a high-DR camera.

-
Interesting observation. I'm curious what image characteristics you prefer from the Micro over the A7S3? I watched Potatojets video on the FX3 and was particularly impressed by the DR and handling of highlights in the sunset scene where he was backlit and had the sun in shot: Is that something to do with the S-Cinetone profile perhaps? I don't really speak "Sony" so not too sure if that contributes to this look? When I compare the Micro to the GH5 the things that I really feel stands out on the Micro is the DR and the lack of digital sharpness, which just make everything feel like a Hollywood film straight-out-of-camera. I've done comparisons where I shoot the same scene with both cameras and match the colours in post, but it's a pretty arduous task and would be pretty difficult to do unless I had shot every scene with the Micro, which kind of defeats the purpose! Anyway, back to the A7S3 image, it seems to be quite reminiscent of the Micro, at least compared to the GH5 anyway(!) so I'm curious what you're seeing.
-
Well, that went about as I predicted. In fact it went exactly as I predicted! I said: Then Tupp said that he didn't watch it, criticised it for doing things that it didn't actually do, then suggests that the testing methodology is false. What an idiot. Is there a block button? I think I might go look for it. I think my faith in humanity is being impacted by his uninformed drivel. I guess not everyone in the industry cares about how they appear online - I typically found the pros I've spoken to to be considered and only spoke from genuine knowledge, but that's definitely not the case here. There's irony everywhere, but I'm not sure what you're talking about specifically! 🙂 I'm not really sure who you think Steve Yedlin actually is? You're aware that he is a professional cinematographer right? I'd suggest you read his articles on colour science and image attributes - they speak to both what he's trying to achieve and you can get a sense of why he does what he does: http://www.yedlin.net/OnColorScience/index.html I agree, but I think it's worth stating a couple of caveats. Firstly, he shoots large productions that have time to be heavily processed in post, which obviously he does quite a bit of. Here's a video talking about the post-production process on Mindhunter, which also used heavy processing in post to create a look from a relatively neutral capture: That should give you a sense of how arduous that kind of thing can be. Which I think makes processing in post a luxury for most film-makers. Either you're shooting a project where people aren't being paid by the hour, such as a feature where you're doing most of the work in post yourself. This is a luxury because you will be able to spend more time than is economical for the project. Film-makers who don't have the expertise themselves and would have to pay someone, or more likely they would just try and get things right in-camera, and do whatever they can afford in post. The second aspect of this is knowing what you can do in post and what you can't do. Obviously you can adjust colour, and you can degrade certain elements as well, but we're a long way off being able to change the shape of bokeh, or alter depth of field, or completely perfectly emulate diffusion. So it's important to understand what you can and cannot do in post (both from a resourcing / skills perspective as well as from a physics perspective) and take that into account during pre-production. I completely agree with this. It certainly eliminates great proportions of the people online though. I suspect that the main contributor to this is that most people online are being heavily influenced by amateur stills photographers who seem to think that sharpness is the most important image attribute in a camera or lens. I think this tendency is a reaction to the fact that images from the film days struggled with sharpness (due to both the stocks and lenses), and also early digital struggled due to the relatively low number of MP at the start as well. I think this will eventually fade as the community gets a more balanced perspective. The film industry, on the other hand, still talks about sharpness but does so in a more balanced perspective, and does so in the context of balancing it against other factors to get the overall aesthetic they want, taking into account the post-process they're designing and the fact that distribution is limited to a ~2K perceptual resolution.
-
I've posted them quite a few times, but it seems like people aren't interested. They don't follow the links or read the content, and after repeating myths that Steve easily demonstrates to be false, the people go back to talking about if 6K is enough resolution to film a wedding or a CEO talking about quarterly returns, or if they should get the UMP 12K. I mentioned this in another thread recently, but it's been over a decade since the Alexa was first released and we have cameras that shoot RAW in 4, 9, and 16 times the resolution of the Alexa, but the Alexa still has obviously superior image quality, so I really wonder what the hell it is that we're even talking about here....
-
There was a recent reaction video that @Tito Ferradans posted, reacting to a video about anamorphic lenses that was published on another YT channel. Apart from fact-checking the other video, almost to death considering that it got a lot of information wrong about anamorphic lenses, Tito also mentioned that the other video had used shots from his video without permission, and that he went through the process to have it taken down as they used his content without his permission. So I think you're meant to get permission, regardless of the circumstances, and if you don't then you leave yourself open to take-down requests. I've heard instances where people had their own content taken-down by other people who claimed their content as their own, and the mechanisms seemed to be skewed towards taking the content down, instead of leaving it up by default. Also, considering I mentioned Tito and anamorphics, go watch his channel - it's awesome! https://www.youtube.com/user/tferradans
-
I think you make excellent points but disagree with this part of your post, as I think we've been concentrating on the wrong things in camera development. Specifically, we have way more pixels than we need, which you mentioned, but the missing link is dynamic range, which is still very immature in terms of development. Almost everyone can compare an Alexa frame with a sub$2500 digital camera frame on a big TV and see why the Alexa costs more. Under certain controlled situations this difference can be managed and the cheaper camera can come a lot closer, but in uncontrolled lighting and high DR situations it's quite obvious. This comparison still holds if you compare those images on a laptop screen, and even a phone screen in some situations. The fact that the Alexa looks better on a 2.5K laptop display, or a 720p phone screen, means that the image quality cannot be about resolution, as the resolution advantage of the cheaper camera will be eliminated by the downscaled image. What is left is colour science and dynamic range. We should be taking these 8K sensors, putting on the OLPF from a 4K sensor, and sending every fourth pixel to a different ADC pipeline with differing levels of gain, which are then digitally combined to get a very high dynamic range 4K image. The Alexa was released over 10 years ago, shot 2K, and had a dual-gain architecture. Here we are over a decade later and we have cameras that have 16 times as many pixels, but still don't match the DR, and still don't look as good. The real "progress" that has been achieved by the manufacturers is convincing people to buy more pixels despite the fact that they really wanted better pixels.
-
Netflix buys non-4K stuff often, and even the stuff they commission is frequently shot on <4K cameras, including 2K Alexas. Think about image quality not pixel quantity. To paraphrase a quote from another industry: "If the pixels are sh*t, why would I be happy that there are 4 times more of them?".
-
lol pretty much covers it... of course, people around here might disagree - I asked the question and people thought that the sensors all look the same and you can use basically any camera to get any look: I went back to editing some BMMCC footage and just shook my head.
-
 The reason I bring up which controls is that I've heard that controls are designed to work in a colour space (for example, LGG in rec709) so they won't scale things correctly. After a conversion to Linear, often the values are almost completely clipped, so I'm not sure what a control that's only meant to adjust things that are under (or close to) 100 IRE would do. I guess it's just a matter of knowing its an unknown and trying things if it doesn't look right. I've definitely struggled with doing WB in post on non-RAW footage before, so it's useful to me to learn more and to hear that BM is working on improving it. I just went back and found the reference to the WB mention in R17, and maybe I'm remembering it wrong, because maybe it's not more in-line with perception rather than just being purely mathematical, which is the next level again. Perhaps they operate in XYZ colour space, or something similar? Anyway, it's great that the ZCam OSX does the heavy lifting for you. I keep hearing great things about Zcam from professional users, and it seems like they might be on track to grow and really mature as a brand and product lineup.
 -
Help me on an eBay hunt for 4K under $200 - Is it possible?
kye replied to Andrew Reid's topic in Cameras
And thus, ironically, making those cameras no longer cheap! -
But whatever you do, just don't let Jessica Biel on set....
-
I haven't heard this talked about much, so a couple of follow-ups if I may: In Resolve, if someone does a CST to Linear, then adjusts WB, then CST back from Linear, which tool should be used for that WB adjustment? I'm guessing it should be Offset? The tools in Resolve all work in different gamma curves so I'm curious which one will work properly in Linear In Resolve 17, they have changed the way the Temp and Tint sliders work so they now work correctly. I saw this mentioned in passing in the middle of a colourists video, but the release notes don't say what they did, or why it's now correct, and no-one seems to be talking about it. The colourist suggested that they used to be wrong and created artefacts, and it sounded like they might now work in Linear without you having to do it manually. Any ideas?
-
In addition to what @mercer said, you should also get a few action cameras, put them in their waterproof housings, mount one as a helmet cam, one has a chest cam, and maybe one somewhere else, then just have everyone go nuts in shooting and run through the middle going from hiding place to hiding place. Film that in 120p and you'll have lots of close, slow-mo, wide angle "it feels like you're in the middle of it", shaky action footage. Shots like that can be great in the edit.
-
When protecting from impact damage, the goals are to spread out the impact force over time, and over a larger area. This is why cars now have "crumple zones" and airbags. Spreading it out over time means having thicker padding, and over a larger area also kind of comes with the thicker padding, but could also be done via some sections of thick cardboard placed over any particularly sensitive areas. Considering that weight is a consideration, either for the gimbal or just you having to carry it, I'd suggest some lightweight foam, with some thick cardboard over any more sensitive areas (like maybe the rear screen, etc) and put it all in the rain cover which will protect from any paint being splattered or dripping into the camera.
-
After deep reflection, I've concluded that I want my lenses to weigh almost nothing, and yet have diameters like saucers and be almost 100% full-by-volume with bulbous glass elements. If anyone has seen that then please let me know immediately.
-
Help me on an eBay hunt for 4K under $200 - Is it possible?
kye replied to Andrew Reid's topic in Cameras
I suspect a few things: People in quarantine taking up new hobbies and wanting a "cheaper older camera" People in quarantine / not able to travel getting nostalgic for older equipment they sold or used to lust after People who ravenously upgraded because of specs have discovered that quantity of pixels isn't a substitute for quality of pixels and are upgrading to older cameras -
I went out and shot with it and missed focus on quite a few shots. The 4X digital zoom is ok for focusing, but the controls are a bit stiff in places and it's quite sensitive. I'm thinking I'll have to fabricate some a much longer pin / arm for the focus control to give me more leverage and fine control. Definitely more to come.
-
Thanks. I'm not sure how brave I'd be with a newer and more expensive action camera.. the fact this would be cheap to replace is what makes me feel ok to take these risks.
-
Help me on an eBay hunt for 4K under $200 - Is it possible?
kye replied to Andrew Reid's topic in Cameras
To that end, here's the explanation about resolution vs bit-depth. You can downscale a higher-resolution image to a lower resolution and get some/all of the benefits associated with an increased bit-depth, but only in certain circumstances. The critical factor is the noise / detail in the image. If there is a decent amount of noise then this technique works, but if there isn't any noise or detail then it won't work. You also need to be aware that this detail or noise has to be present at the point where the downsample happens. For example, if you are downsampling in post, perhaps by putting 4K files on a 1080 timeline, then the detail and noise needs to be present in the files coming out of the camera. Therefore, any noise-reduction that happens in camera will limit or eliminate this effect. Any flattening of areas of the image due to compression will limit or eliminate this effect. This is why banding in skies or banding in out-of-focus areas is not fixed by this process, and needs to be captured in 10-bit or higher in the first place. It matters for each pixel in the image and what the surrounding pixels are doing, so you might get varying levels of this effect in different parts of the same frame, depending on the values of that group of pixels. This is one of the reasons why RAW is so good, it gives a really good bit-depth (which is colour depth!) and it also doesn't eliminate the noise in the image, which can benefit the processing in post even further. Some examples: If you're shooting something with a lot of detail or texture, and it is sharply in-focus, then the variation in colour between adjacent pixels will enable this effect. For example, skin tones sharply in focus can get this benefit. If there is noise in the image above a certain amount then everything that has this level of noise will benefit, such as out-of-focus areas and skies etc. Skies from a camera with a poor bitrate and/or noise reduction will not be saved by this method. Skin-tones from a camera with a poor bitrate and/or noise reduction will not be saved by this method either. Details that are out-of-focu from a camera with a poor bitrate and/or noise reduction will not be saved by this method. This is why I really shake my head when I see all the Sony 4K 8-bit 100Mbps S-Log cameras. 100Mbps is a very low bitrate for 4K (for comparison 4K Prores HQ is 707Mbps and even 1080p Prores HQ is 176Mbps - almost double for quarter the pixels!) and combined with the 8-bit, the very low contrast S-Log curves, and the low-noise of Sony cameras it really means they're susceptible to banding and 8-bit artefacts which will not be saved by this method. What can you do to improve this, if for example you are buying a budget 8-bit camera with 4K so that you can get better 1080p images? Well, beyond making sure you're choosing the highest bit-rate and bit-depth the camera offers, then assuming the camera has manual settings, you can try and use a higher ISO. Seriously. Find something where there is some smooth colour gradients, a blue sky does great, or even inside if you point a light at a wall then the wall will have a gradual falloff away from the light, then shoot the same exposure across all the ISO settings available. You may need to expose using SS for this test, which is fine. If the walls are too busy, set the lens to be as out-of-focus as possible and set to the largest aperture to get the biggest blurs. Blurs are smooth graduations. Then bring the files into post, put them onto the lower resolution timeline and compare the smoothness of the blurs and any colour banding. Maybe your camera will be fine at base ISO, which is great, but maybe you have to raise it up some, but it should at some point get noisy enough to eliminate the banding. If you've eliminated the banding then it will mean that the bit-depth increase will work in all situations as banding is the hardest artefact to eliminate with this method. Be aware that by raising the ISO you're probably also lowering DR and lowering colour performance, so it's definitely a trade-off. Hopefully that's useful, and hopefully it's now obvious why "4K has more colour depth" is a misleading oversimplification. -
Help me on an eBay hunt for 4K under $200 - Is it possible?
kye replied to Andrew Reid's topic in Cameras
I'm sensing things here too, but it's not irony. Ah, now we've changed the game. You're saying that the resulting downscaled image will have the same reduced colour depth as the original image. This is not what you have been saying up until this point. You said that "4K has 4 times the color depth (and 4 times the bit rate) of full HD" which implies that I can film a 4K 8-bit image and get greater colour depth than FHD 8-bit, but now you're saying that the resulting downscale to FHD will have the same limitations to colour depth, which completely disagrees with your original statement. Correct. Which is why "4K has 4 times the color depth (and 4 times the bit rate) of full HD" is a fundamentally incorrect statement. I shoot with 8-bit, I get colour banding. I shoot with 10-bit, I don't get colour banding. Seems like it has everything to do with the colour depth of the resulting image. Please provide links to any articles or definitions (or anything at all) that talks about how colour depth is different to bit depth, because I have looked and I can't find a single reference where someone has made the distinction except you, who it seems suspiciously like you're changing the definition just to avoid being called out for posting BS online. Then explain it simply. I have asked you lots of times to do so. The really sad thing is that there is some basis to this (and thus why Andrew and others have reported on it) and there are some situations where downscaling does in fact have a similar effect to having shot in an increased bit-depth, but you are not explaining how to tell when these situations are and when they are not likely. Making assertions that resolution can increase bit-depth but then saying that banding will still occur is simply disagreeing with yourself. For those having to read this, firstly, I'm sorry that discussions like this happen and that it is so difficult to call someone out on them posting BS misleading generic statements. The reason I do this is because as I've learned more about film-making and the tech behind it, the more I've realised that so many of the things people say on forums like these is just factually incorrect. This would be fine, and I'm not someone who is fact-checking 4chan or anything, but people make decisions and spend their limited funds on the basis of BS like this, so I feel that we should do our best to call it out when we see it, so that people are better off, rather than worse off after reading these things. -
Help me on an eBay hunt for 4K under $200 - Is it possible?
kye replied to Andrew Reid's topic in Cameras
You're really not getting this.... Let's revisit your original statement: So, if 4K has 4 times the colour depth, then downscaled to FHD it should be equivalent to FHD 10-bit. When I shoot a 4K 8-bit image and get banding in it, and downscale it to FHD, why does the banding remain? If I took the same shot in FHD 10-bit, there is no banding, so why doesn't the banding get eliminated like you've claimed in your original statement? -
Sigma EVF-11... Looks like a masterpiece of design to me
kye replied to Andrew Reid's topic in Cameras
I don't think we can tell. The USB port is connected, so it could easily be going through that. It depends on how the camera is designed, but it might have the ability to scale the image within the camera, in which case it could be sending an EVF resolution version through the USB and then a full-resolution through the HDMI. Or the EVF could be taking the feed from the HDMI, downscaling it, and putting the OSD on top of it (talking to the camera about what OSD things to display through the USB) which wouldn't pollute the HDMI image. It really depends on how they've implemented it, but I guess my point was that it's possible they're all independent. -
Help me on an eBay hunt for 4K under $200 - Is it possible?
kye replied to Andrew Reid's topic in Cameras
You're making progress, but haven't gotten there yet. Please explain how, in an 8K image with banding, an area with dozens/hundreds of pixels that are all the same colour, somehow in the downsampling process you will get something other than simply a lower resolution version of that flat band of colour? -
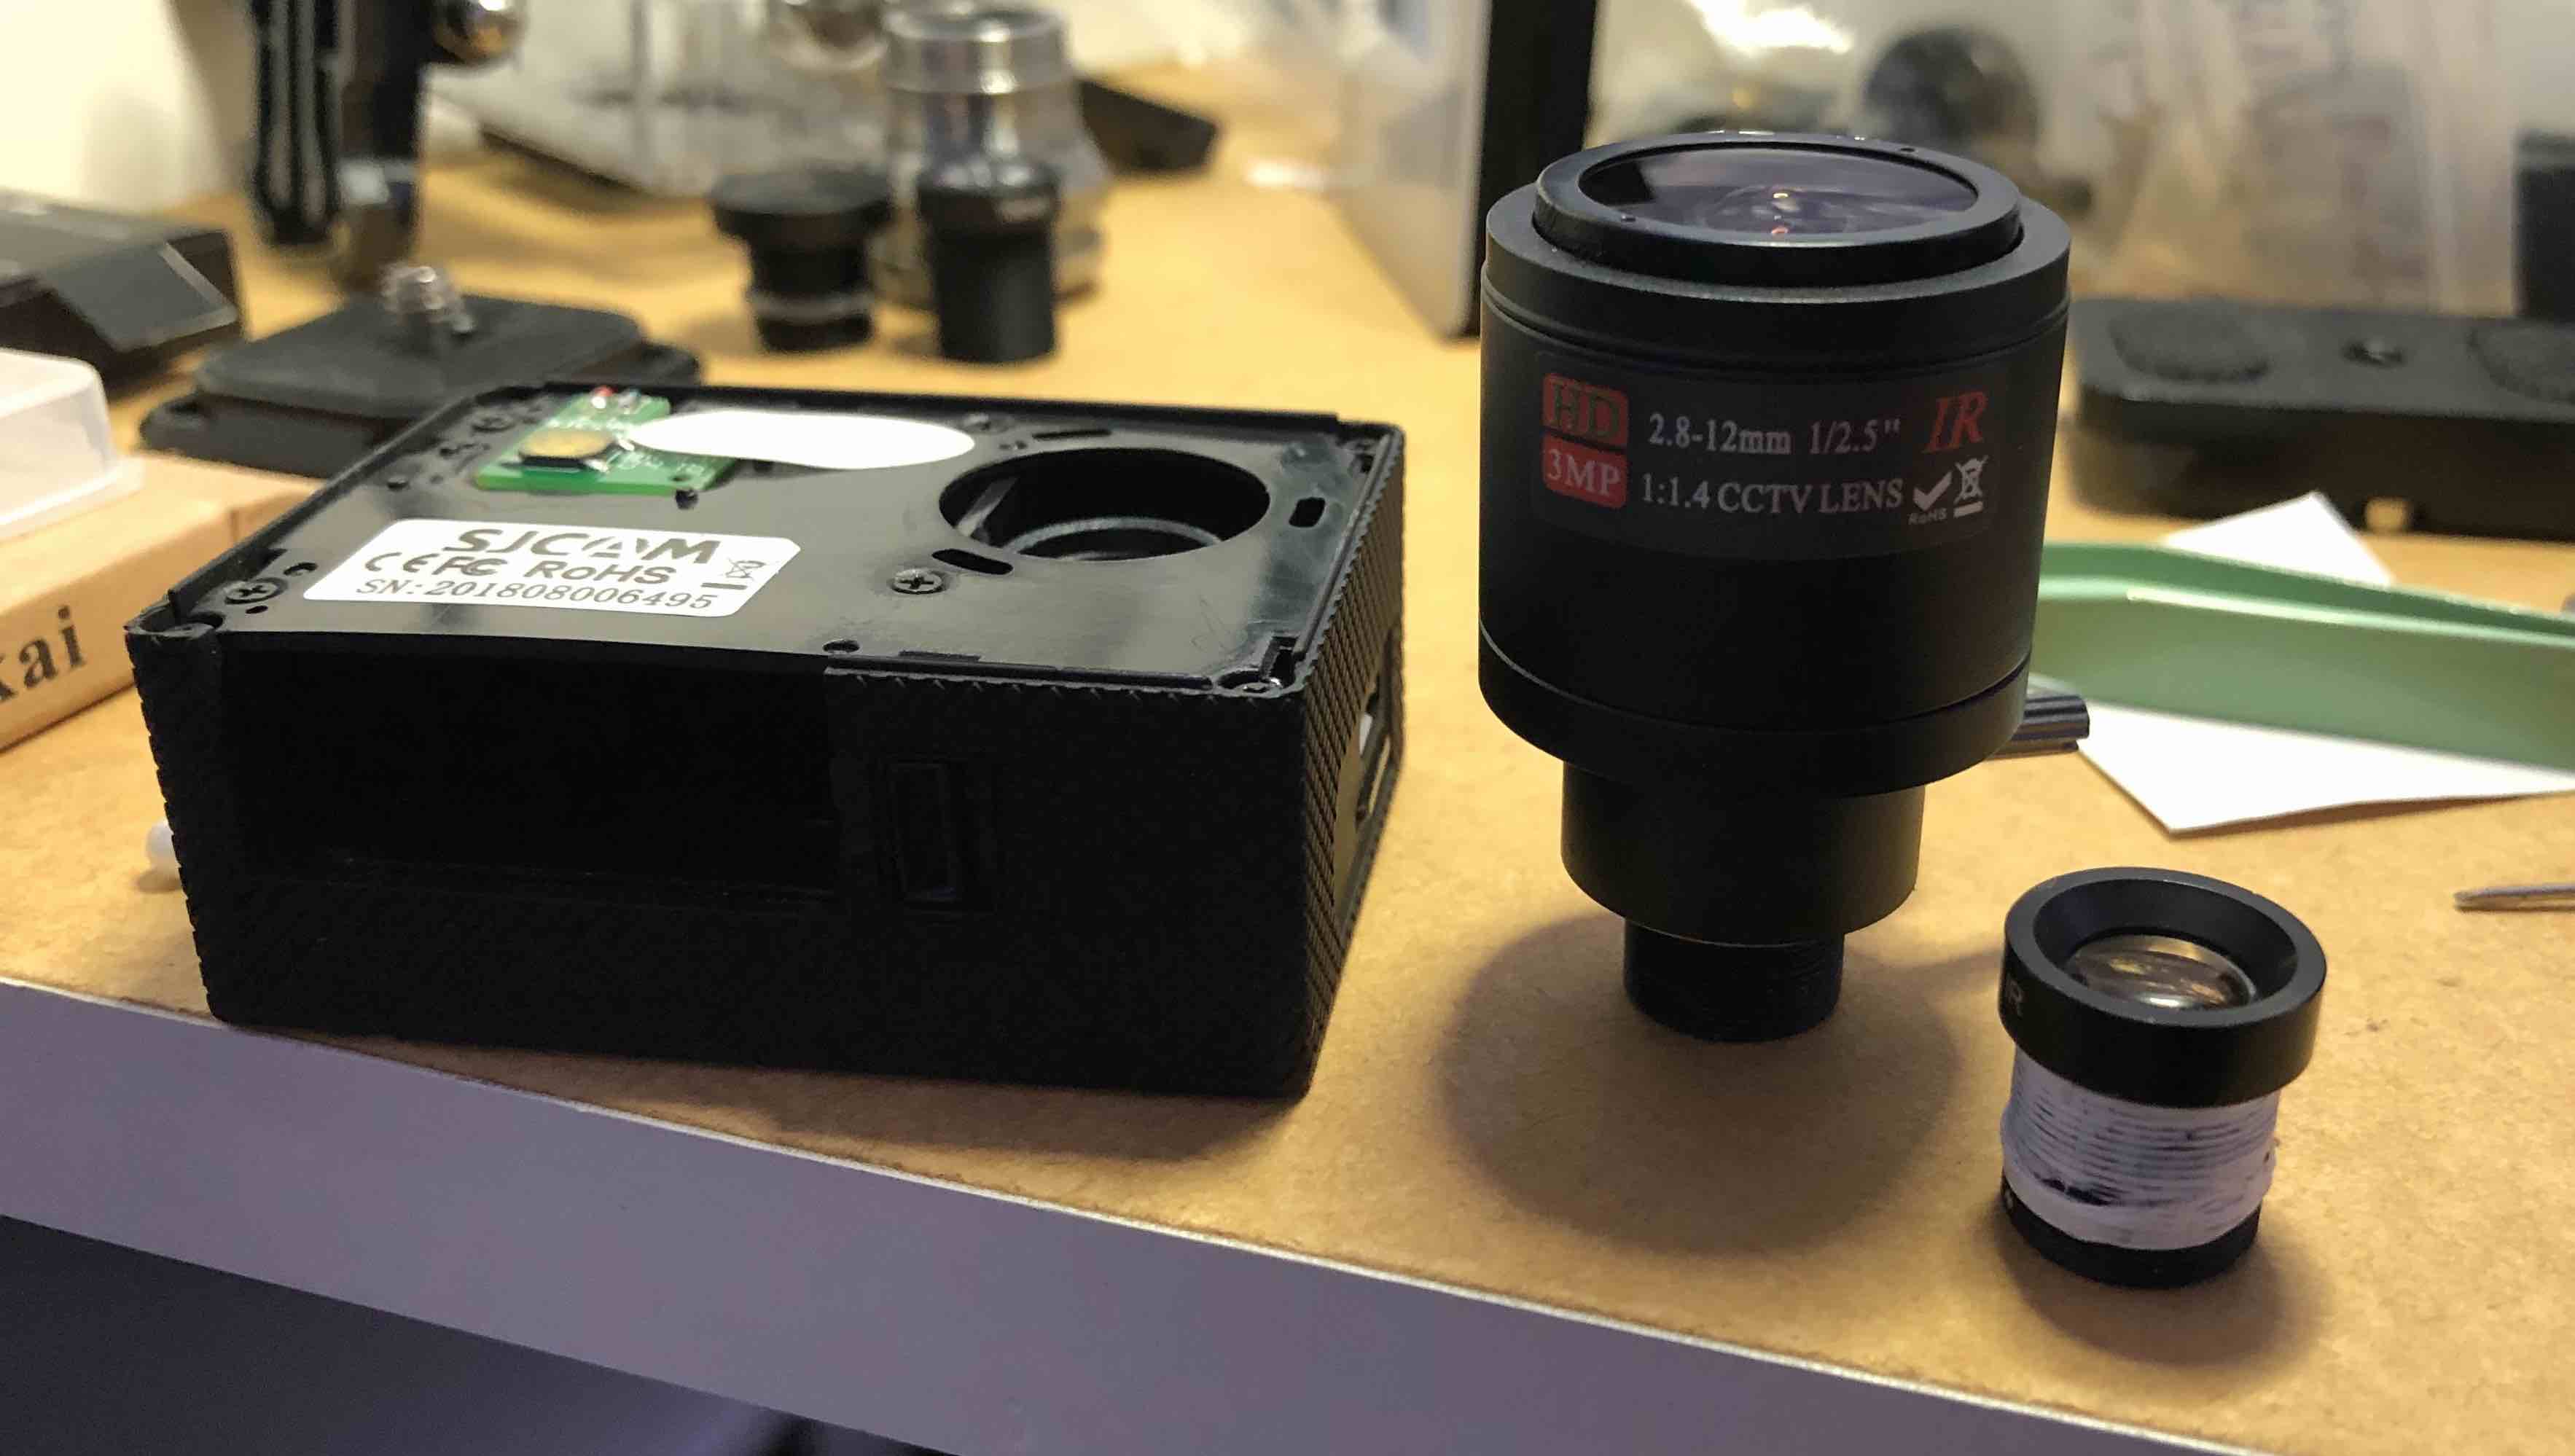
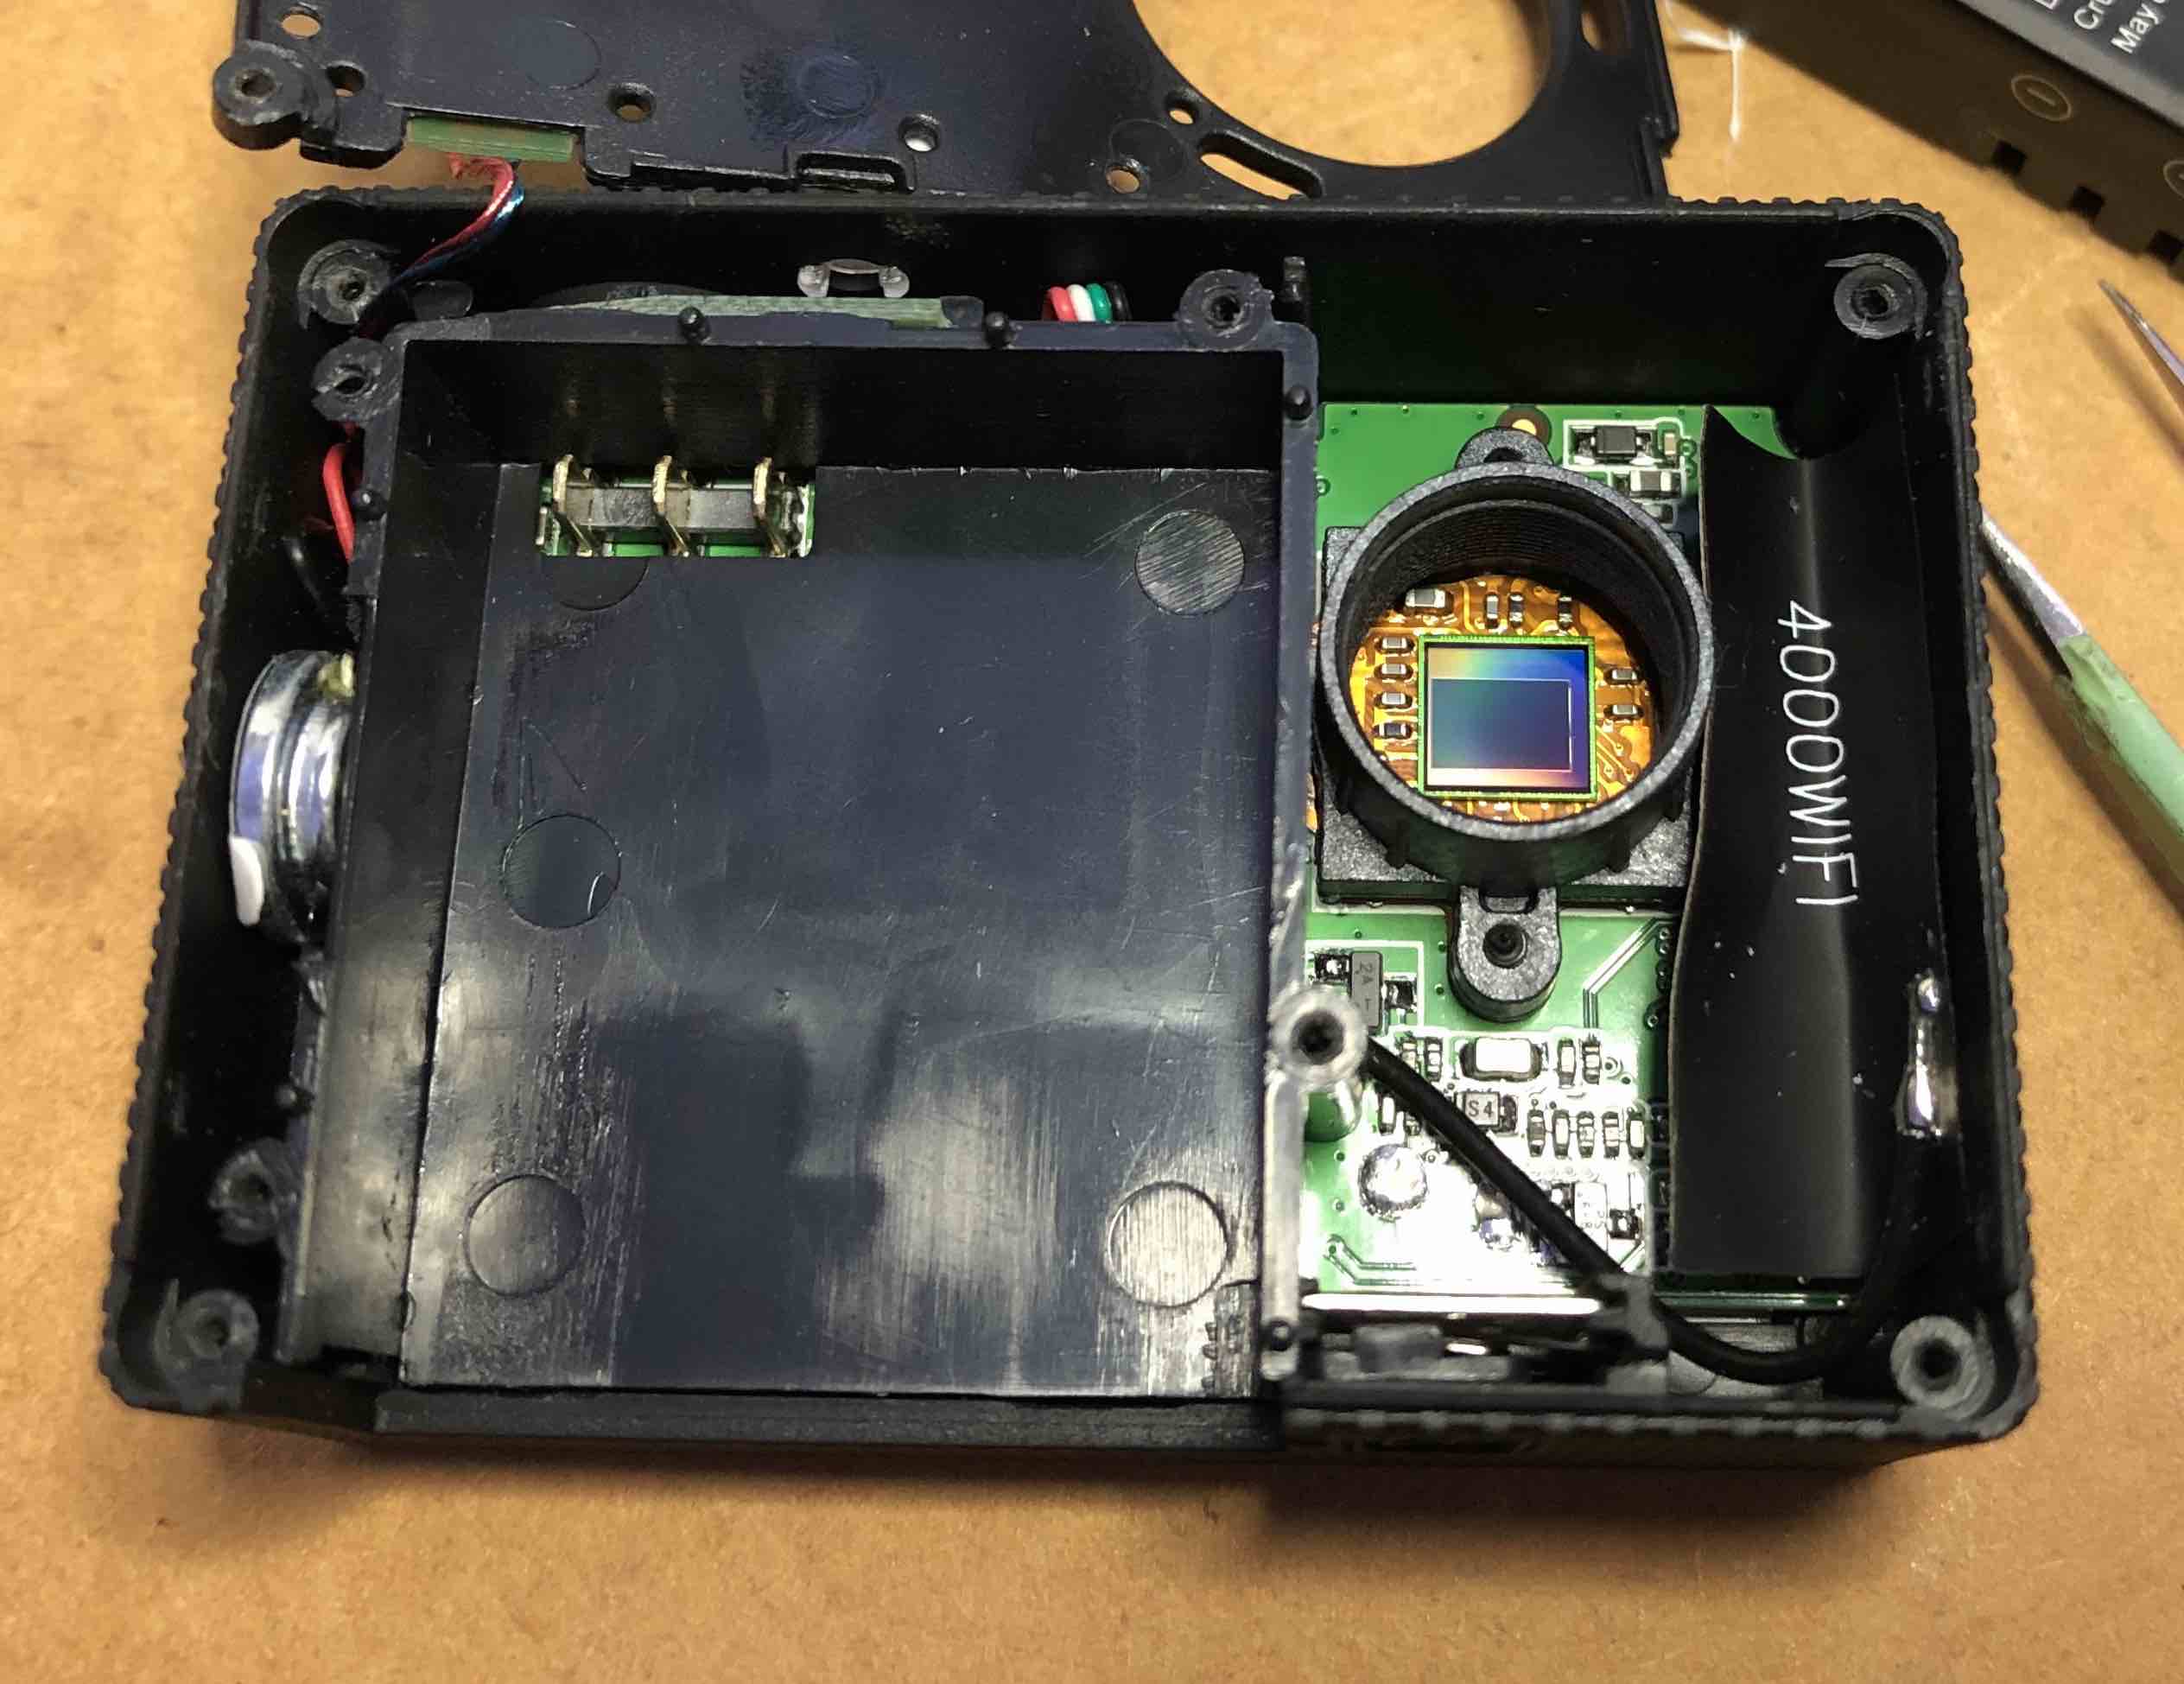
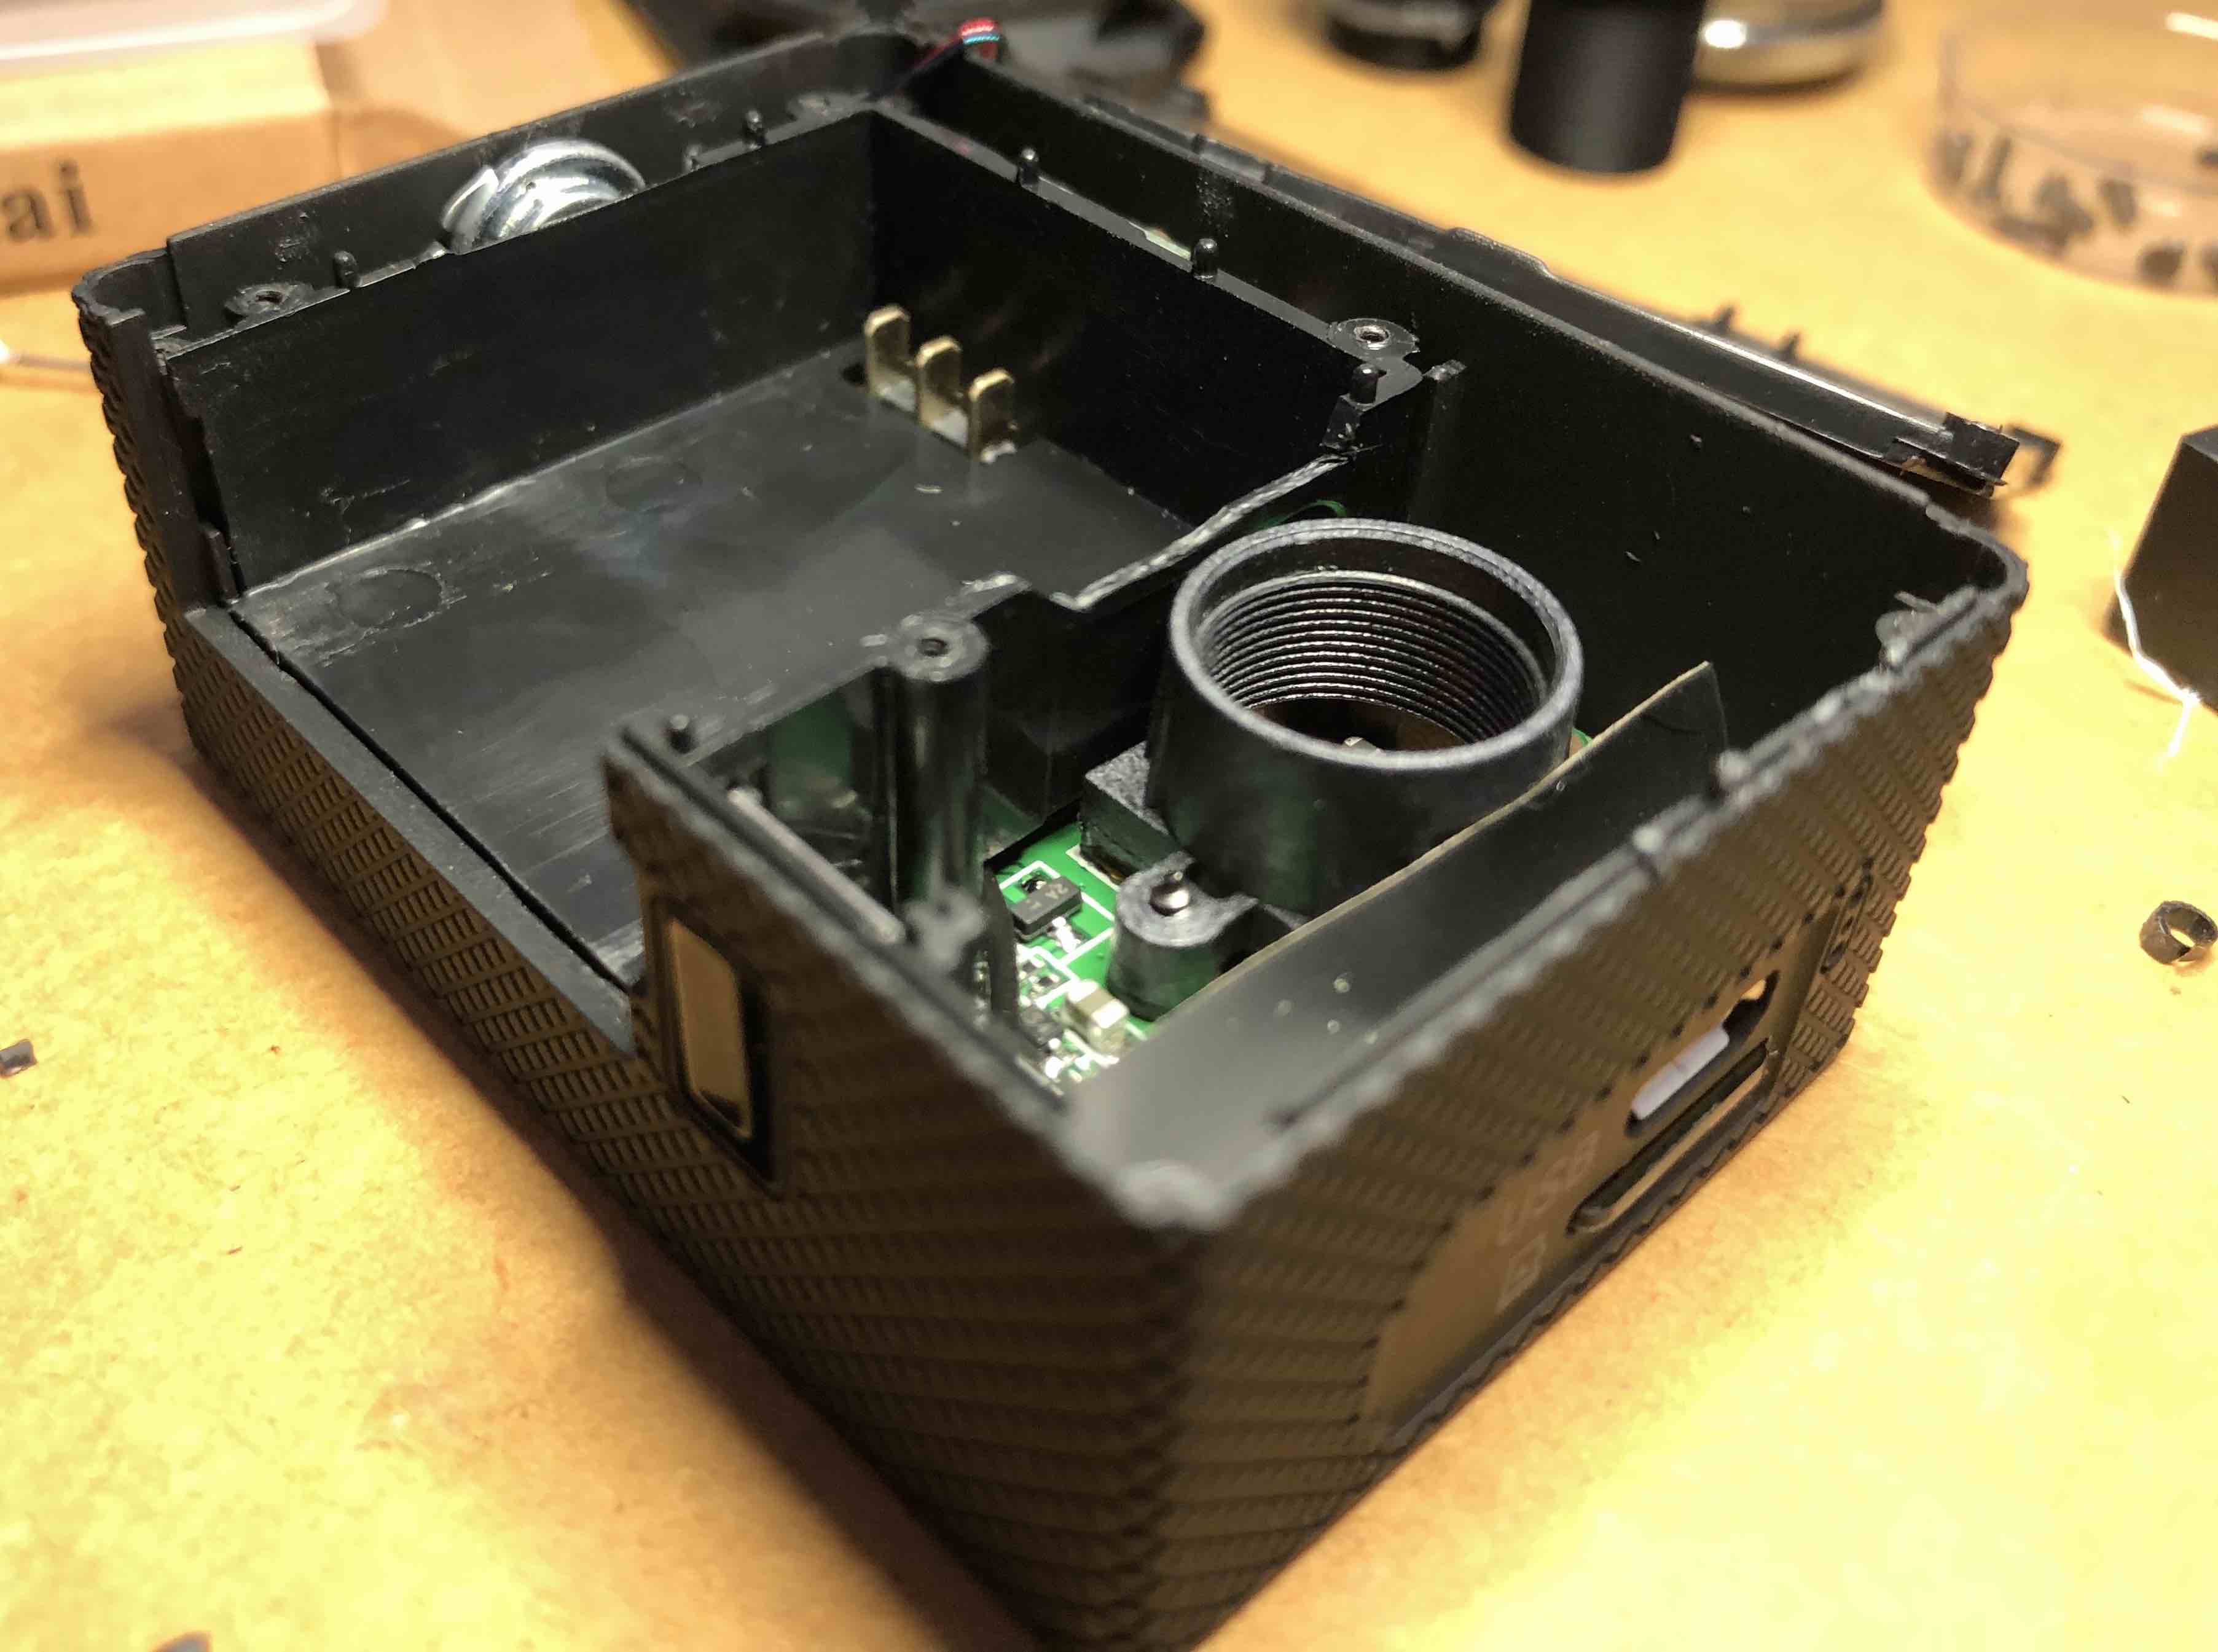
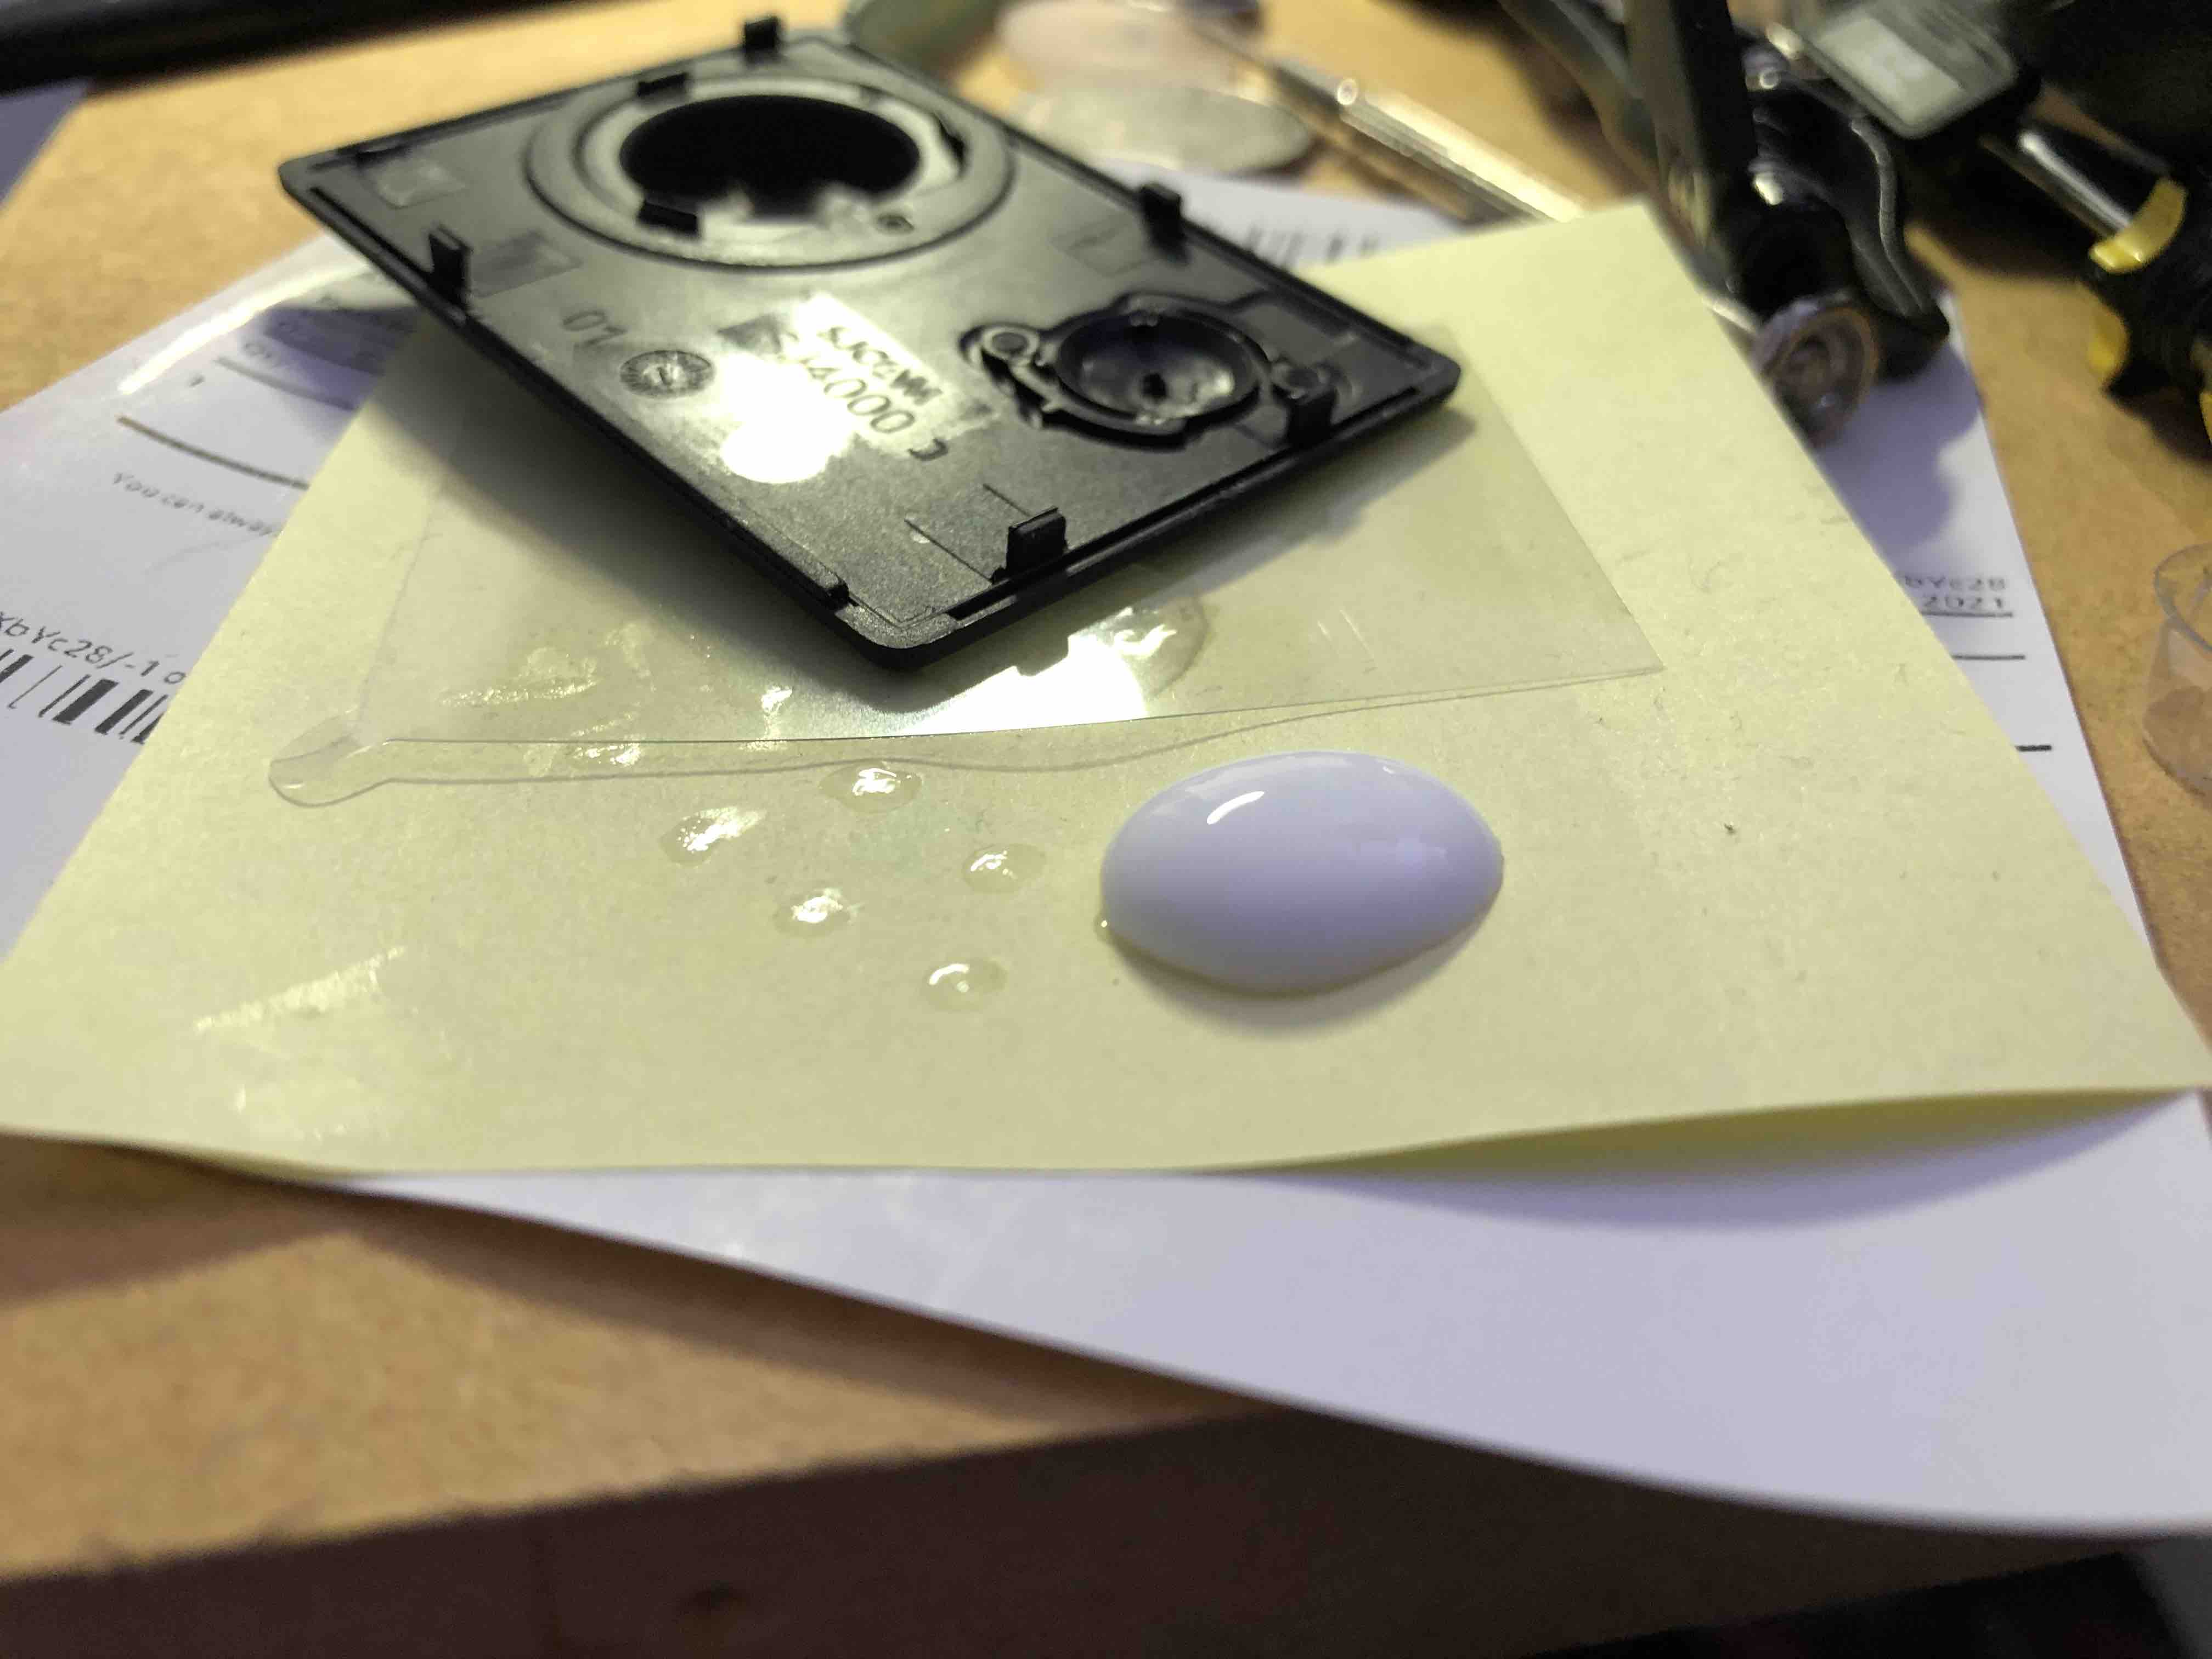
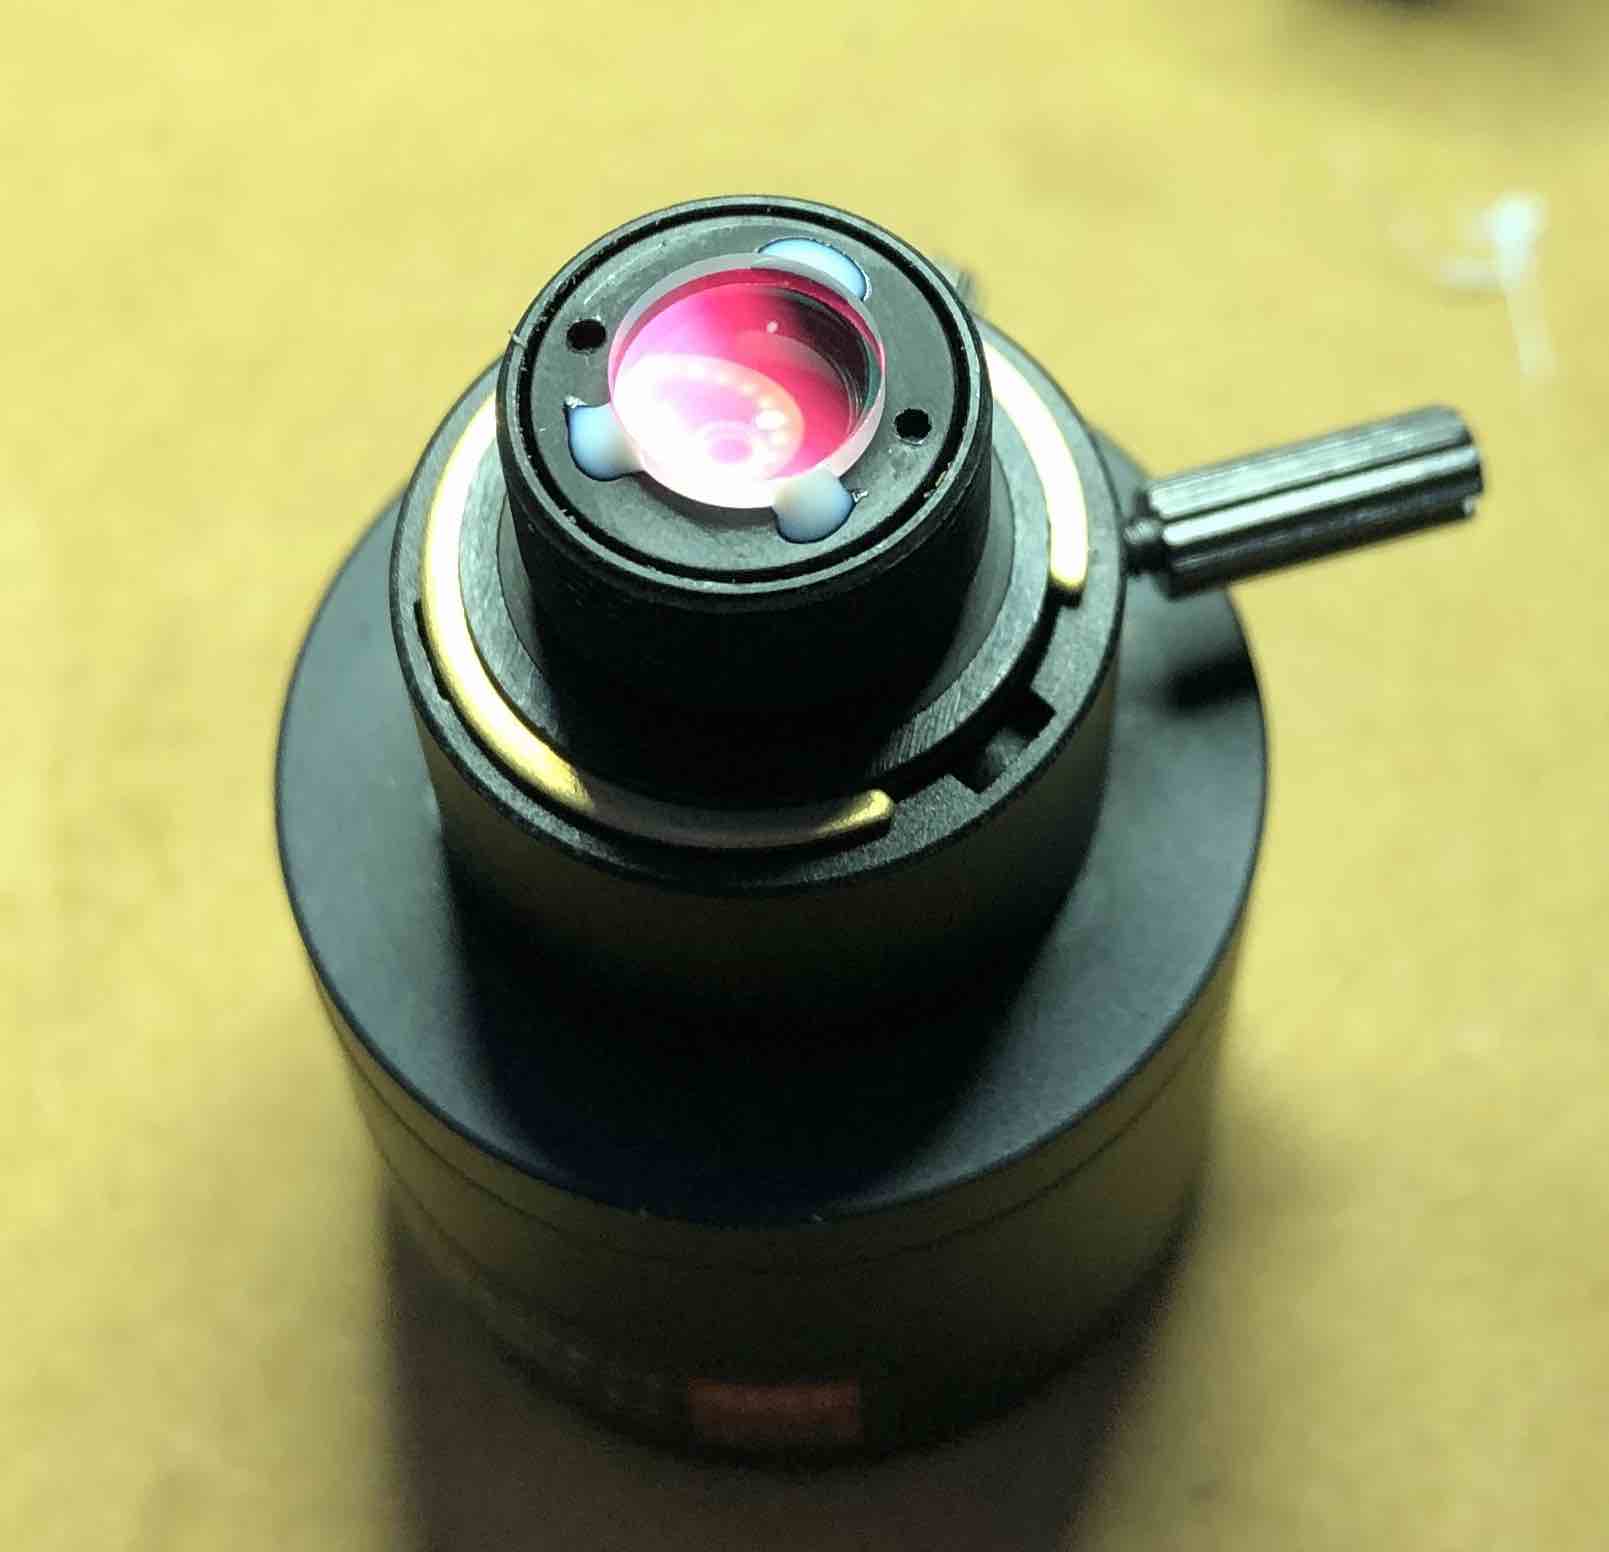
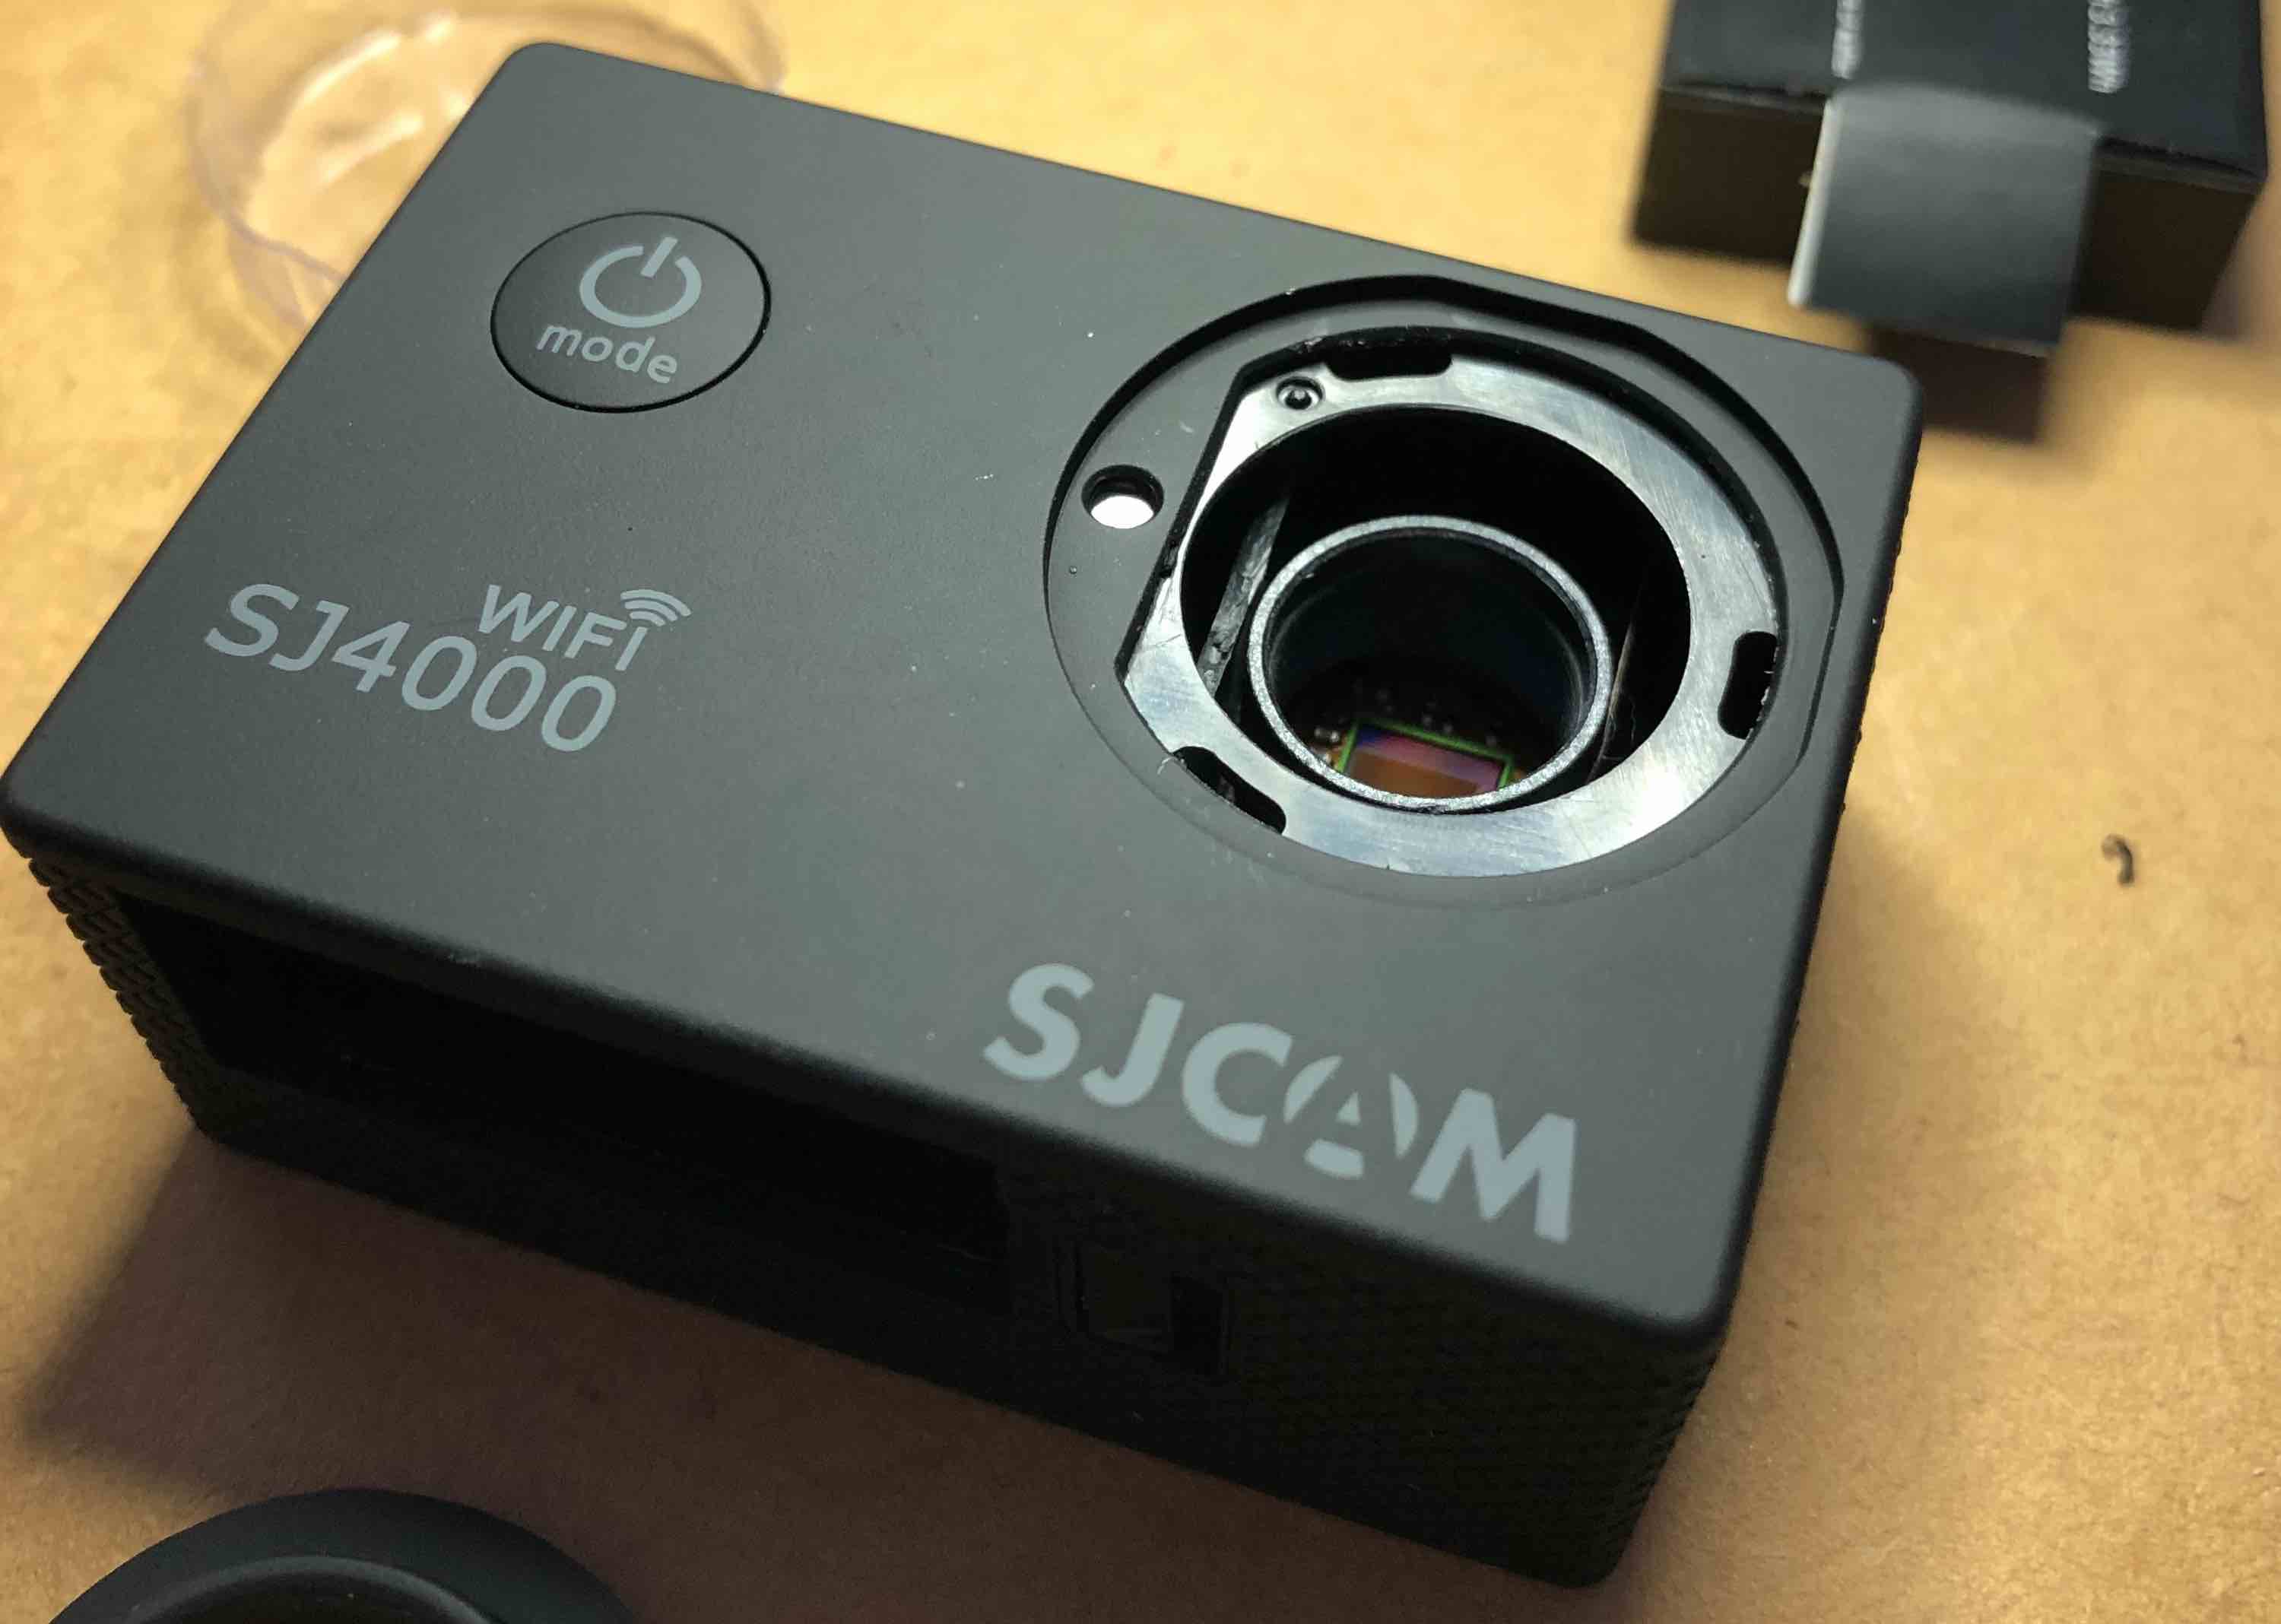
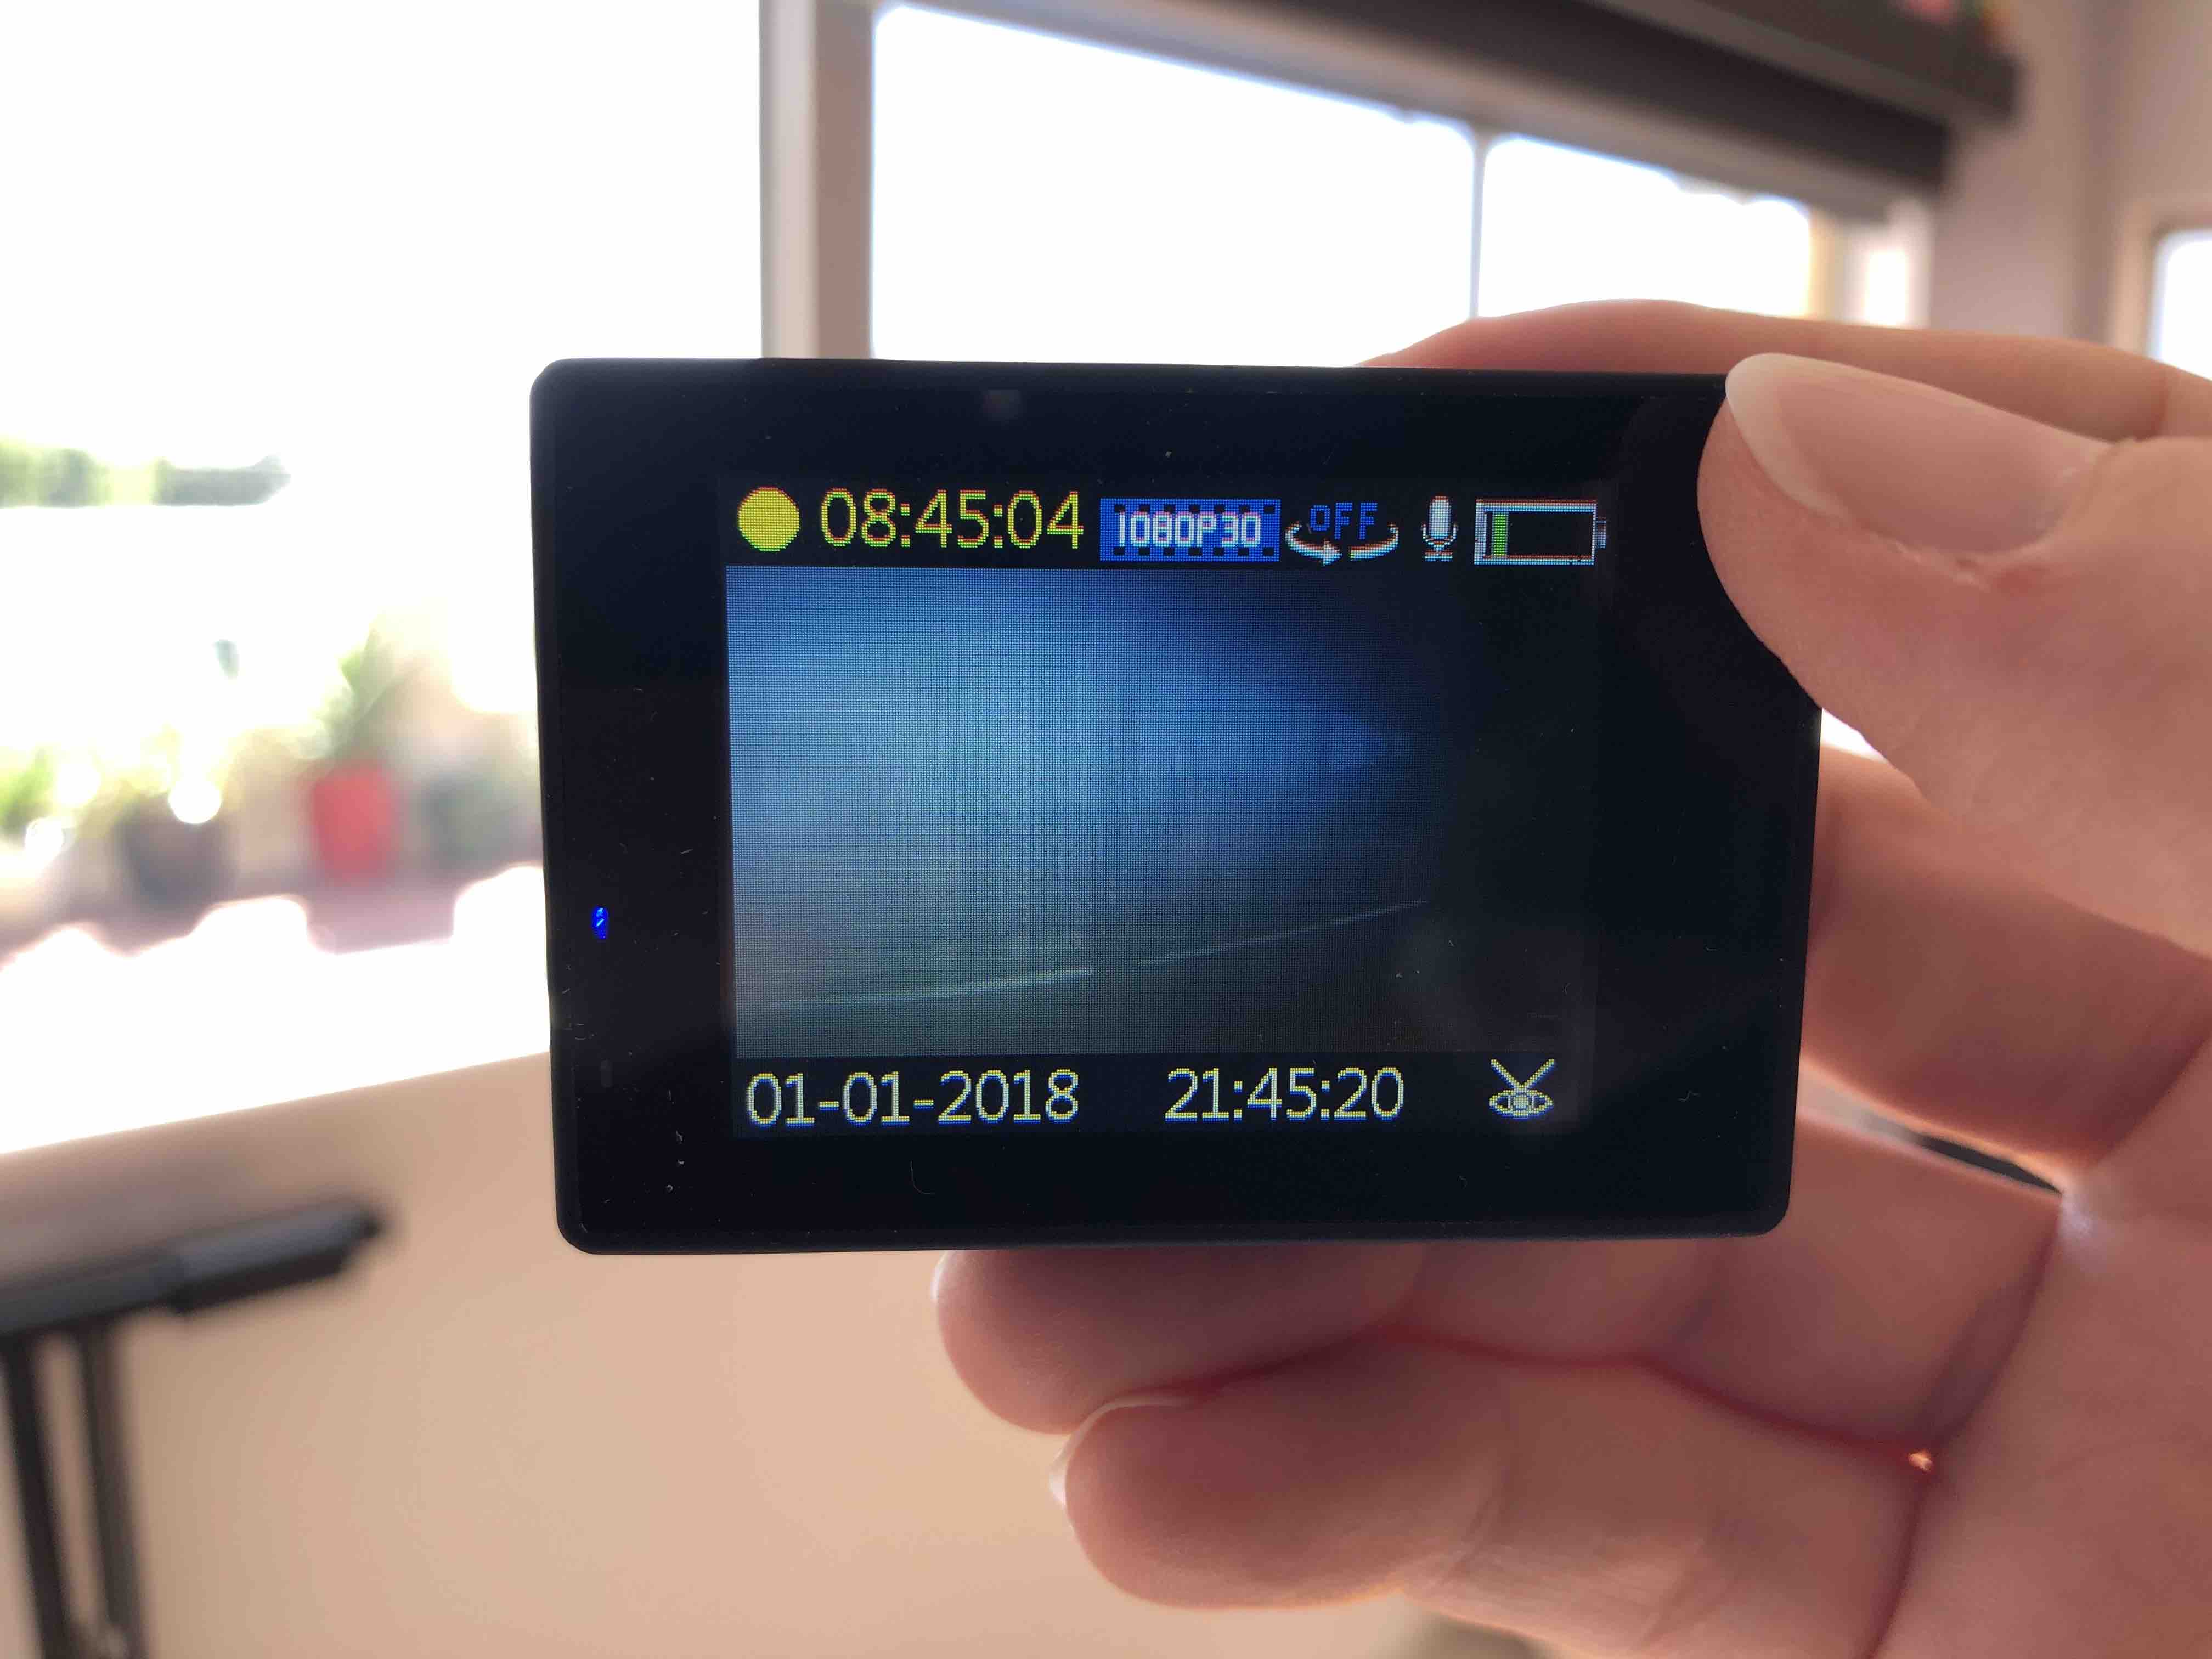
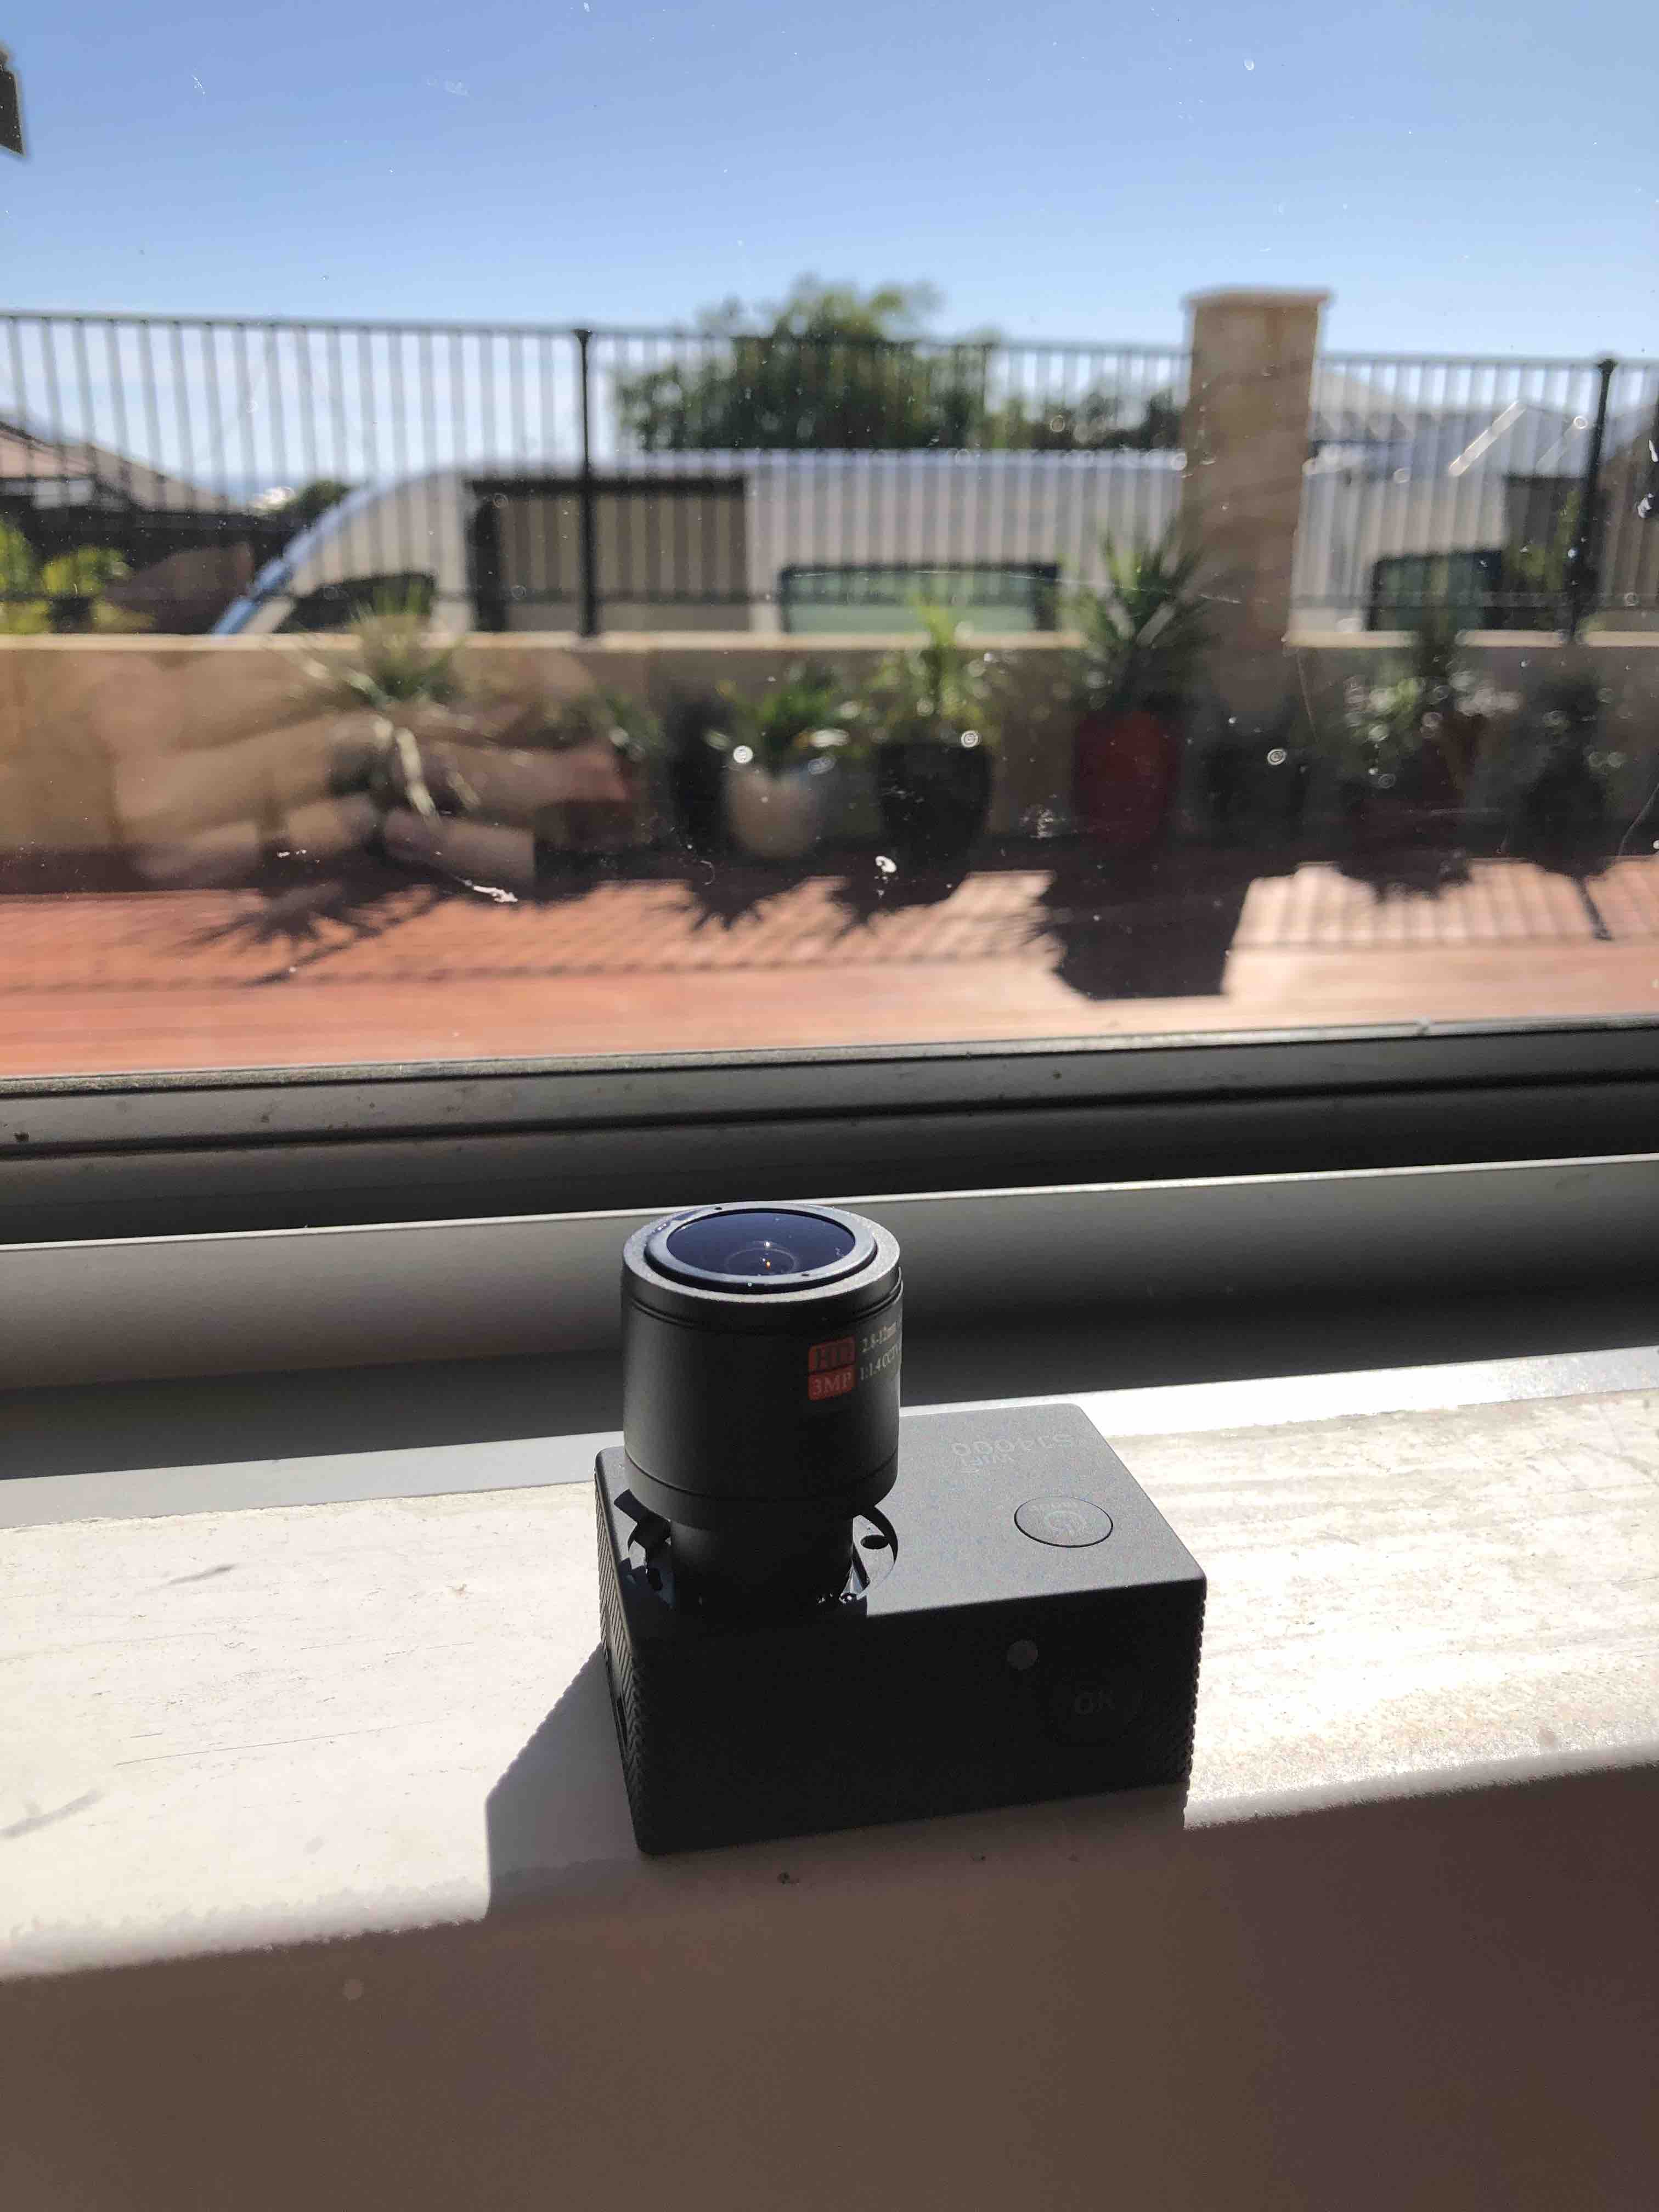
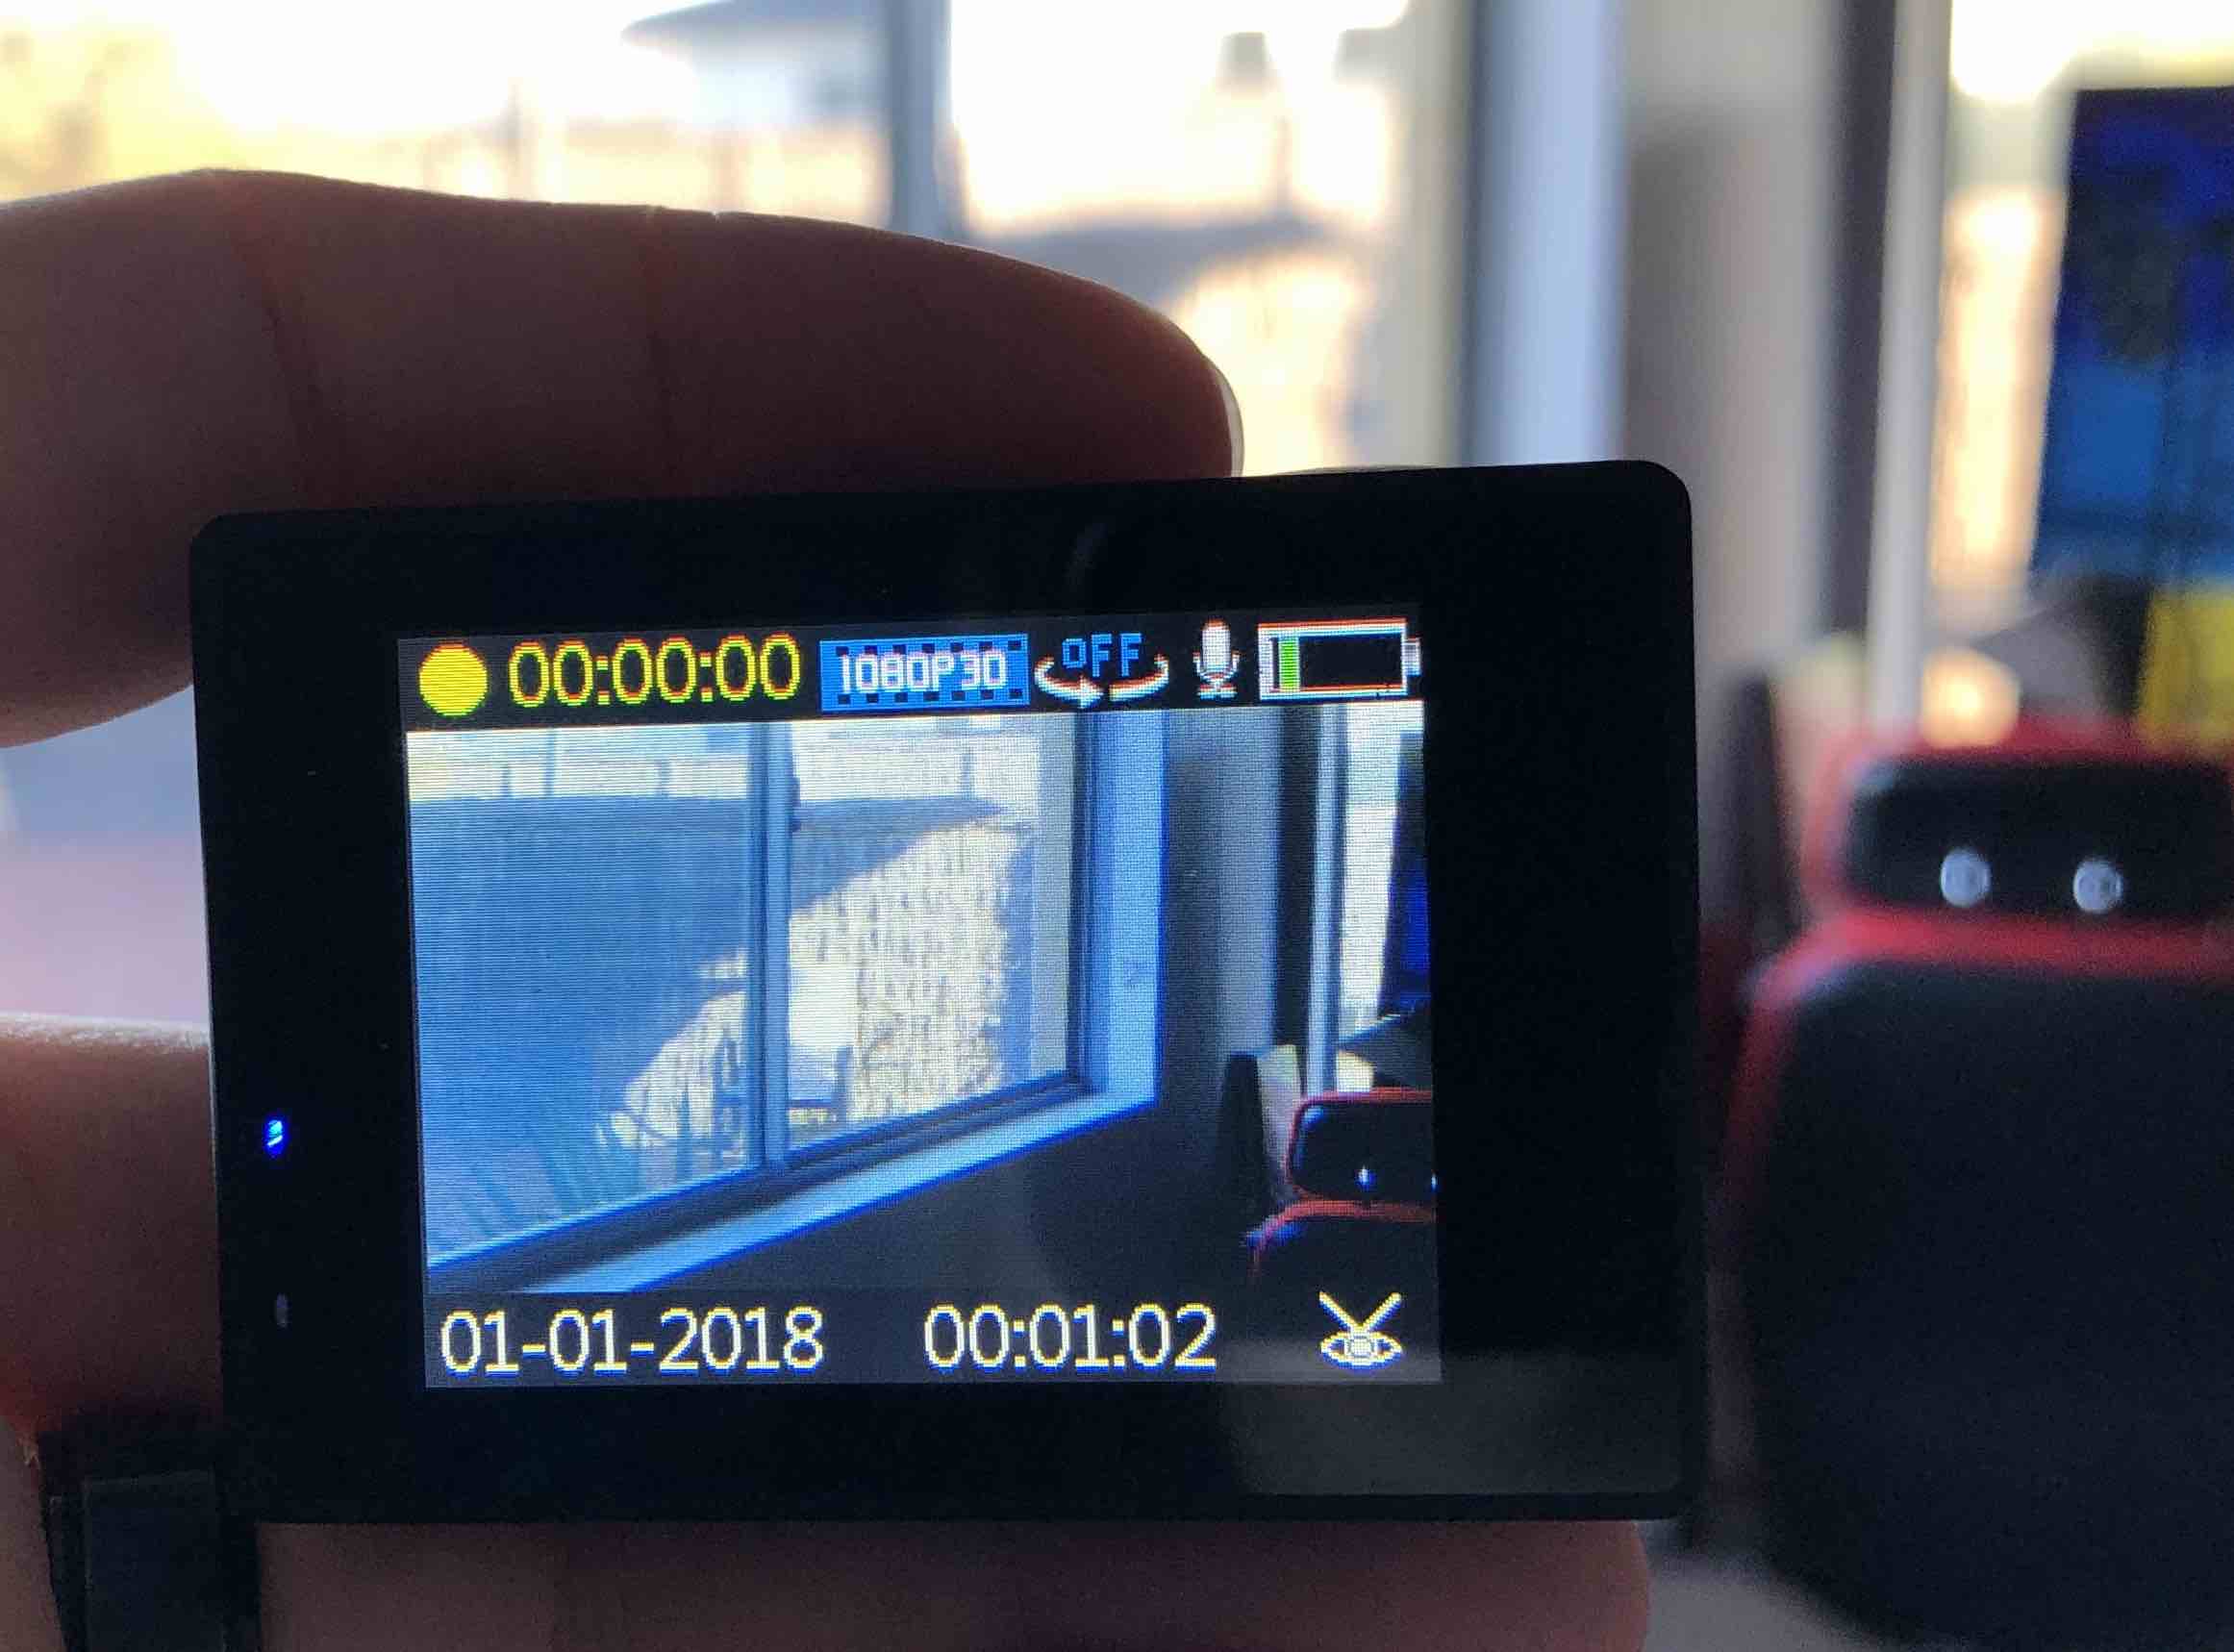
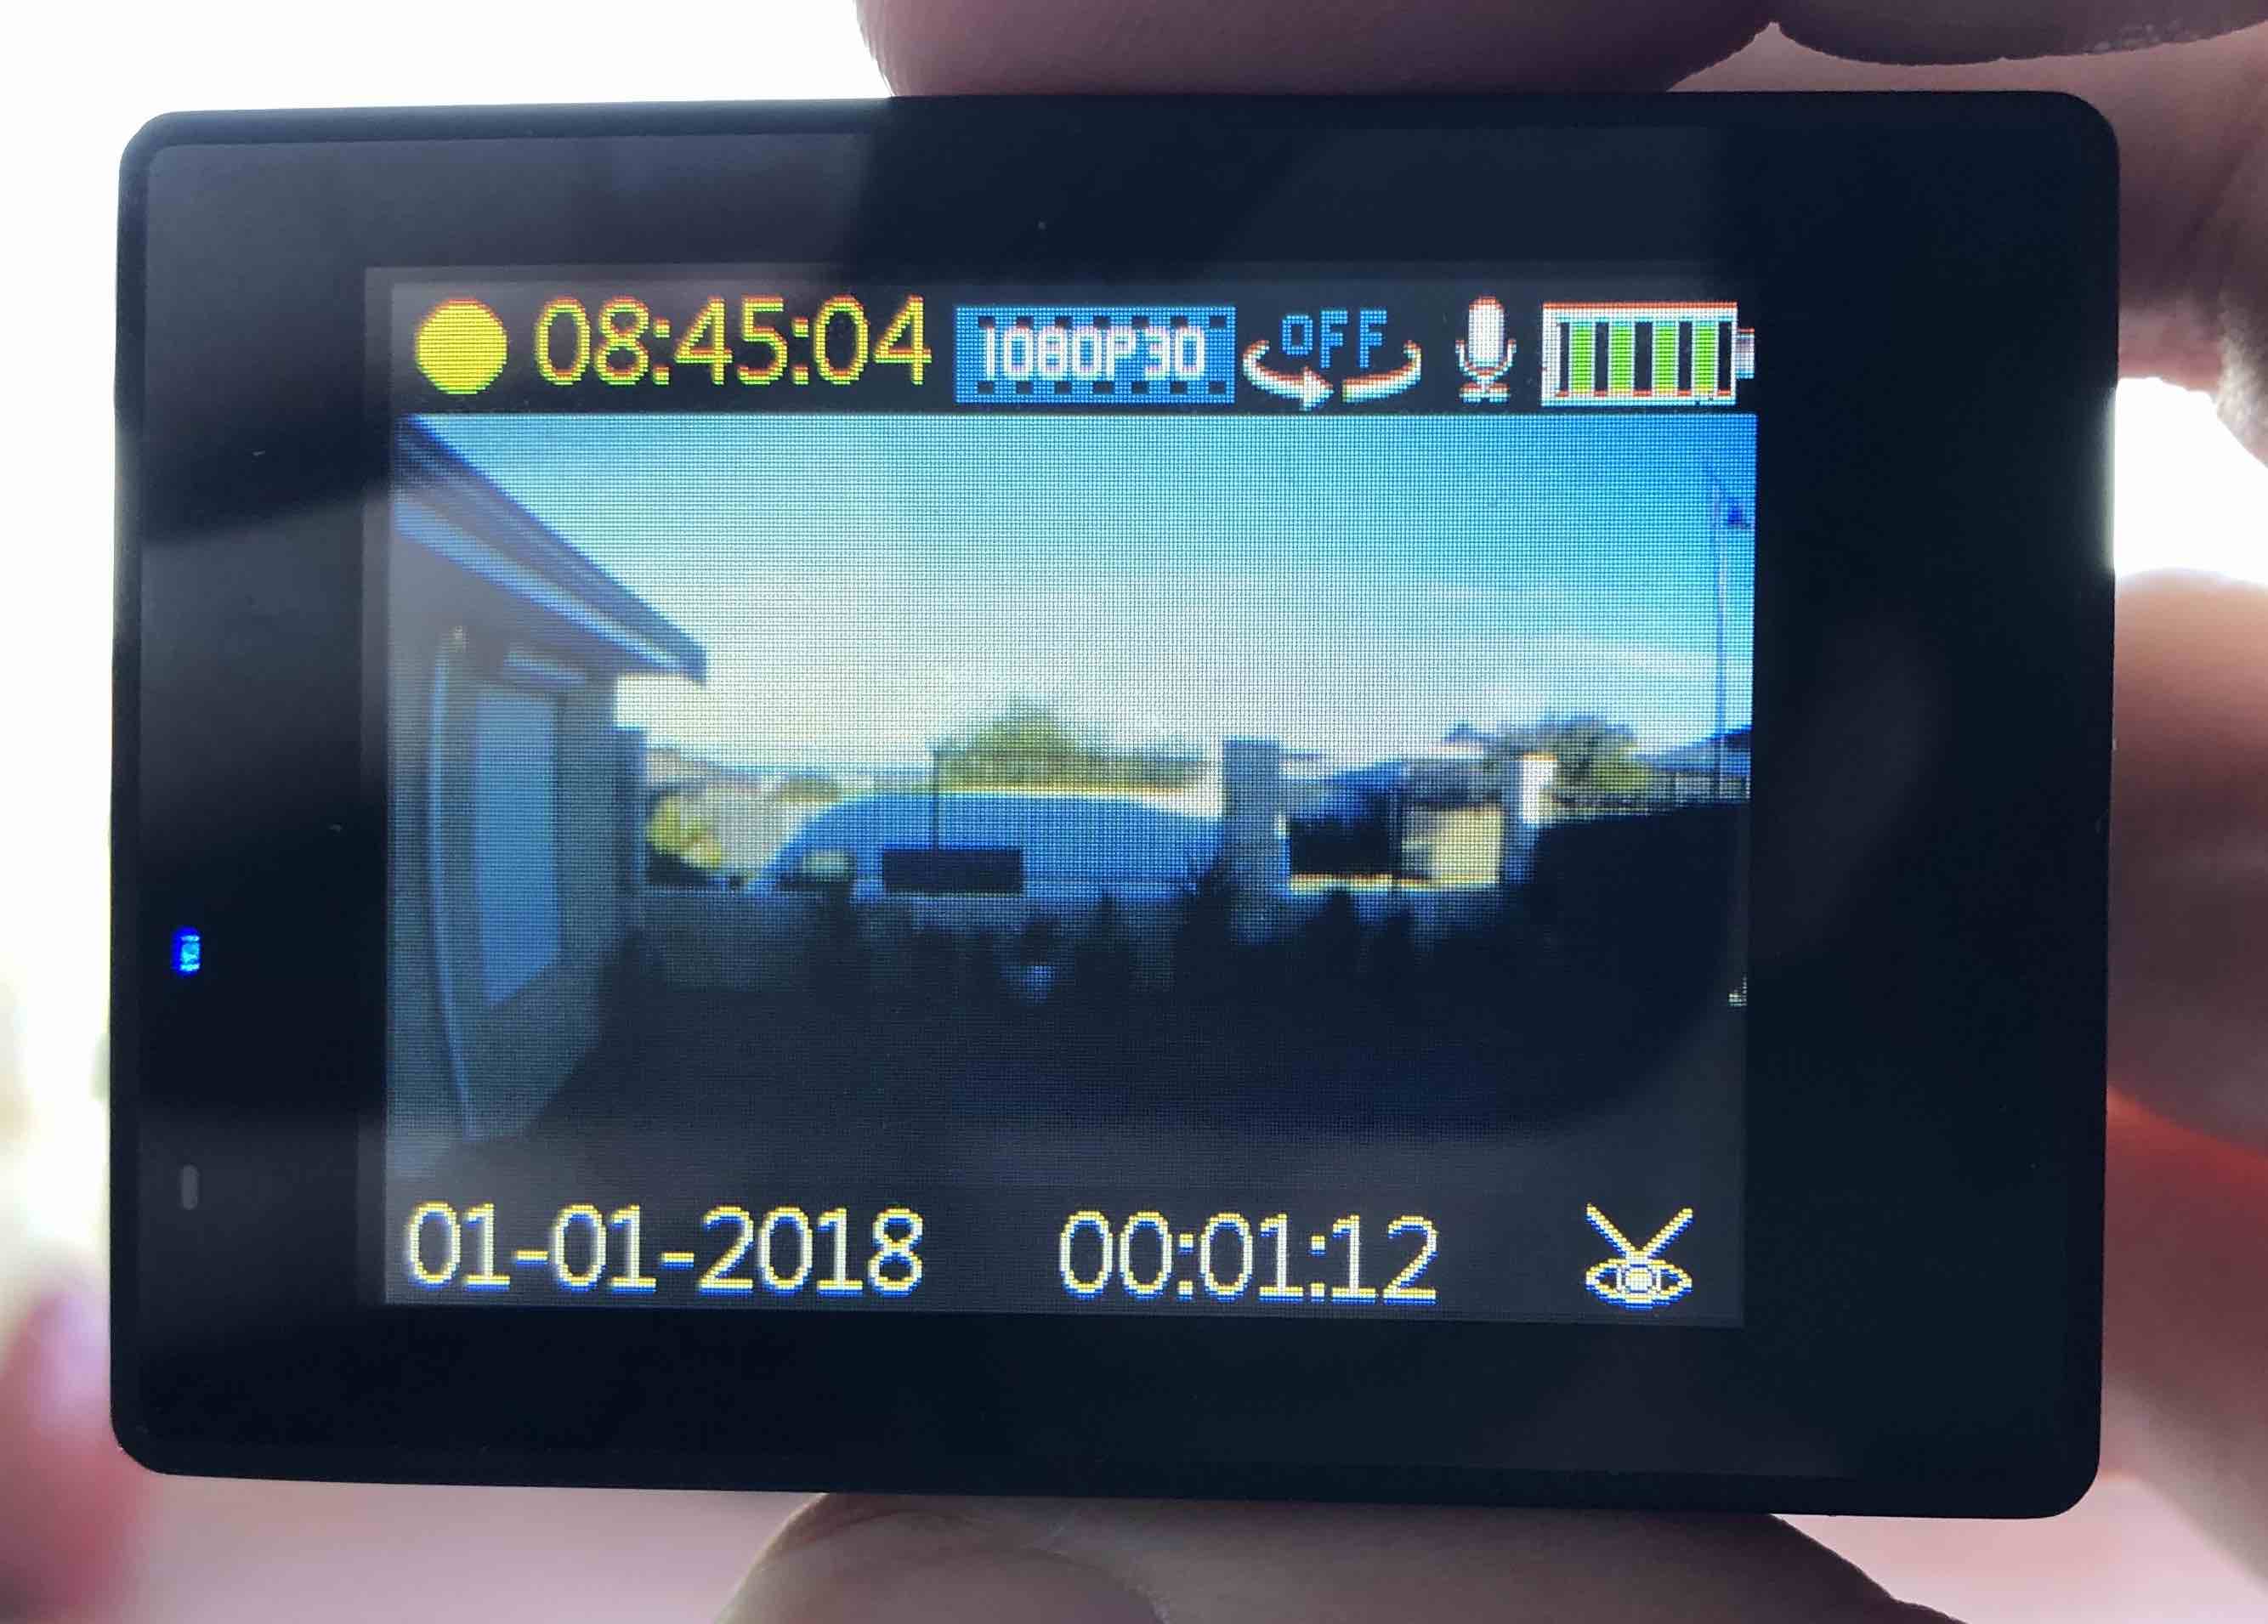
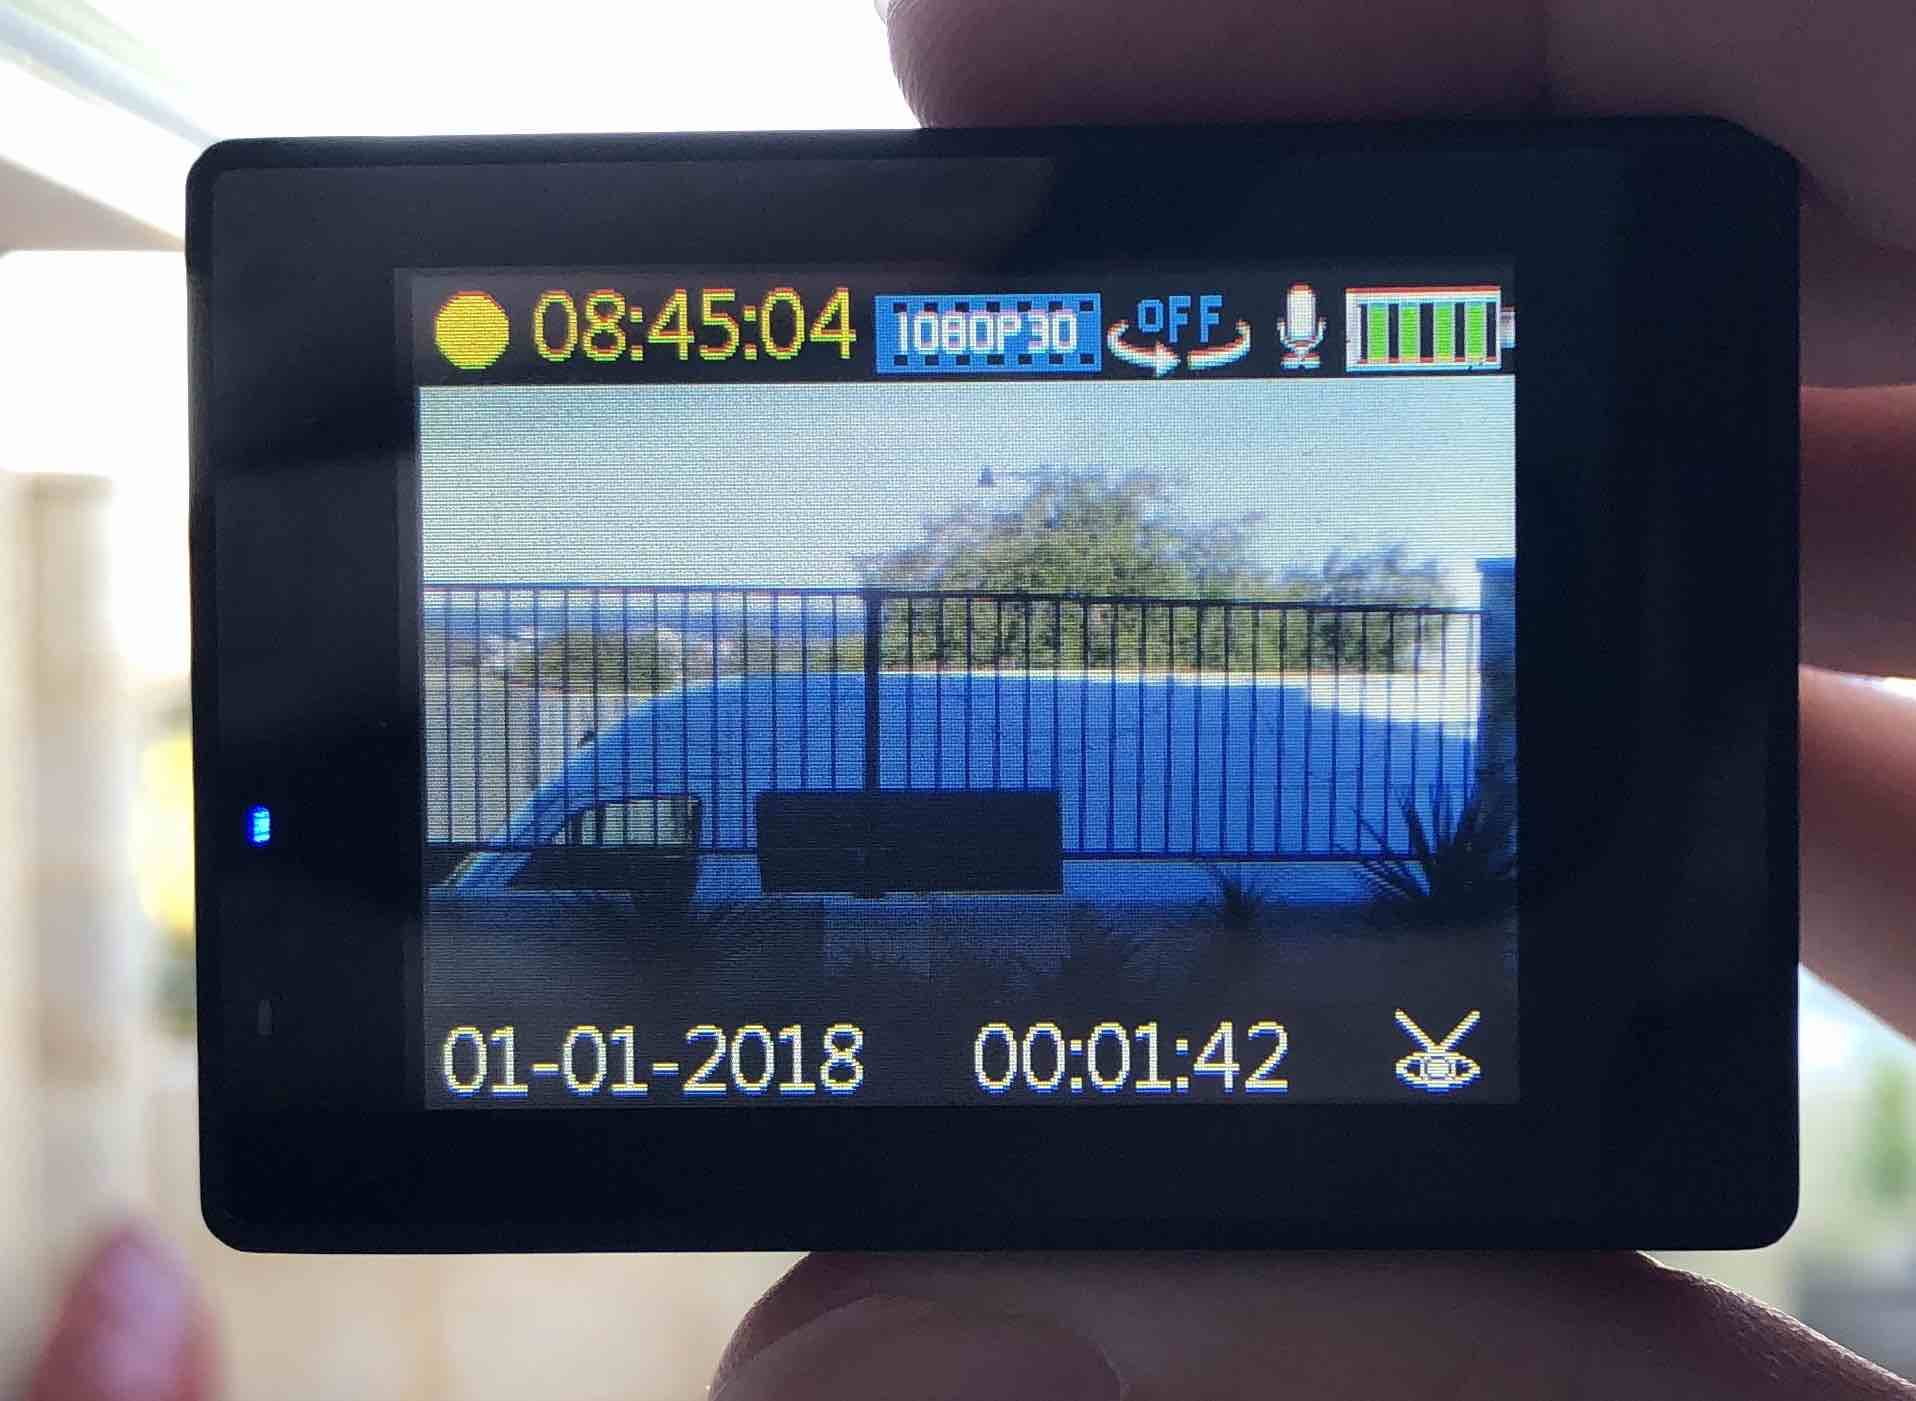
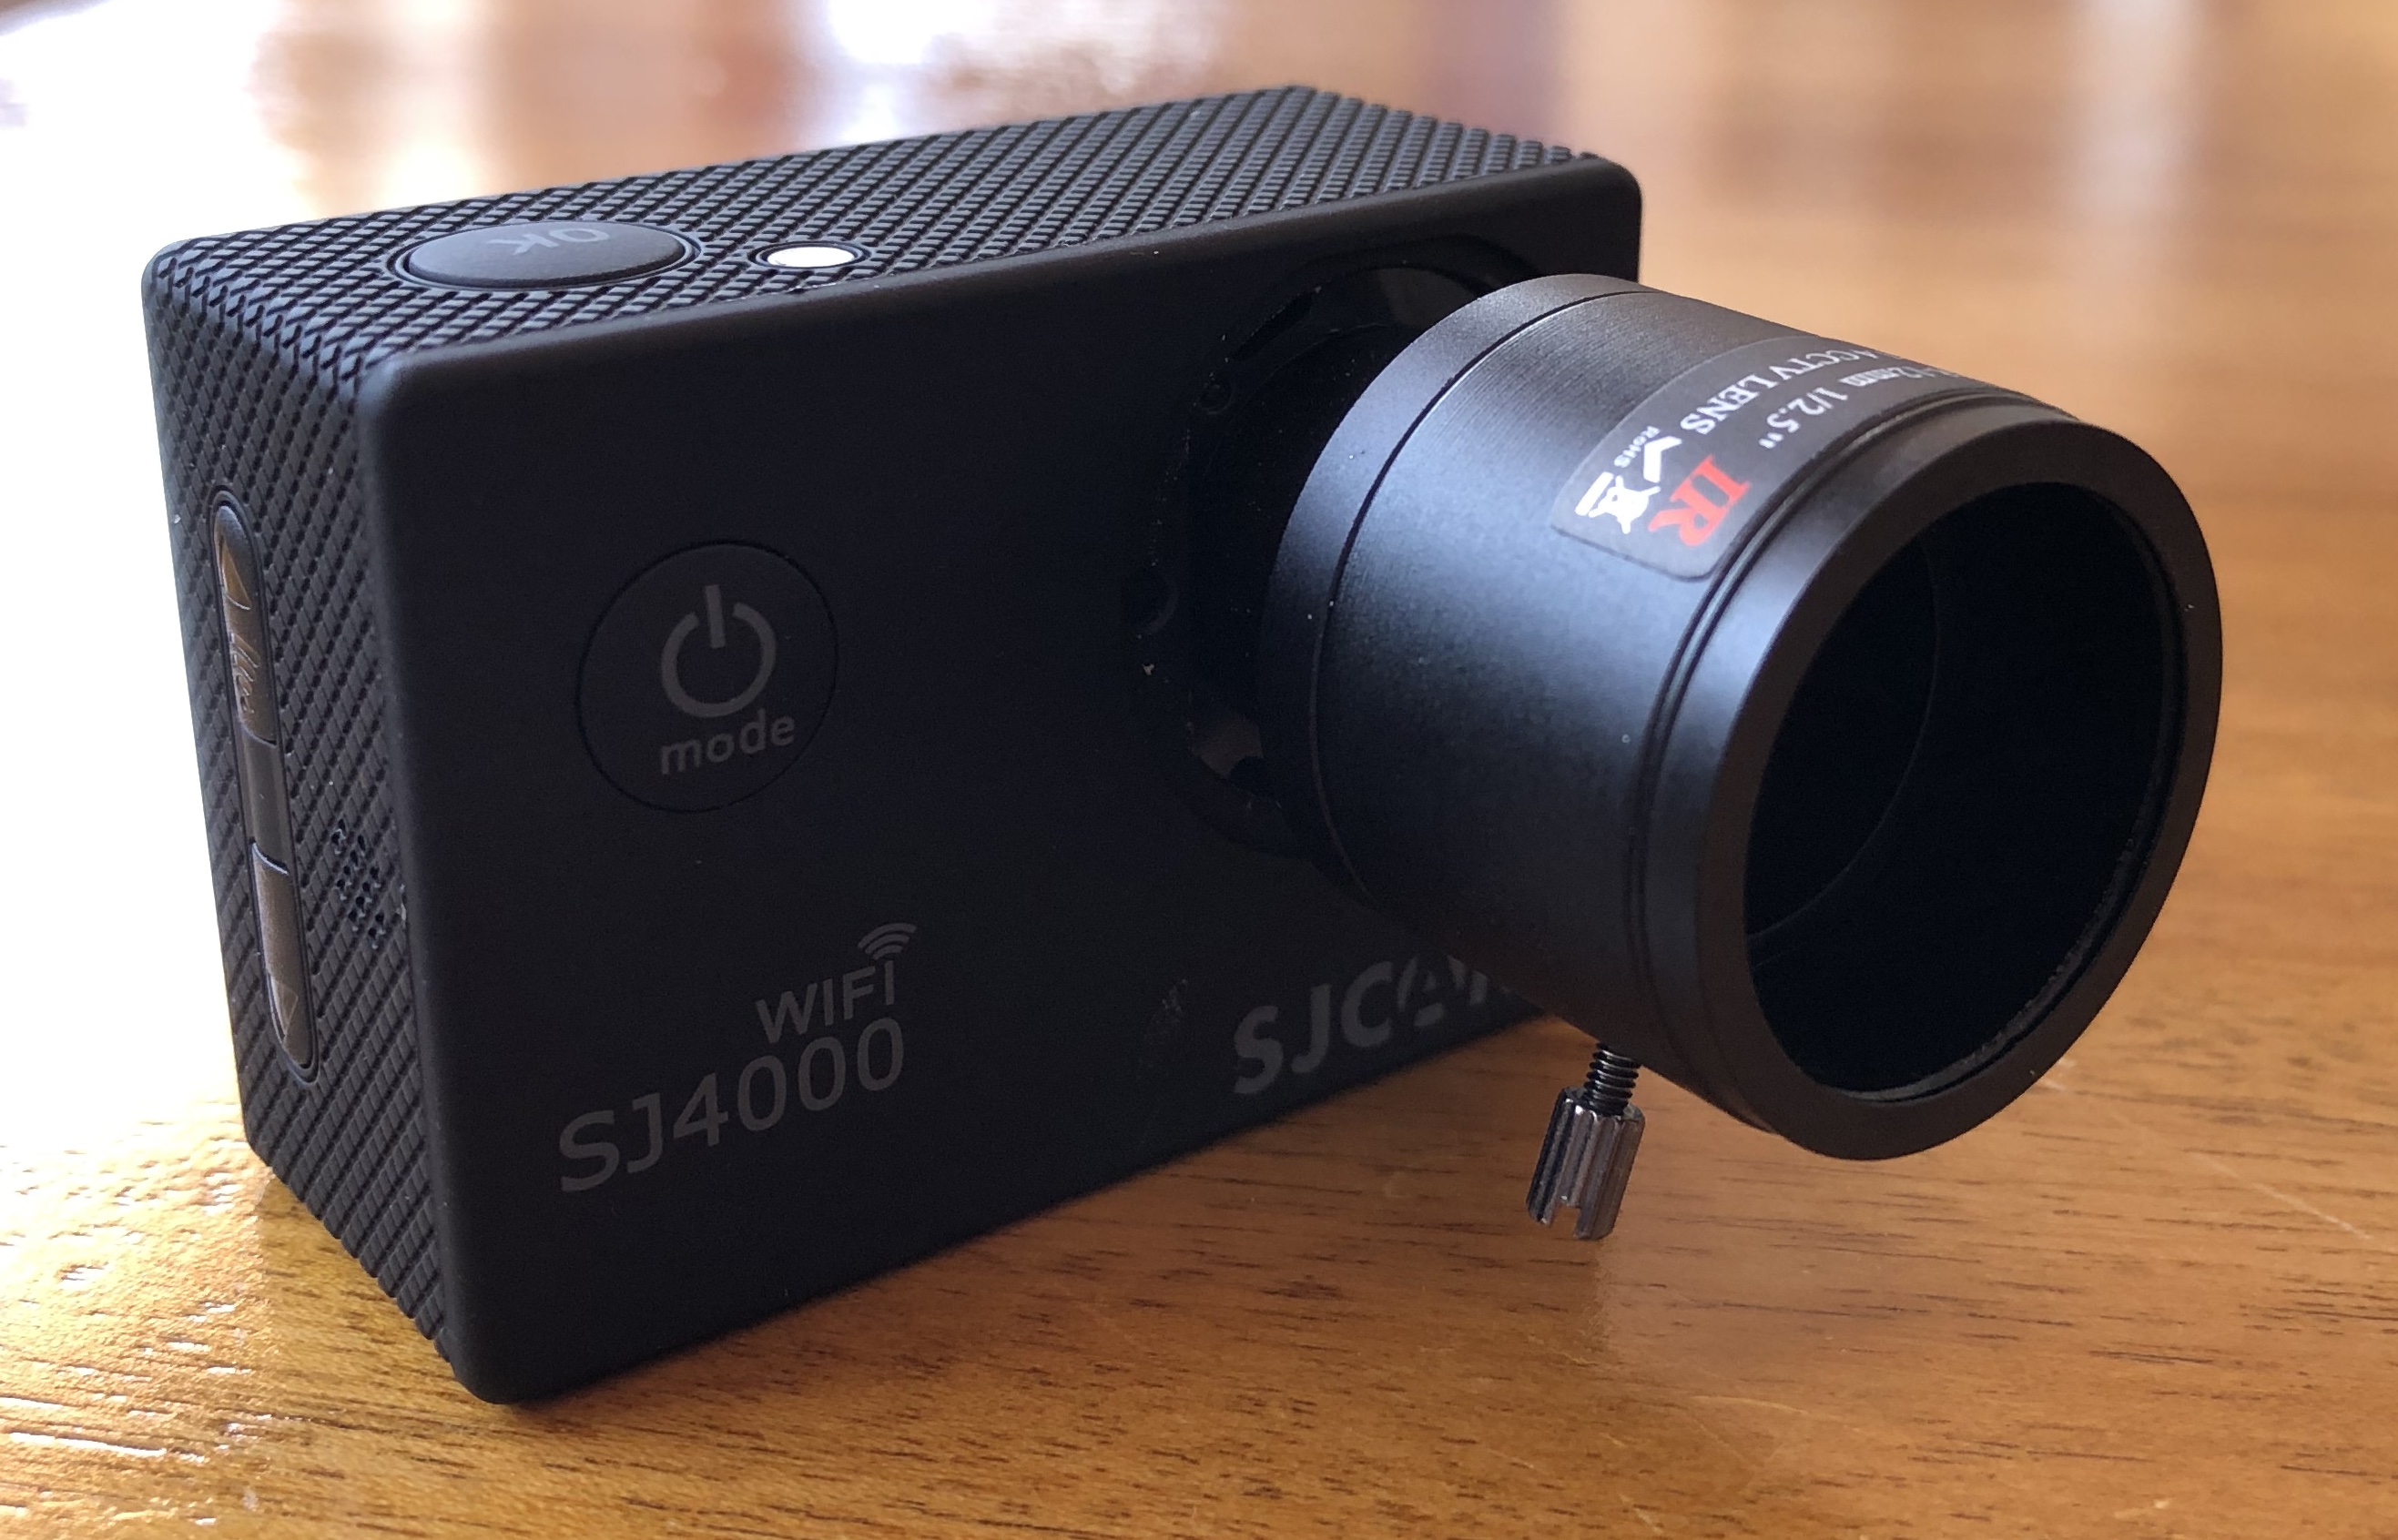
An update... My 2.8-12mm zoom lens arrived and I've completed the mods. It's a nail-biting tale of daring and disaster, but as sure as Hollywood using action cameras with zoom lenses, has a happy ending nonetheless. First impression was that the envelope with the single layer of bubble wrap that was protecting the lens had lost its air long ago, probably while still in mainland China, but concerns of damage were quickly alleviated when I discovered this this is a beast, is heavy, and is made completely of metal. It's also somewhat larger than I anticipated.. here it is next to the camera and existing 8mm lens: I put it onto the camera and couldn't get focus, even if I screwed it all the way in. Naturally, my first impression was to take the camera apart, and modify it to get infinity focus, however it later turned out that this was wrong, and that I had screwed the lens into the camera too far, but back to me going down the wrong path... Camera in pieces: The bit I chopped off thinking it was the only barrier between me and cinematic goodness: It was around this time I realised my error, and that the lens got good focus (across the whole zoom range) with only 2 turns of the lens into the mount. This meant that clearance between the rear element and the sensor wasn't in danger, so I installed the IR Cut filter onto the rear element of the lens. Luckily this lens had a flat rear-element, which made getting the IR filter also flat quite a straight-forward process. I found success with the previous lens by using PVA woodworking glue, which dries clear and holds the IR filter securely (which I accidentally tested by dropping that lens ~1m onto a tiled floor and it stayed on just fine!), so here's the filter: I applied the PVA with a pin and I find that if you give yourself a big lump of glue then you can tell how quickly the glue dries by watching your lump dry, which isn't required in this case but is useful if you glue somewhere that you can't see: Next job was to modify the front plate to allow the lens to sit where it needs to. In this case the front part that clips in needs to be removed: It comes out easily and looks like this when mounted back on the camera: You can see that the mount in the camera is only plastic, which is quite concerning for robustness, but it also presents another problem, which is that the focus and zoom controls on the lens are stiff in parts of their range, and the lens would rather twist in the mount rather than adjust, so my previous trick of putting plumbers tape into the threads did nothing. This is where the story takes a turn - I decided to glue the lens into the mount. I did this for a few reasons. Firstly, this lens give the focal range I need and so I wouldn't need to change it ever again. Secondly, it will help resist turning in the mount, and will also make the whole thing more robust. In terms of risks, I figured that if I needed to remove the lens for some reason I could potentially break the seal on the glue and get it out. If that didn't work then I might break the lens thread in the camera, but maybe not enough to prevent other lenses being used that go deeper into the camera (the previous 8mm lens I had in there went in quite a way). There was never going to be damage to the new lens as it's all metal, including the mounting threads. Worst-case is I kill the SJ4000, which was under $100, and could be replaced. So, I went for broke, and put in quite a lot of glue, both onto the lens and the mount. I made sure to dry it lens-down so that any squeeze-out would drop down the outside of the lens rather than on the inside of the lens mount and potentially onto the sensor. I waited until my lump of glue was completely dry, and then put a battery in and fired up the camera. Disaster. You will note that the windowsill is in focus, so the diffusion is not from poor focus. I suspected some kind of haze from the glue, considering it was fine with the lens installed prior to my glue-up. I have a theory about haze. If something can become a gas and then solidify onto a surface, then it must be able to become a gas again and everything that condensed should evaporate again leaving a clean surface. Assuming that it doesn't perform a chemical reaction or anything. I thought that PVA is water-soluble, so I figured that the haze could simply be condensation, considering that the little chamber between the lens and sensor would have been where a lot of the water would have gone. First attempt to cure it was the late afternoon sun: I pulled the battery and SD card after taking this shot, to remove power and the possibility of them being damaged, and to also let more air in and out via those openings in the case. After sunset I fired it up again and the haze had turned into evenly spaced strange little globs, maybe 10 across the width of the sensor. I didn't get a photo of that, but I thought that movement was good, showing that whatever it is isn't stuck there forever. I left it there overnight and thought I'd contemplate the next strategy the next day. The next morning..... BINGO! Like a phoenix rising from the ashes! I suspect dry air from the air-conditioning gave it the time required to dry out. So, having flirted with disaster but avoiding peril with great skill luck, what do we now have? FOV at wide end: FOV at long end: iPhone 8 FOV: My completely non-scientific analysis suggests that it's about equivalent to an 18-60 lens, and the f1.4 aperture should mean that exposures are good until the light gets low, which is good because the sensor is likely to have poor ISO performance. So, how is it to use? Well, if there was a competition for least par focal lens in the world, this would be my nomination. Each end of the zoom range has its infinity focus setting at each end of the focus range, and if you go from being in focus at one end of the zoom range and take the zoom adjustment to the other end then the bokeh balls are 1/6th the width of the frame (I did measure that) so it's not a subtle effect. I checked if the zoom and focus rings should be locked together but they deviate slightly over their range. The locking pins are useful for controlling the zoom and focus, but if you screw them in completely then they lock the controls, so I'm thinking that I should glue them in place so they're solid. I'll have to be careful not to get glue into the mechanisms but that shouldn't be too hard. So, how the @#&@#$ do you focus using the 2" 960x240 LCD screen? Why, by using the up and down buttons on the side to engage the 4x digital zoom function of course! In terms of natural diffusion and flares, the lens also looks promising, and I've already noticed a round halo if you put a bright light in the centre of frame, so that should be fun to play with. There's probably little chance of this lens ending up in the clinical lens thread! I've matched the colours to the BMMCC via the test chart, so already have a nice post-workflow for it too. I haven't shot anything with it, but will do soon, and considering its size it should be quite easy to film in public without drawing too much attention. So, is it a pocket cinematic beast? Only time will tell.
-
Help me on an eBay hunt for 4K under $200 - Is it possible?
kye replied to Andrew Reid's topic in Cameras
No. Colour depth is bit-depth. The wikipedia entry begins with: Source: https://en.wikipedia.org/wiki/Color_depth