kye
-
Posts
8,219 -
Joined
-
Last visited
Content Type
Profiles
Forums
Articles
Everything posted by kye
-
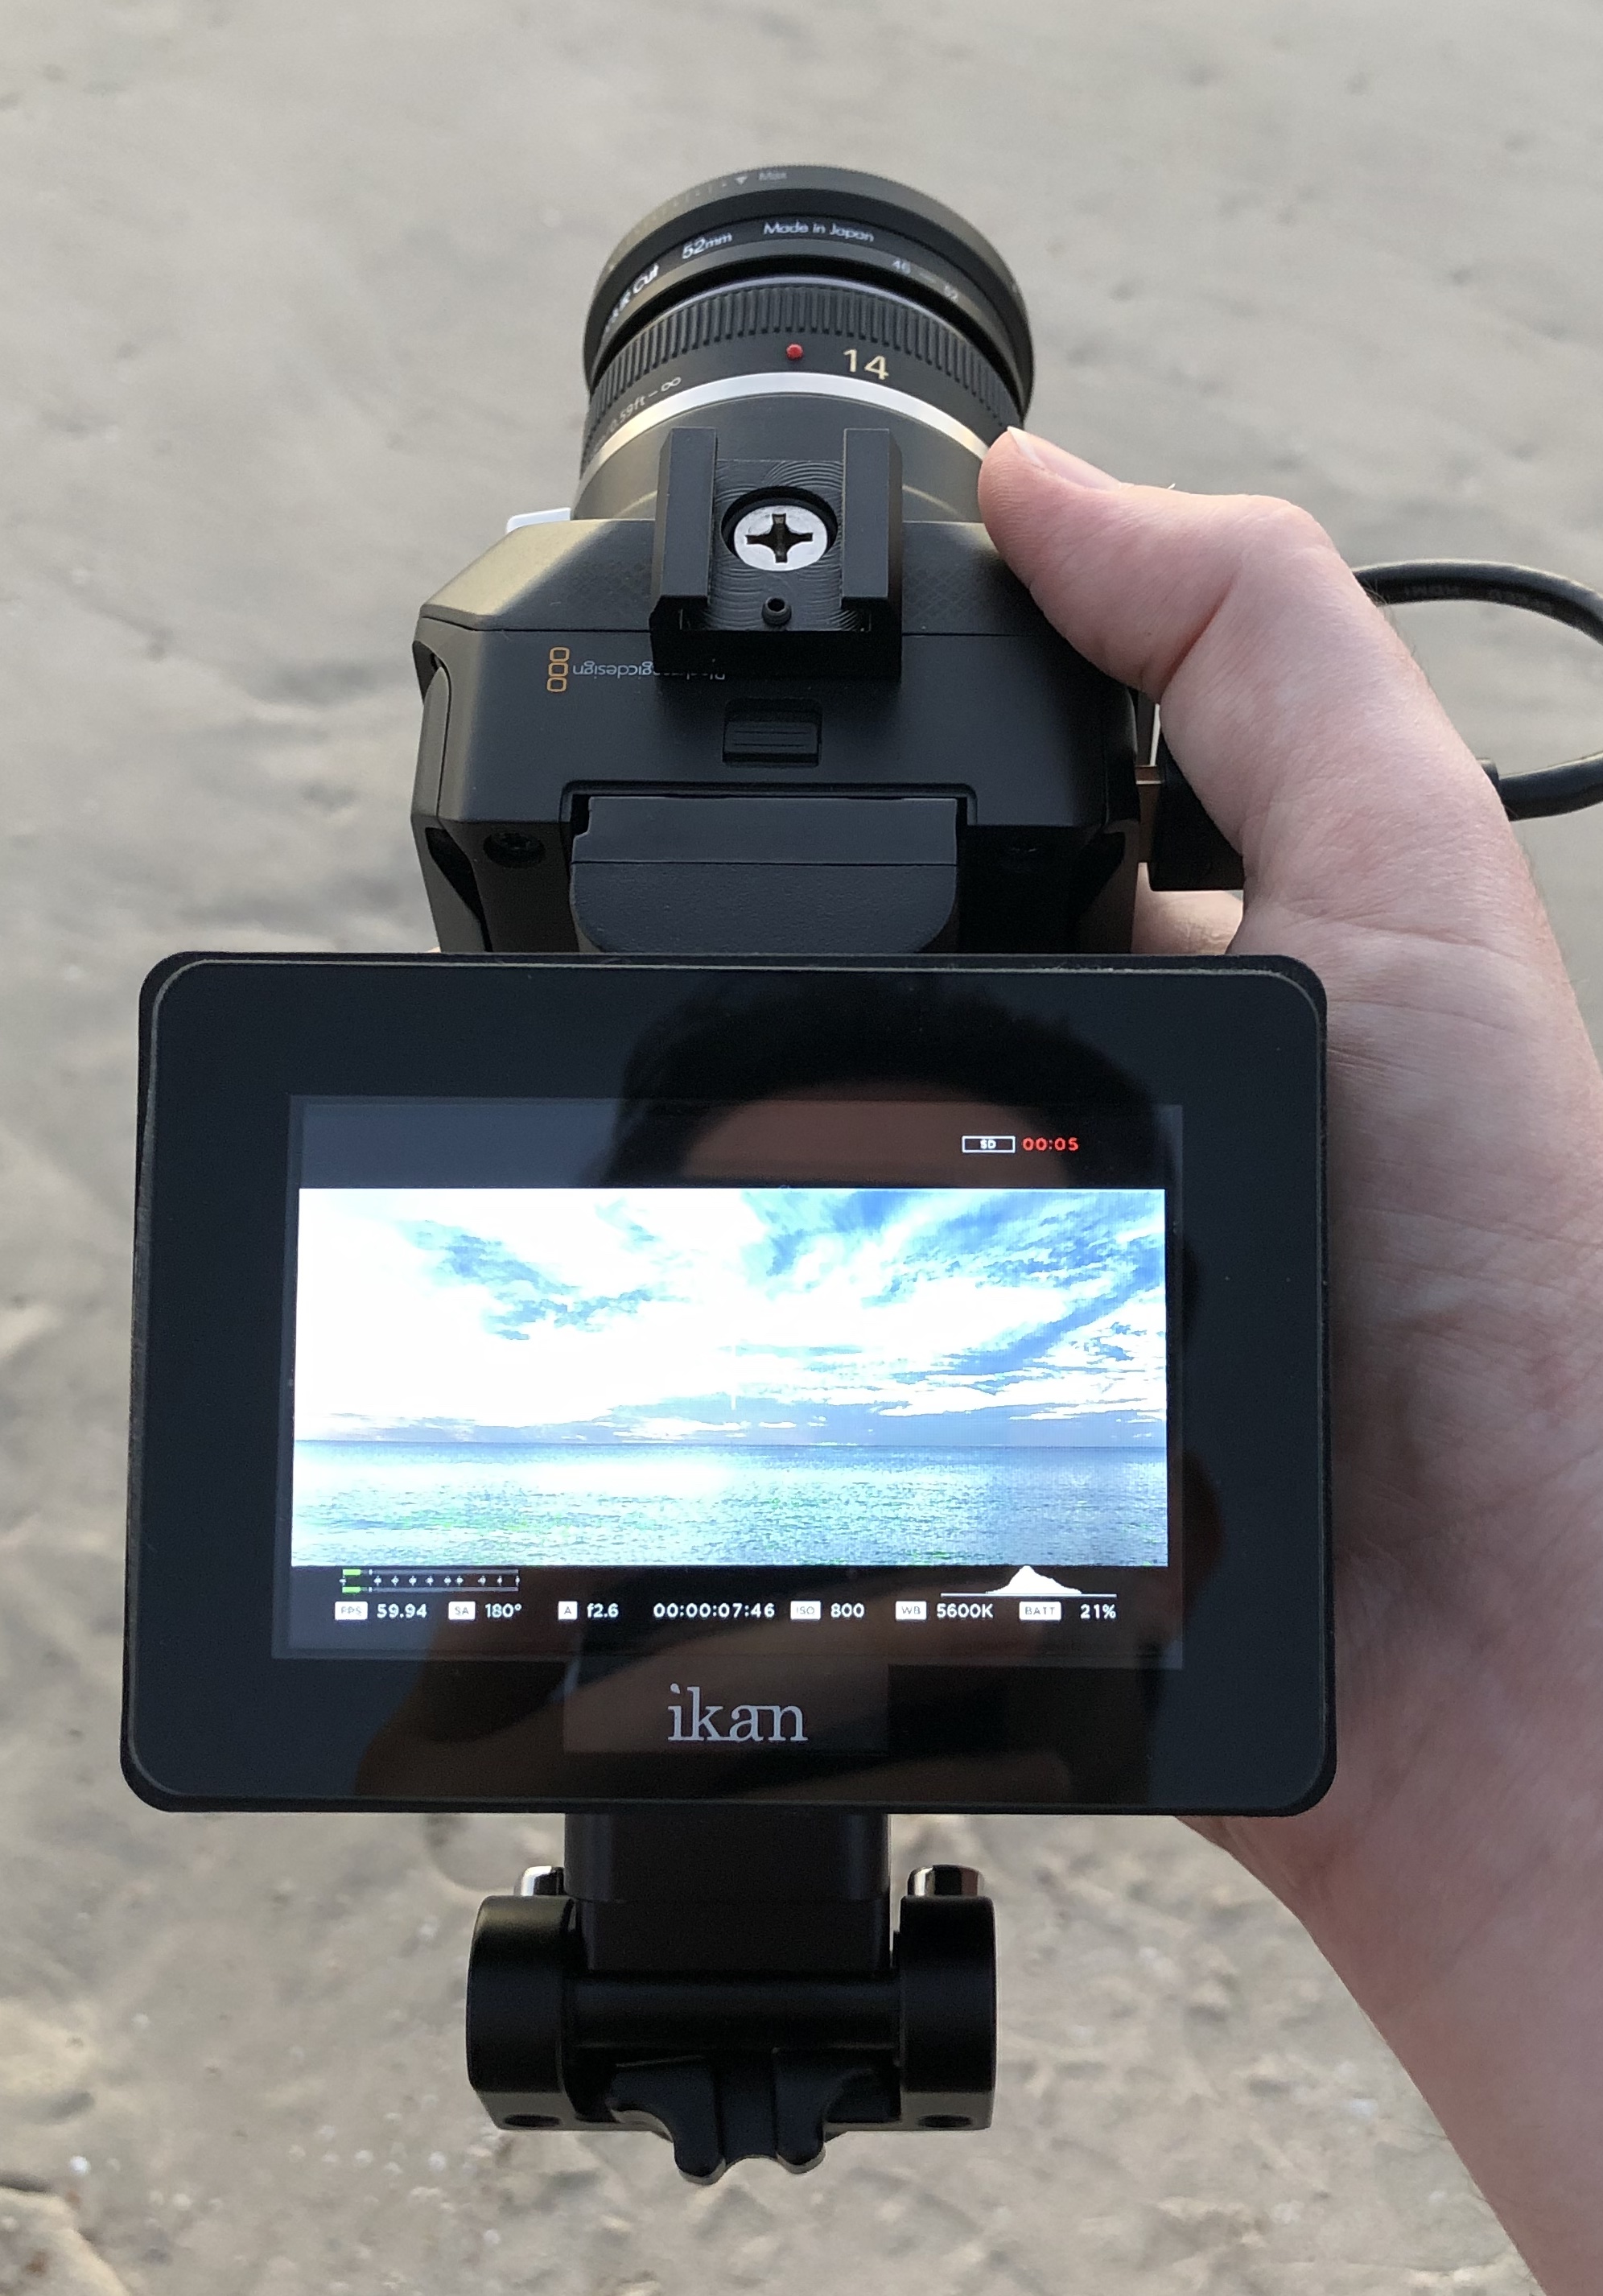
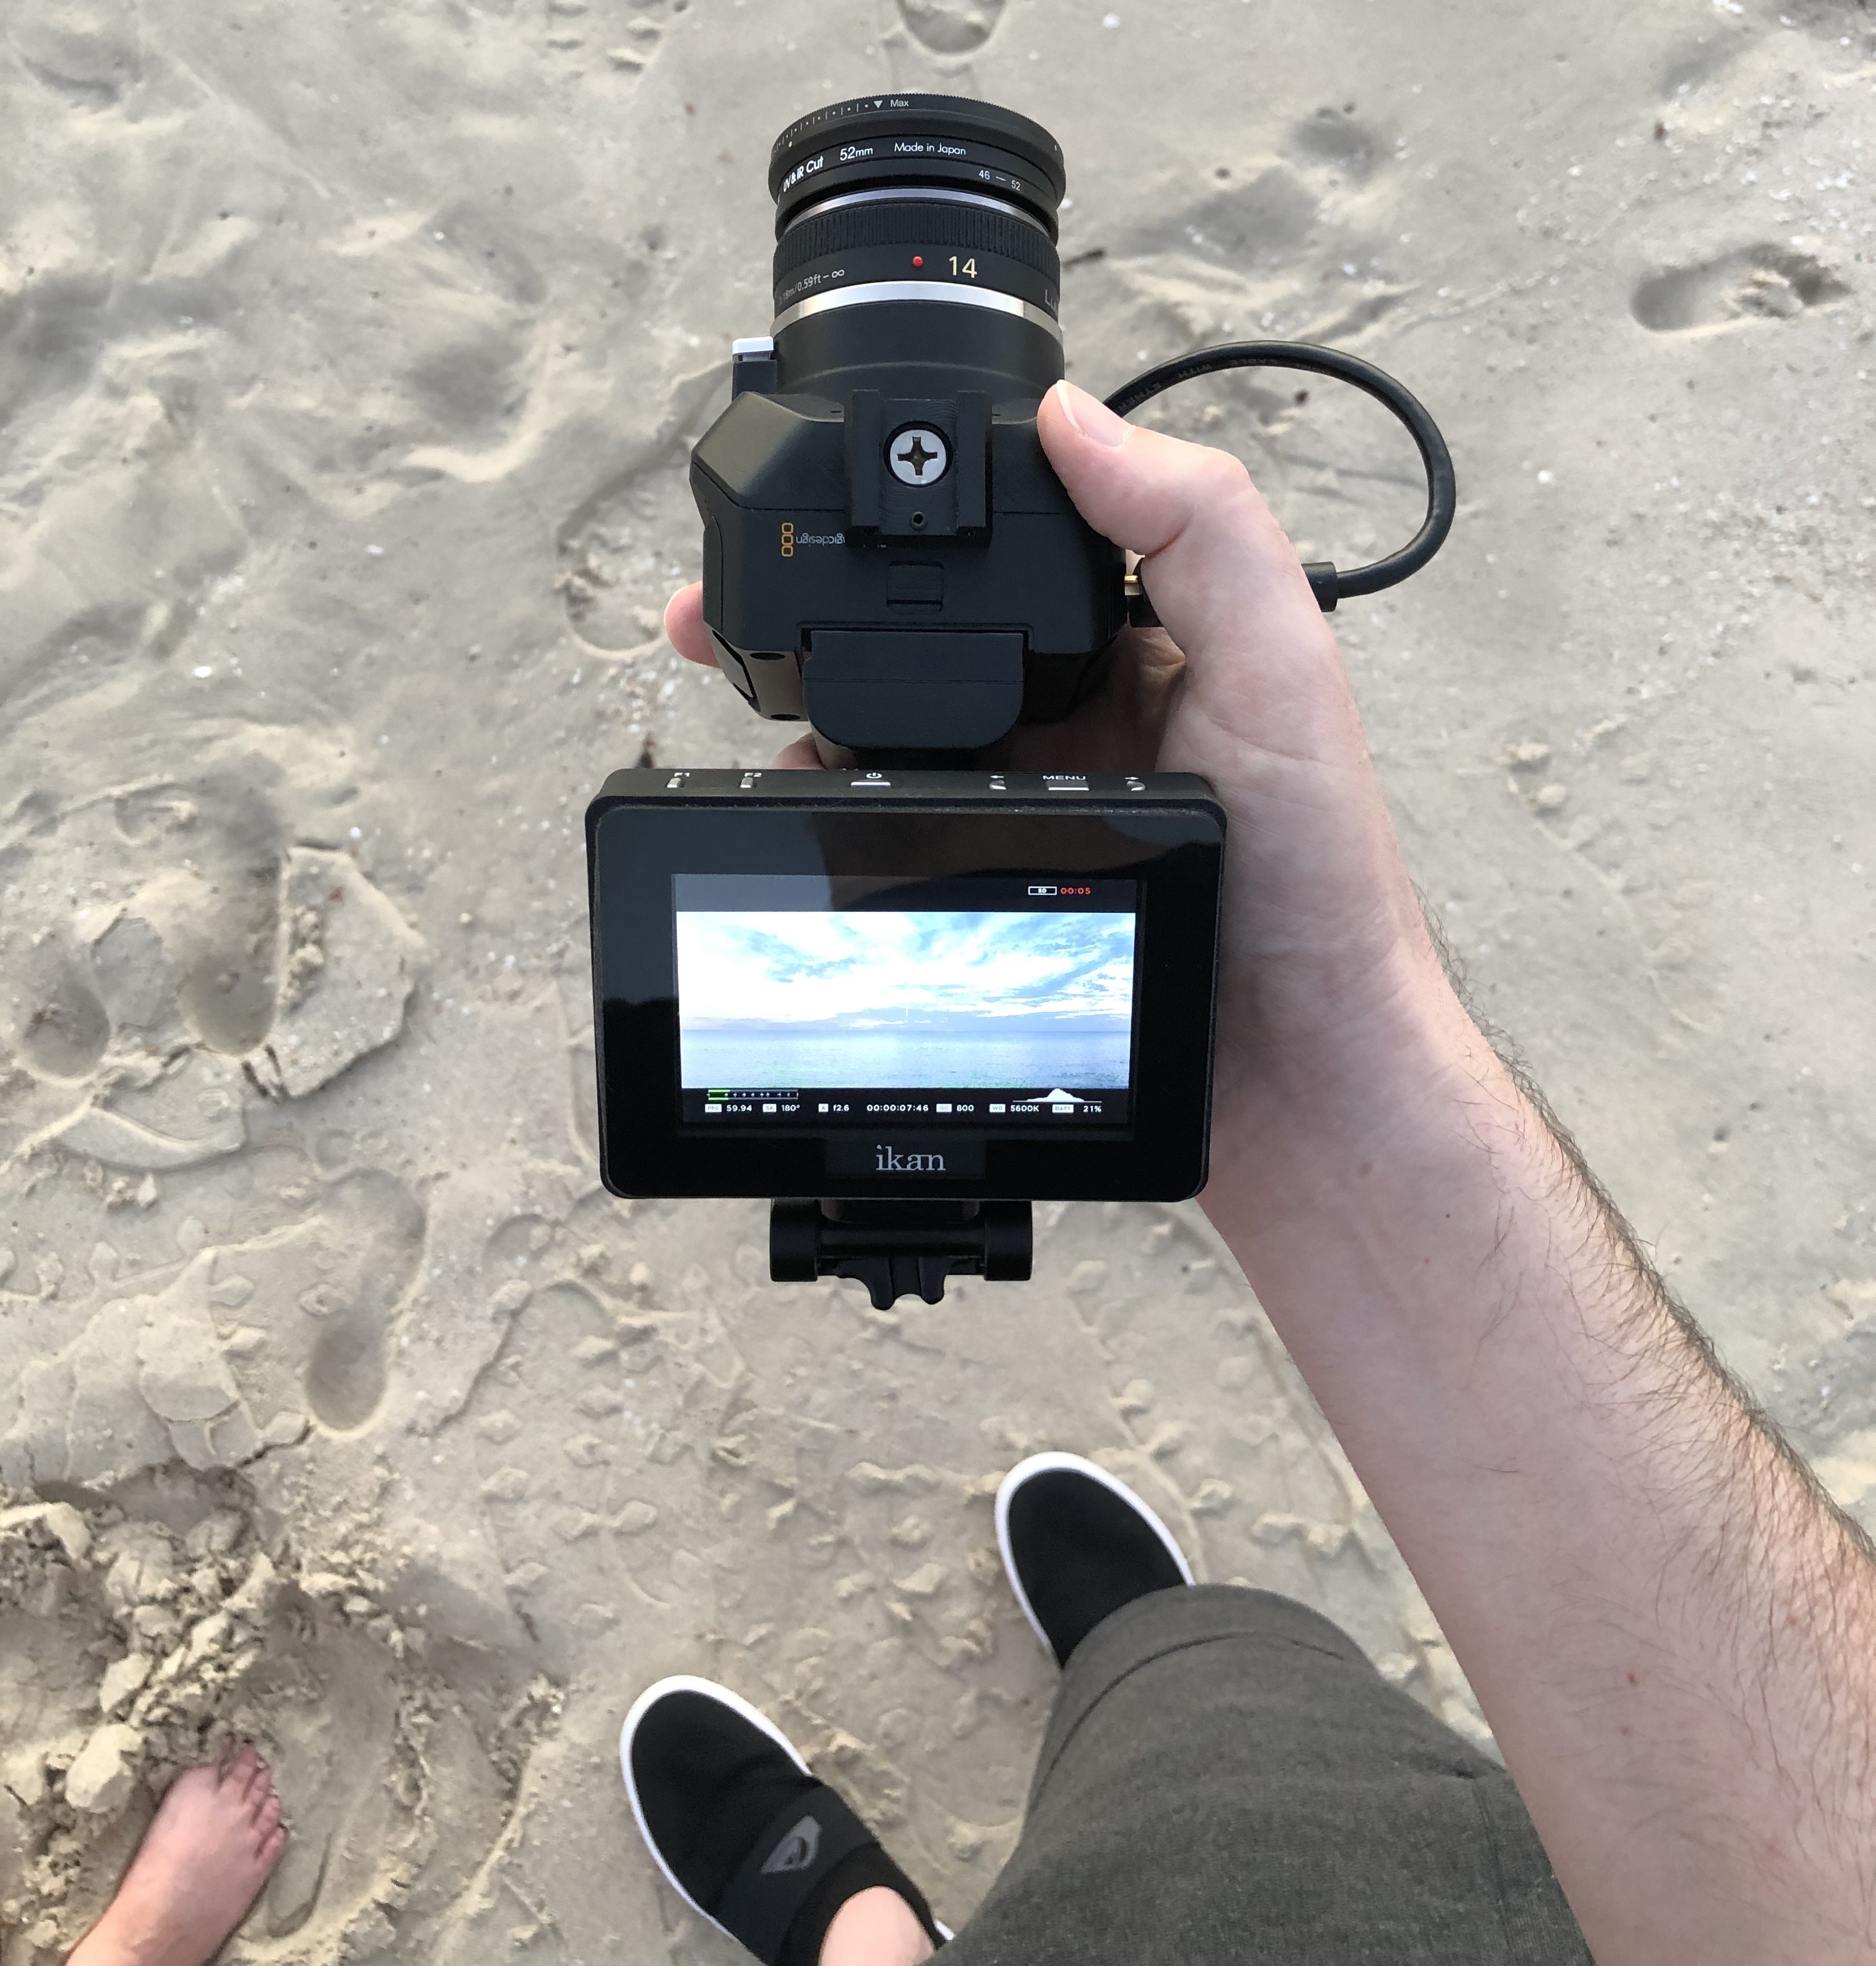
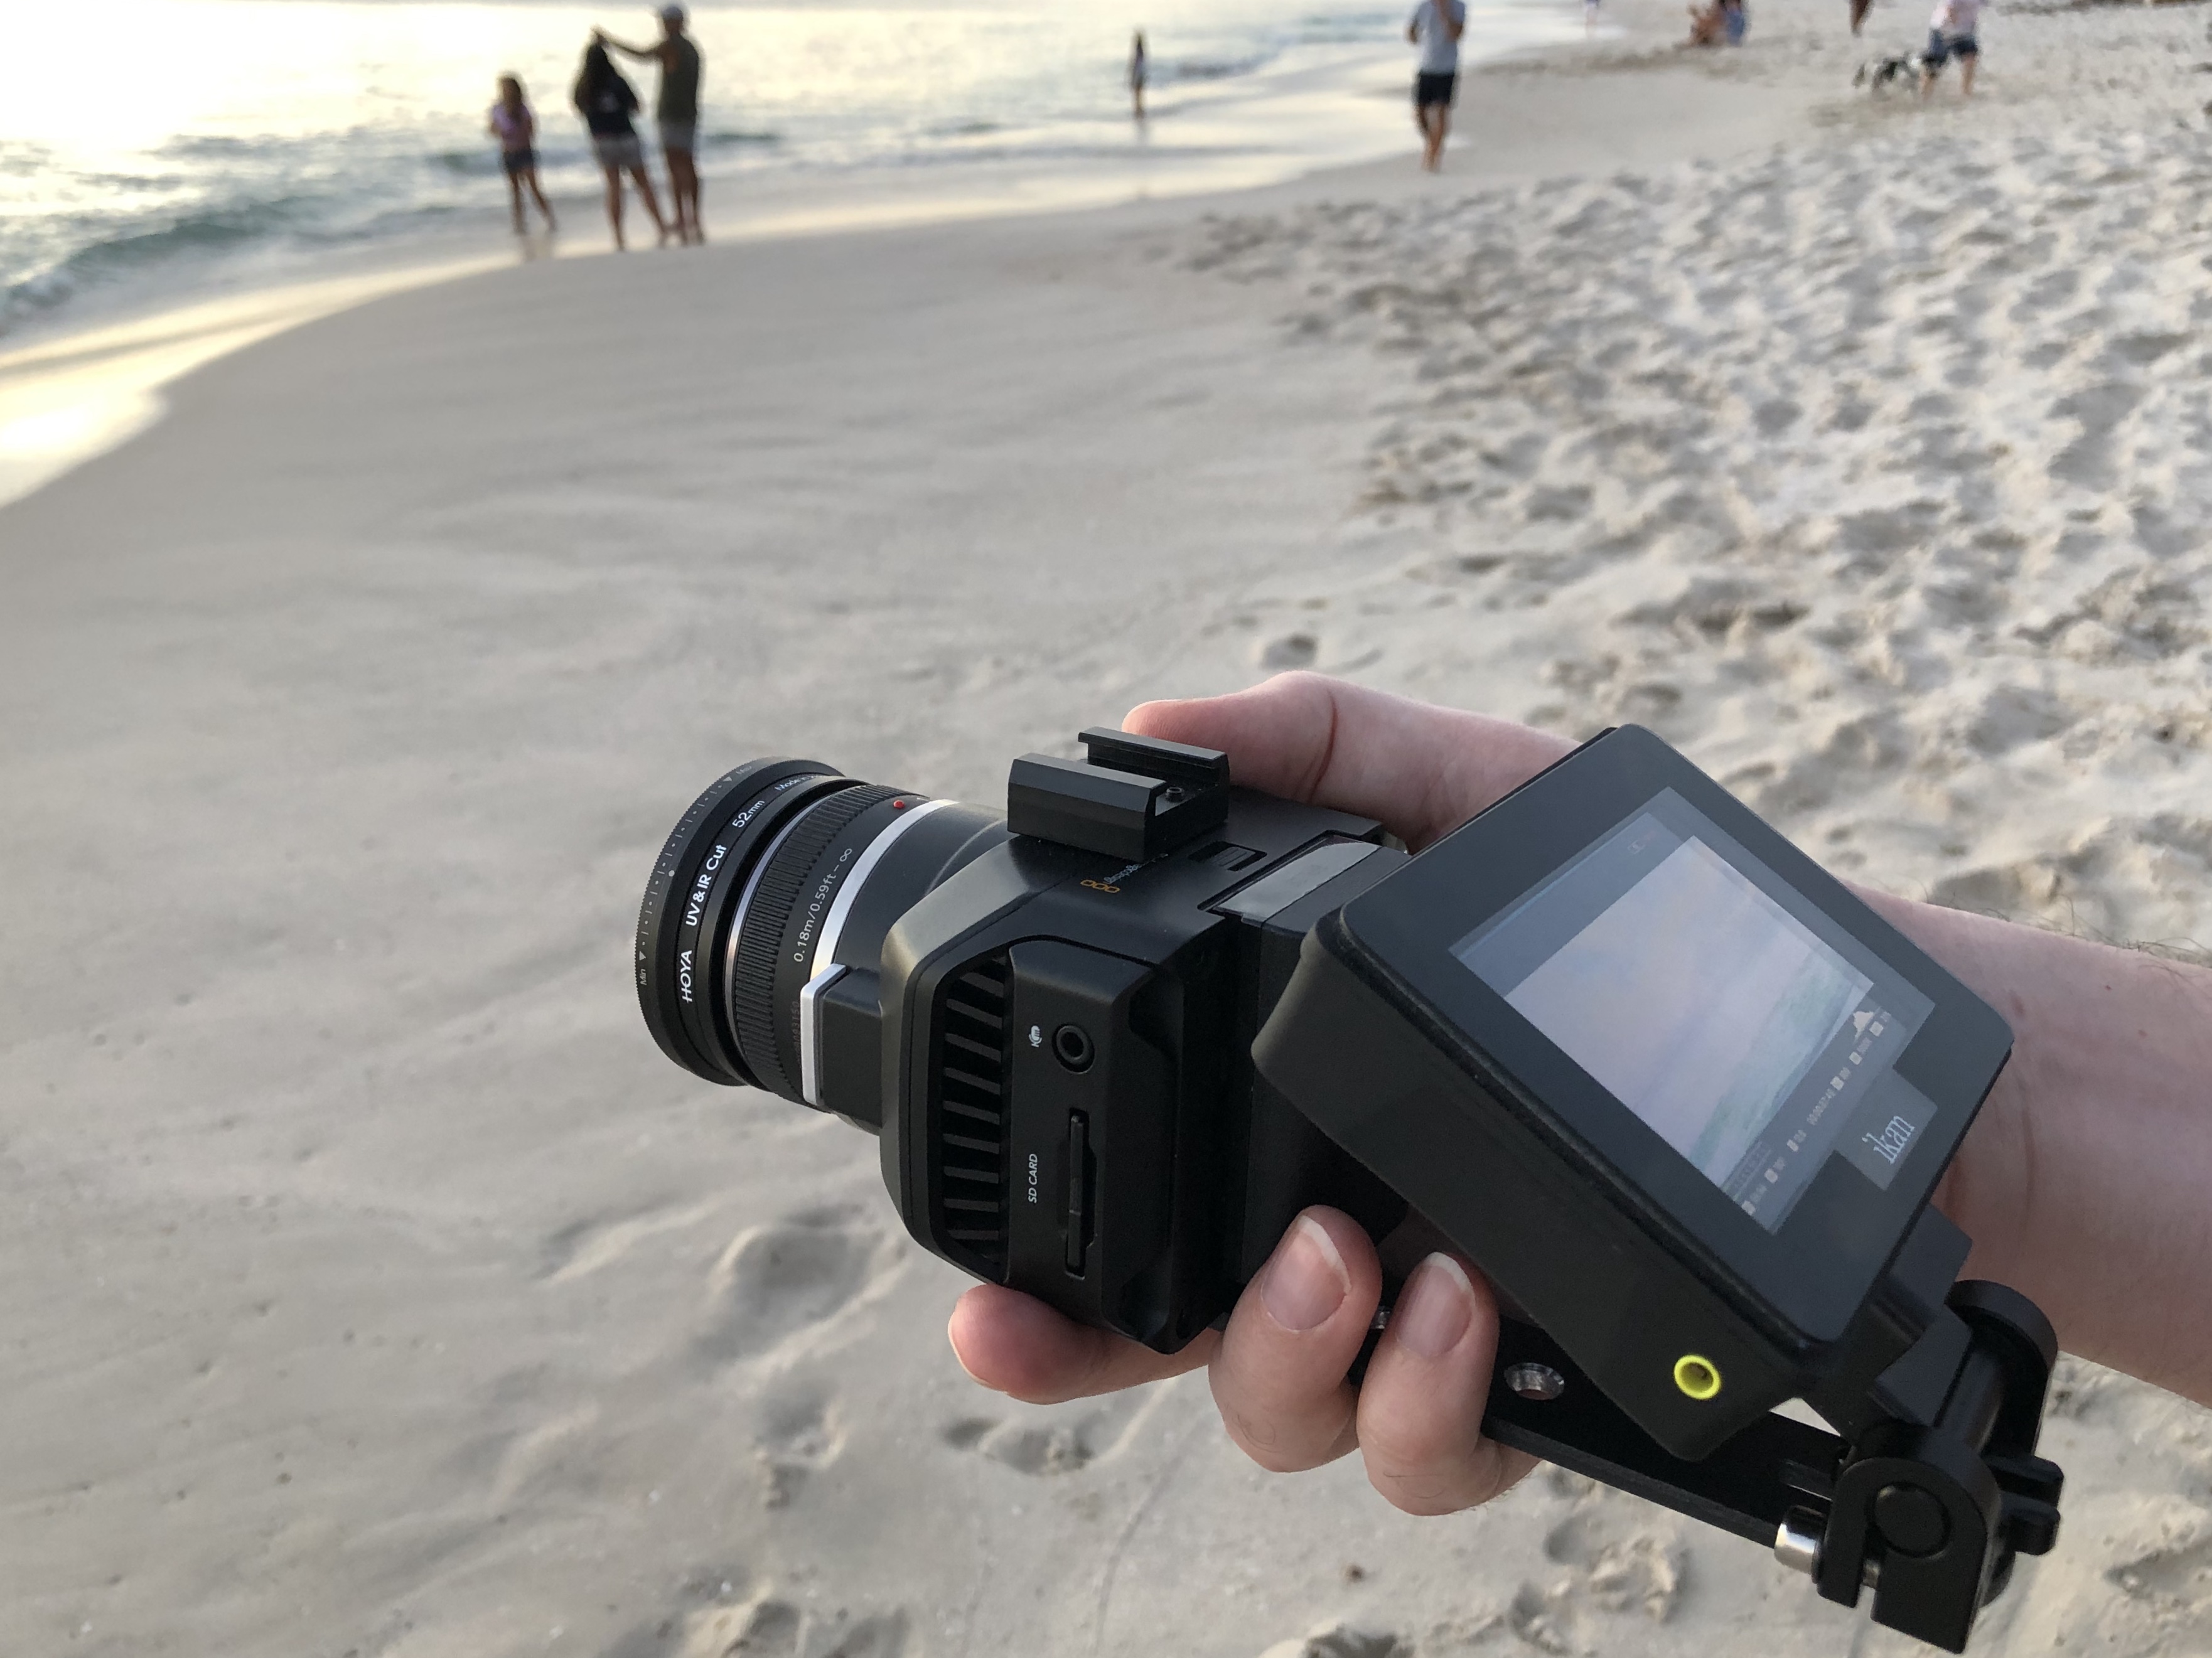
I've used this rig lately and I'm really liking it. It makes the Micro feel a lot smaller while still having a monitor.

-
 This is all true, but there are already 5-6 pound cameras! I'm just saying I think there's a gap, not that every camera somewhere else in the features landscape should all be eliminated in order to fill my gap 🙂 The Micro has a full-sized HDMI. In reality it's just a slightly larger connector, so having a robust socket isn't impossible.
 -
In terms of price, fake SJ4000 action cameras can be had for under $50. They shoot 640x480 in something like 1Mbps* and 2 stops of DR* but you don't see people using these as crash cams - quality does factor into the equation. (* this isn't strictly true but after you've vomited from looking at the images you won't be able to tell through your tears)
-
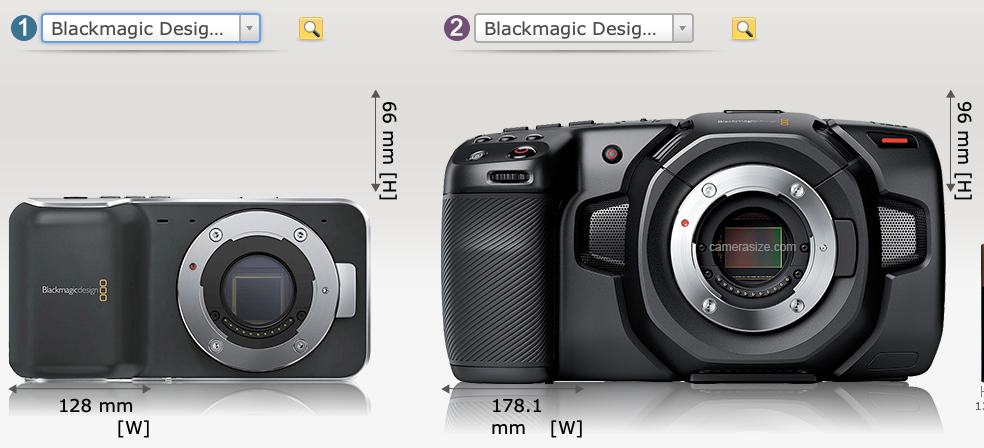
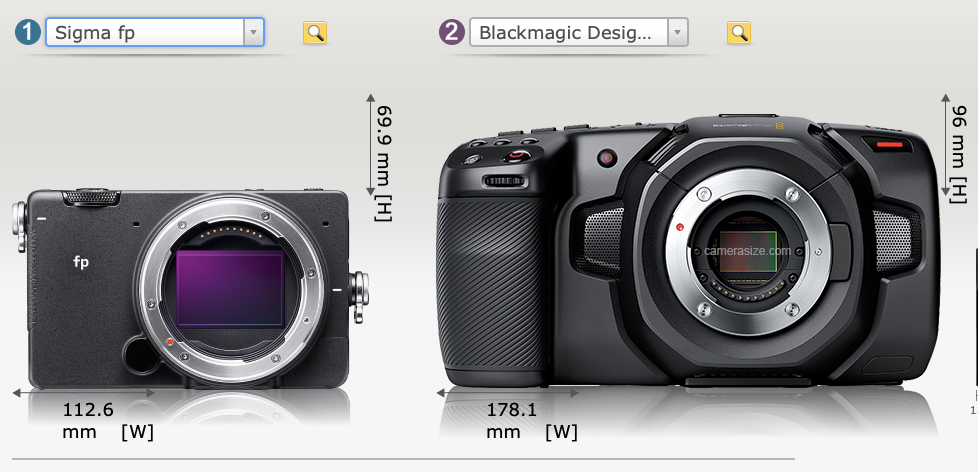
It still needs an external display. I have the Micro, but by the time you add an external monitor it's the size of a 1DX. Also, I kind of don't really understand the logic of questioning why a camera needs to be small. You can always add a rig if the camera isn't big enough. I would love someone to direct me to the department for things I add to my rig to make the camera smaller / lighter. The Sigma FP is a full-frame cinema camera that records RAW internally, and has decent battery life. Really there's no excuses.
-
Yes, they were likely put in positions that were high risk.. otherwise, they did well, destroying at least three of them! I've read in multiple places, including from Shane Hurlbut about Need for Speed (link to first article here) that using crash cams is a tricky thing. If you start with the premise that you will destroy the camera, then the tendency is to be frugal and get the cheapest cameras possible. Getting the cheapest cameras possible means getting the crappiest image, so you get to a point where the image is so bad you don't want to use it for more than a few frames in the final edit, which makes it worth less to the production, which means you want to spend even less on it. But the problem is that it's a false economy. Using any camera that doesn't offer manual controls means you have to 'fool' it into using the right settings by doing camera tests with taking light readings and dialling in NDs to work out how to get the right ND for it to choose 180 shutter on its own. The limited dynamic range of such things is also a PITA in trying to match the footage in post. .....and if we're talking convenience in terms of having a screen when setting up the cameras instead of using a monitor? That's from the article I linked above. Here's the trailer with each of the shots labelled, to see the Gopro shots and also for general interest: When you're using a C500, Alexa, and 1DC, you can't imagine that someone would reach for a Gopro because they have many options in that form-factor. Same for the E1, although it has a better codec. If someone released a small form-factor camera then I think they could easily have it "replace" Hollywood using Gopros and E1s as crash/helmet cams, if the sensor had a great image with lots of DR then it could replace the P2K / P4K / P6K for budget film-makers, and fit into all sorts of other uses like gimbals, drones, and other jobs where weight and size matter. I've been on a quest now for a tiny camera to shoot fun projects out and about, especially since travel is out of the question, and I got to having a modified action camera where I loathe the 15Mbps files, my GF3 where I am disappointed because the h264 is so much crappier than the RAW stills which show what the sensor is capable of, and general despair about the third high quality option because ML is so confusing and fiddly and unreliable, the P2Ks are stupidly expensive, and the Sigma FP h264 is poor and the RAW isn't compressed so file sizes are enormous. I'd previously eliminated the E1 because the 100Mbps still looks like every over-sharpened low-bitrate low-bit-depth consumer image next to the P2K. Essentially I'm staring into the black hole where a decent camera option should be, but isn't, and I think lots of people would also like there to be one here, but there just isn't.
-
So $7K for a working setup, vs P6K or P6KPro, but both setups are absolutely huge. Comparing to BMPCC 4/6K Komodo rigs would be larger than BMPCC 4/6K because the monitor would be additional height. Lots of great points in here, and a useful summary of the state of the DSLR revolution... I know we're getting a bit off-topic from the Z-cam E2-M4, but Z-Cam are one of the very few who are pushing the envelope with big codecs and resolutions/framerates in small size and cost packages. When RED first entered they were the plucky upstart challenging the incumbents, but now they are an incumbent and people like Zcam are the challengers.
-
The LUTs seem to be the kind where you can record things as directed and then just apply and get what the designer intended, but maybe not. Have you tried reaching out to the designer and getting some help? If you're buying something then you should get some kind of support for using it correctly...
-
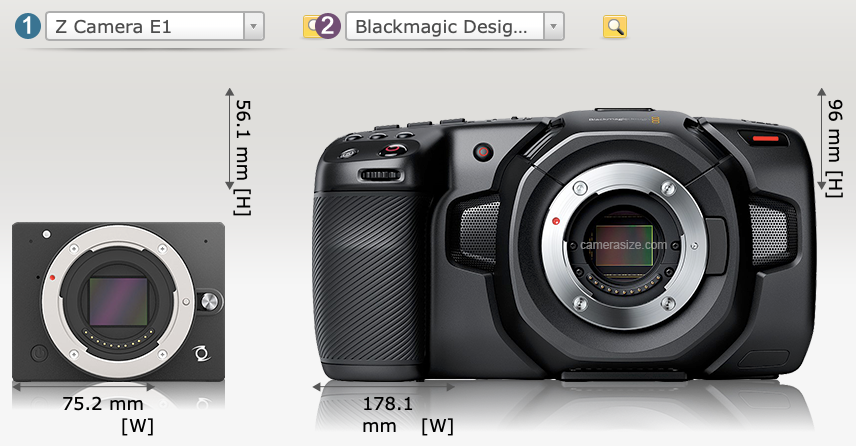
With the Komodo being USD$6,000 it's a serious financial hit, especially once you rig it out. It would be very interesting if RED truly went for the "easy on-ramp" approach of creating a budget cine line that is affordable to entry-level folks and prevents them from investing in and getting familiar with another brands lineup. Something under the $2500 mark would do that neatly, and would bring the fight squarely to BM, assuming that the specs were there. I think there's a "hidden" niche for ultra-compact cine cameras with internal recording and usable screens. Not only are they great as an entry-level offering, but they're great on gimbals, crash cams, and all kinds of other tasks. Having to setup a cine-cube as a crash-cam with a HDMI monitor to check settings / composition / focus and set it rolling, then disconnect the HDMI before the vehicle drives off is a pretty cumbersome workflow. Currently this niche seems to only have the original BMPCC and the Sigma FP. Everything else either records a consumer codec (h264/5) or doesn't have a screen. Even if such a camera didn't record RAW but simply Prores HQ, that would be a great offering. Hollywood is still using 'crappy' cameras as crash cams.... here's the Zcam E1 being destroyed used on Mission Impossible 7: Source: https://ymcinema.com/2020/10/09/z-cam-e1-crash-cam-spotted-in-mission-impossible-7/ This might be a reason why the Blackmagic Micro Cinema Camera is still listed as current by BM, when it's basically the same as a OG BMPCC except for the 50p, and the OG BMPCC it treated by BM like it's been "superseded" multiple times over. By why was the E1 chosen over something like the BMMCC? From the article: My answer is that it's cheaper, and has a better form-factor, including a screen.
-
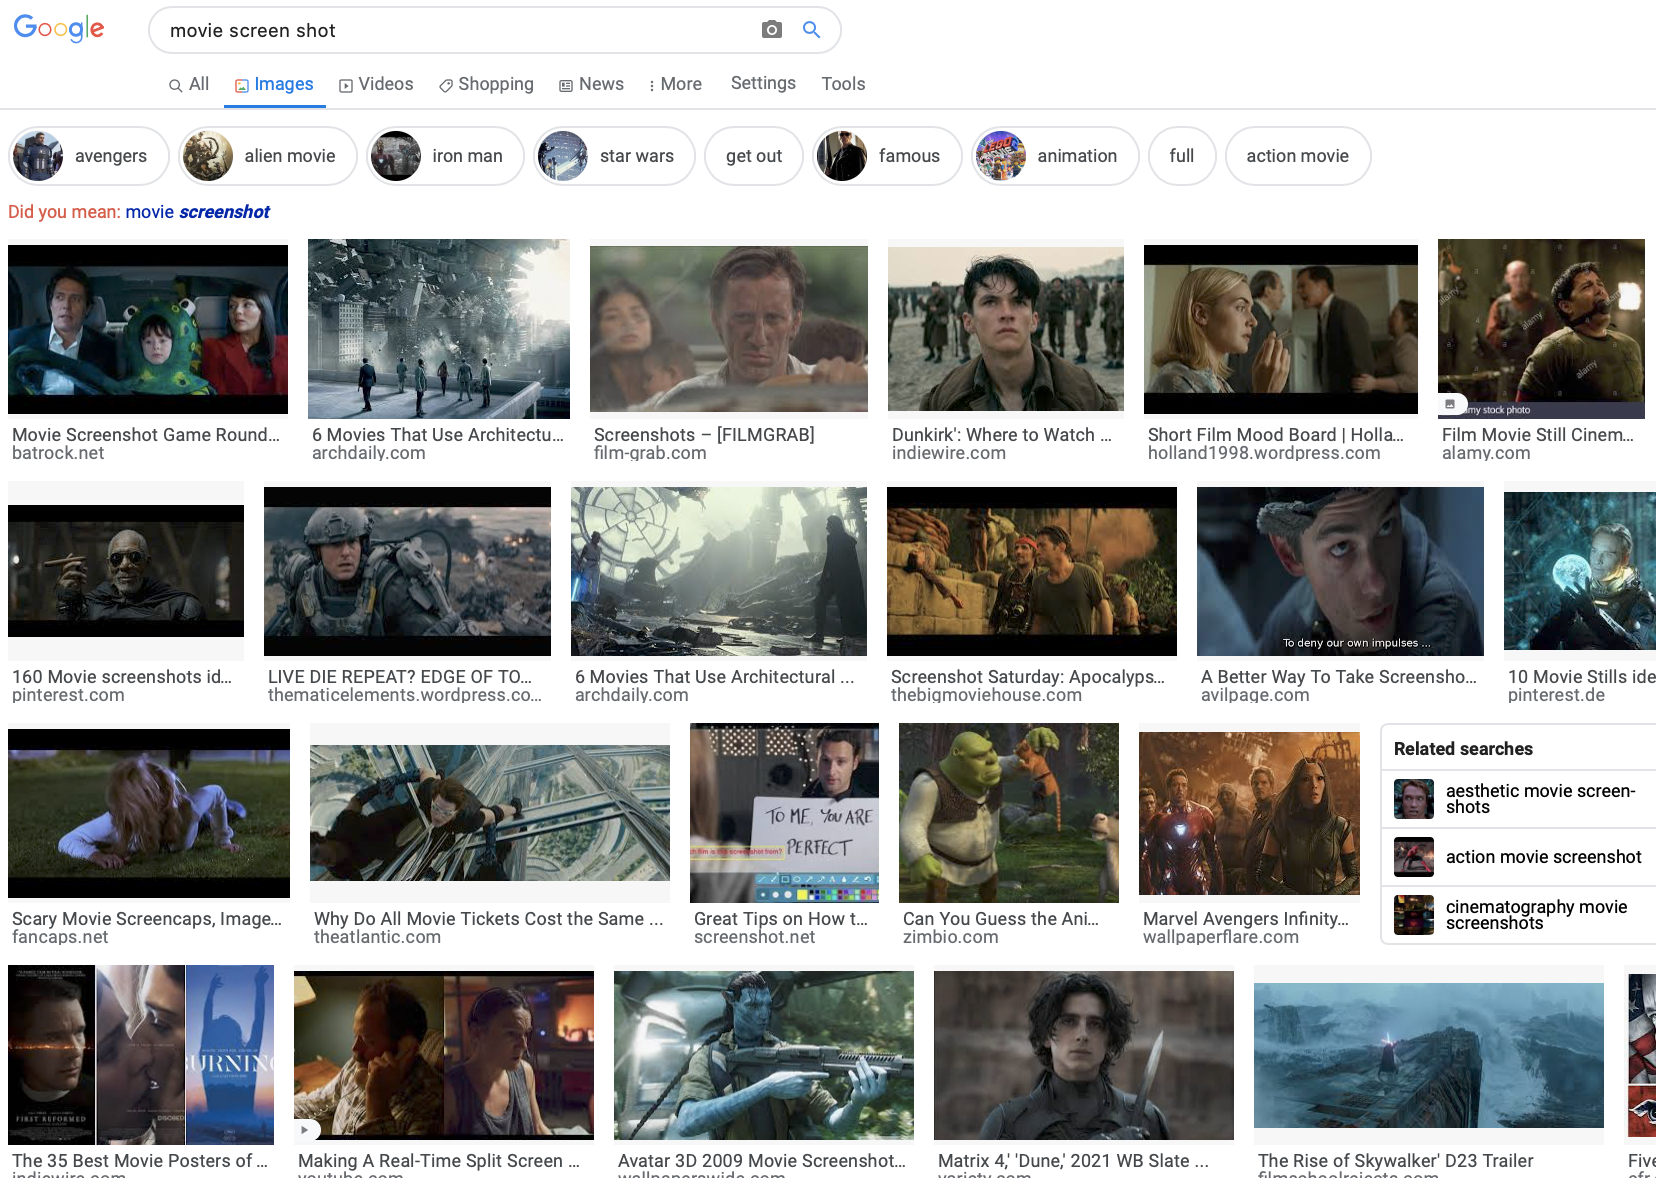
Welcome to the forums... While I don't know about your camera or these LUTs specifically, here's some general thoughts: You should set exposure and WB in-camera for the camera / codec that you're using to get the correct exposure. There's lots of debate about ETTR and other exposure techniques, and experimentation is good, but normally the 'correct' settings are the best, as often colour profiles (if you're not shooting RAW) will encode the highlights and shadows with a lower contrast and give you headaches in post if you're trying to re-expand anything in those ranges. Sometimes LUTs are designed to have a different exposure setting than the correct one for your camera / codec combination. In your NLE you should be able to adjust the image before the LUT is applied, which often helps. If you can, you should apply the exposure correction with a linear offset style control in Linear gamma. LUTs are often designed to be applied with a partial opacity, so that's worth experimenting with, although it doesn't appear that the one you're looking at above is one of those. LUTs often work best if you're adjusting levels before the LUT is applied. For example, Lift Gamma Gain adjustments underneath the LUT can often yield good results. It's also worth saying that there is no 'correct' colour grade. Taking images and carefully using a colour chart to make the final images perfectly match the rec709 colour space is a reliable way to make the images look pretty awful (IMHO) and older Sony cameras are known for having some of the least desirable colour science, and yet when they tested them they found that it was more accurate than Canon or Nikon which have more desirable colour science. Think about the story and the message you are trying to convey, then think about the character / scene / shot and colour grade with the aesthetic that best aligns with that moment. Film-making is a creative process. Look at this google image search: Lots of different colour palettes, but none that you'd say were 'accurate'. If it looks good, it is good.
-
Great stuff... looking forward to another competition! Can we have multiple categories? A photo and a video component. Should we allow multiple entries per person? Half the fun, for me at least, is seeing what people come up with.
-
Well said. Ultimately, when all the good stuff has been done, you can either repeat the good stuff or .....
-
Everyone is lost in translation. However, I'd be curious about a definition of 'business' that doesn't involve 'money'. Maybe you mean 'profit' instead? I get your point, which is that learning by watching other people on a film set is a worthwhile endeavour and can make you better at your own role. However, the point that I was making, and might be beyond the culture and mindset of the film industry, is that everyone is making decisions that impact things further down the line, but the lack of exposure further down the line means that the decisions are made not knowing how those impacts happen. Learning relies on feedback, which is always imperfect when it has to happen between people. If this wasn't a thing, then why are there articles from the people who work in production that are focused on how they can better educate the people who work in pre-production to avoid creating problems they have to solve in production, and articles from the people who work in post that are focused on how they can better educate the people who work in production to avoid creating problems they have to solve in post? Yes, there are feedback mechanisms, but until you're forced to solve all the problems that you create, you won't have a full exposure and thus won't have full learning. The biggest challenge in working as part of a team is that when the project isn't a success, everyone thinks that the problems were someone else rather than with themselves, when typically, everyone contributed to it, at least in some small way, so the opportunity for learning from that is lost. Think about a great director, and how having a great director can really energise and really focus the team to making a great end result. Everyone knows examples of that. But there will also be examples, probably less publicised, where the 1st AC was great and really impacted the whole production, or the 1st AD, or the 2nd AD. I would wager that there are examples, if you could somehow google every film set that ever was, where someone great was able to really make a difference to the whole production and final result, from every position on a production, pre, prod and post. The things they did really well probably aren't learned because there's no feedback and everyone has a SILO'd mentality that what they do impacts things only so far, and not beyond that, which is due to a lack of feedback. Absolutely. There's visible problems and invisible problems. If you do so something that results in something you know is bad, like crunched audio, then you have a standard already set, you know you didn't meet that standard, and you probably know a way to do it better next time, or can google it. But if you do something that results in something that you don't know is bad, like doing things a less efficient way that still gets the job done, or making decisions that are creatively non-aligned with the emotional tone or motivation of the project, then there isn't something you can point at and know you need to change things to get an improvement. You said "seeing the outcomes on screen while you're pulling focus". I was just replying and including an example you gave. If you think that me replying to an example you gave means that I don't know very much, then I guess that's unfortunate and difficult for you, but I guess that over time, with patience and hard work, you can get better. We can all learn new things and improve 🙂
-
I would suggest that unless you're there for the entire editing process, and seeing the reactions of the clients who the film was commissioned for, then you're only seeing part of the full picture. Sure, you can see when someone missed focus, or missed exposure, or anything that is a "mistake". However, if you're not seeing the editing process, and you're not seeing the client feedback then you're not seeing how the decisions made earlier in the process impact the final result later on in the process. In a larger production I get that you're a small cog in a big machine, and that someone else is making lots of the decisions. However, if I film some stuff, edit it, then show it to people, and they don't like that I made an action film out of the funeral footage I shot, then I get that feedback first hand. If you got told to shoot some shots of people attending a funeral, you could expose them well, shoot them as directed, and do everything you were asked to do, but that's not film-making, that's operating one step in the a production line of how films are made. Yes, it's difficult and creative and requires all kinds of skills that single-operators don't have to know because typically single-operators aren't creating quite the level of production that larger teams are setup to create, but it means you're missing out on some of the lessons on film-making in general. One thing about watching is that it's easy to see when the person makes a mistake, because you're not using 100% of your capacity to do all the things they're doing right, because you're just watching. Do you learn from those mistakes, sure, although watching and doing can be quite different. I could watch any master craftsperson work, for years if I had the time, and I'm sure that I'd learn some stuff, including from their mistakes, but when I turned around to do it myself, I'd probably still deliver rather lacklustre results. Probably not as bad as if I'd never watched them at all, but probably not as good as if I'd spent a lot of that time actually doing it myself. There's a principle that you learn to do something right by learning all the ways to do it wrong first, but if you're just watching someone do things mostly right then you're not learning the mistakes they didn't make. Are you going to learn how to be a great AC? Sure. But film-making is more than just that position in a much larger team.
-
It's quite annoying actually, for the GF3 at least. The alternative is to use a native lens like the 14mm 2.5, but that means the GF3 is constantly changing the aperture to control exposure (along with SS and ISO) which I'd rather it not do. So, if I want aperture control then I need to have a manual lens, but there aren't any cheap manual lenses around, for the ~10-17mm range, that I can find for any semi-comparative price anyway.
-
True, but I find that there is a real lack of detail available on other peoples mistakes. I guess the whole premise of this thread is that true knowledge is understanding that a decision I make here, in this particular shot, at this particular moment, will generate these particular choices in post, which leads to this particular type of edit, which leads to this particular type of finished edit, which leads to this particular type of overall outcome (customer satisfaction, etc). As an artificial example, perhaps I go wide on a shot of someone entering a location. I have made the decision to prioritise their entry in the context of the location, putting the event in a wider context, but distancing me from their reaction, when the alternative was to go tight and get a closeup. This choice means that for this sequence I already have a wide, so then I would probably cut to a closer shot next, before the sequence evolves. That's how that framing has impacted the edit mechanically. Aesthetically, and I'm just making this up for example sake, this will give a certain feeling to that sequence. I've read about other 'patterns' where you do the opposite - start tight to get the reaction, then go wide to show what the reaction is to. The way this sequence is edited may have larger impacts to the structure of the finished piece, as maybe this style of editing means that you want to hit a certain beat in the music and you have to do it earlier or later, meaning that you have to cut or stretch the surrounding sequences, impacting the options on their structure, and on the overall aesthetic and style of the whole film. Knowledge is making that wide/close decision with the knowledge of what it will do to your sequence, edit, style, and final customer reaction. The only way to really understand that is to be present and see what was shot, what wasn't shot, the detailed process of editing from selects to finished edit, and the customer reaction. Yes, this kind of information would be available if you were working with someone and sat with them through the whole edit, and it's available on YT in very very very limited supply. For example, the YT channel Wedding Film School released a series of videos of a wedding edit from start to finish, which has been taken down now, but IIRC it was 10 x 1-hour videos and included the doc edit and highlight reel, and you saw everything including audio issues, people standing in front of cameras, and all the editing decisions and things that didn't work. Those are stupidly rare. There's a visceral sense to making mistakes that I find is difficult to get from others. I also have basically no access to other people shooting and editing, so it's all self-discovery. Yeah, I don't think we need to quibble and make you go count them or anything! I was thinking of people like yourself. Even doing simple edits still counts as that loop where you make a decision and then learn what effects that has. D4Darious is a big believer in making lots of small films rather than only a few larger ones, or trying to make a feature and never finishing it... I typically shoot my camera tests as real projects, in order to get the benefits of going through the whole editing process. The business of film-making is complex. This thread is about making the film, not about making money. If this thread was about making money, I'd suggest people get off the camera forums and spent their time in the business forums, or better yet, working on their businesses 🙂
-
Size matters in my setup, but I got the 58mm BPM 1/8 so that's fine. Those Harrison and Harrison filters are fascinating - a couple even look like they have bubbles in the glass. I'm not familiar with them, but for $500 US I can buy half a P2K, so that's where my money would be better going! In terms of having a set of filters, I know it's typical to add more diffusion on longer focal lengths, but I looked at the tests and found that the black levels typically get lifted almost the same amount from a 1/8 and then I can add extra diffusion to longer shots in post if I want to, with the 1/8 taking care of the things you can't do in post. I've seen DIY videos of people making their own with UV filters and black spray paint, but the 1/8 is ok. My concern with the BPM was that it would be too strong near the hot spot and too weak further away, and I'm sure that I can make a diffusion filter, but I'm definitely not going to be able to control the distribution of that diffusion across the frame. Why? I frequently follow a subject and am panning and pan from almost flat-light to back-light and the sun in frame. It's all well and good if you're shooting something where you get 20 minutes to set up for 5s of footage, but some of us struggle to get 5s to setup before a 2 minute shot. Sometimes I feel like the pros would recommend a C500, wide cine prime and Ninja recorder to a skydiver who wants to shoot POV video mounted to their helmet on the way down! True, but lifting the blacks in post also lifts the noise, which is great if you're trying to create an alien fog full of angry nano-bots who randomly self assemble in squares, but it's not an aesthetic I'm really looking for. Doing it physically raises the black levels optically, which then enables you to lower the exposure to put them back to black and get more highlights, increasing the DR, or for you to have higher black levels in the file, which gives you a softer look without having visible noise.
-
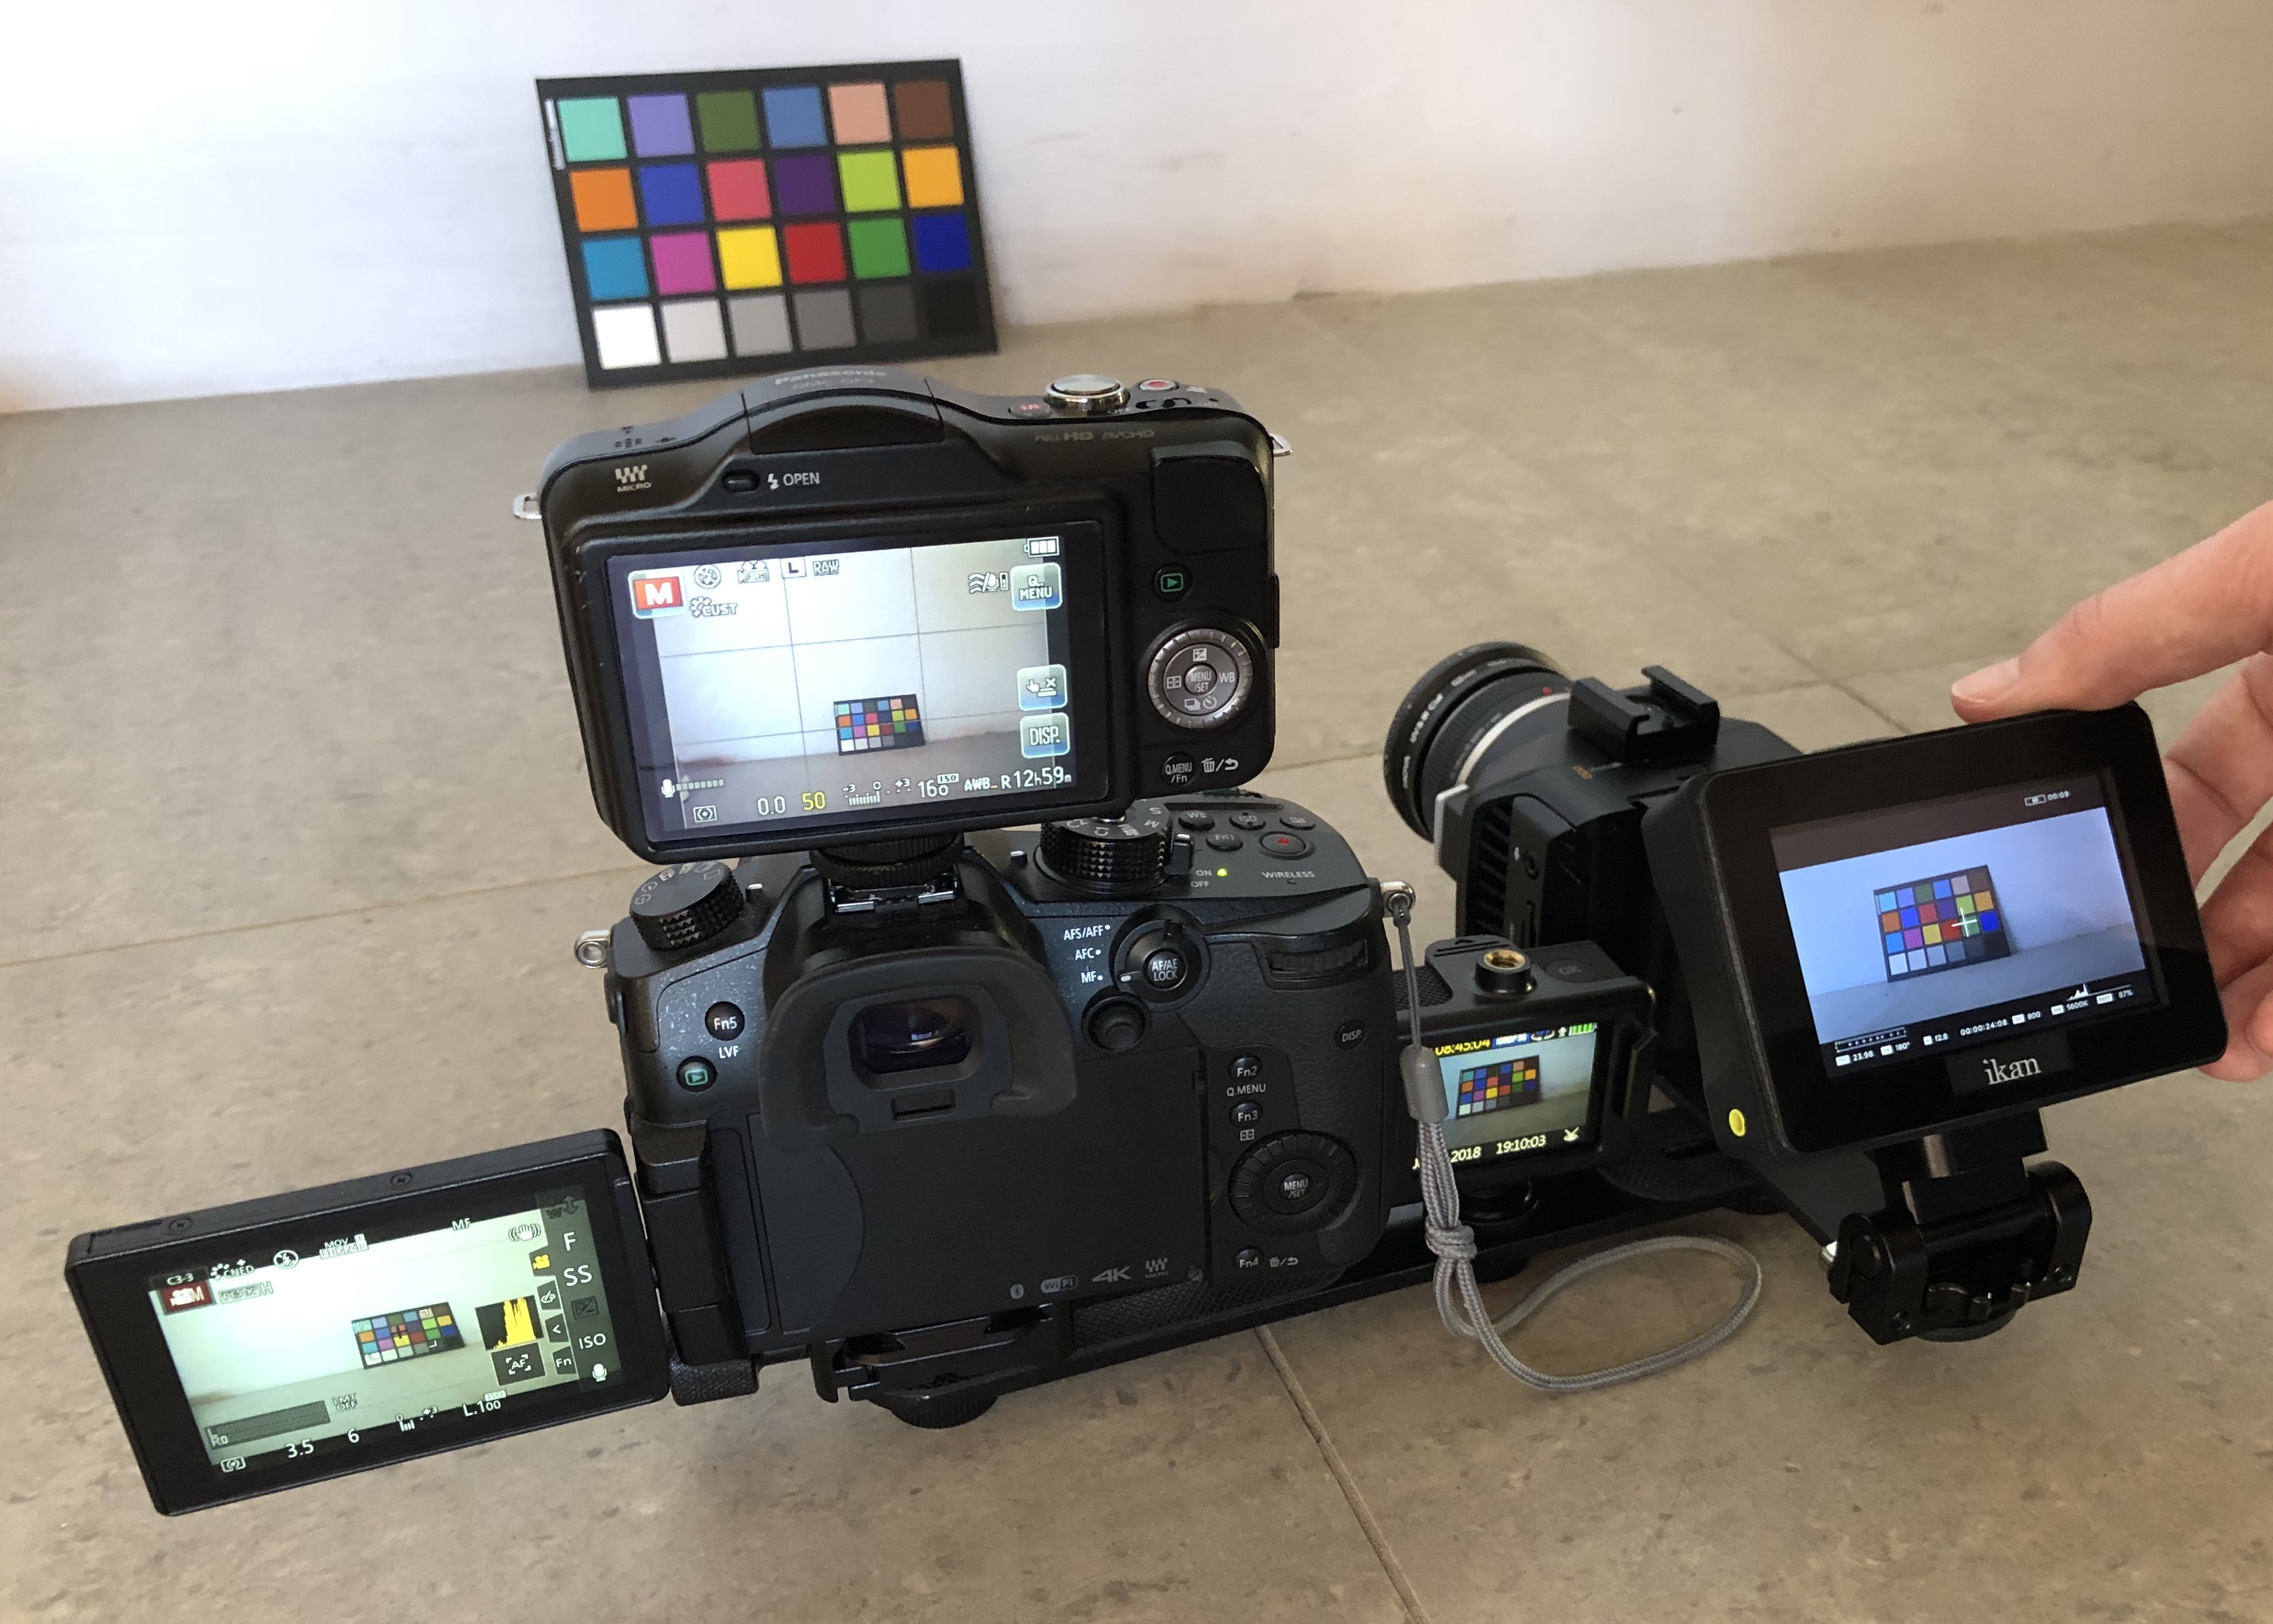
Just because things are fun doesn't mean that they don't benefit from work in post.... BMMCC, GH5, GF3 and SJ4000 action camera. I've shot the colour checker, as well as a few other scenes. I'll try and get a sunset tonight to test the DR too. I've already shot the colour checker for BMMCC and GF3 and developed a base grade to match the hues and saturation and luma from the GF3 to the BMMCC and it makes a huge difference, making the GF3 video look appear much more subtle and filmic. I'm beginning to think that part of the video look is the compliance to the 709 colour profile, where reds are red and blues are blue etc. Film turns its nose up at such kiss-ass behaviour, saying that its only useful for scoring well on tests! Well, if film could talk then I'm sure that's what it would say. I've also discovered that the 15mm F8 is really only a daytime lens, and maybe only an outside lens, on the GF3. Once the GF3 hits 360 shutter and has to ratchet the ISO up, its image falls apart big time.
-
Just ordered a 1/8 Black Pro Mist filter. I searched and couldn't find Low Contrast ones for sale in the size I needed anywhere on earth. So I reevaluated, and looked at some tests I've been doing that have the sun directly in shot with various lenses, including vintage ones, and got a sense of the amount of halation that the vintage lenses gave. These two videos are interesting and useful: In the second one, the guy mentioned how he's a pro cinematographer and has the BPM 1/8 on his lens almost all the time. I'll see how it goes.
-
Prices of the OG BMPCC have gone nuts on the second-hand market. I've recently been comparing my GH5 to my BMMCC and the image is night and day. I'm trying to match colour science, but it's not easy, and you can't fake DR. Lots of people are talking about the 'Sony look' and how all modern cameras now look the same, which you don't realise is true until you see footage SOOC from something that isn't shot on a Sony sensor. What are the cameras not using standard Sony sensors? The OG BMPCC, ARRI, Samsung NX, and what else? Discussion of these cameras always includes discussion about how their 'look' is unique, and most importantly, desirable... So, should someone make a range of non-Sony-sensor cameras? Starting with a sub-$1K mirrorless small body offering? I'd be very interested. Who else?
-
I guess it depends on how exactly we define things. An original idea may be "I Kye, will pick up my camera, and point it at that thing, and record video frames at these exact moments, with the light hitting the subject in exactly this way" and yes, everything we ever do is completely unique. If I say "potato centrifuge Halifax cumbersome trellis" then that's probably the first time anyone has ever said that.** However, if you abstract up a little, getting a mid-shot of the subject with a 35mm FOV, well, that's been done more than a few times before... I did purposefully comment rather cheekily and not actually answer the question. Redundancy in creation is contextual. You could post the same image and depending on context it may or may not be redundant. The Kuleshov effect is in the mix too. If you're creating content for a particular client where they know or care about who is in the footage, in some ways it doesn't matter how generic the style is (or it might even be desirable) because it matters who is in the footage. A corporate video full of middle-aged white men talking about their company in corporate speak is completely meaningless unless those middle-aged white men are the middle-aged white men from your clients company, in which case, the video is worth paying for. Ditto for wedding videos, or the videos I make of my friends and family. Its a tough gig making content for people who don't know anyone who is featured in the final video. In that case you would have to work super-hard to make the content interesting. I'm glad I don't have that burden! (** I look forward to your replies with the google results) Not at all. In terms of new ideas, my videos are far away from that territory. However, as discussed above, my videos are of my friends and family, or are camera tests of some kind, so either the audience knows the people in the video, or the audience might care about the camera test I'm doing. In either case, there's little redundancy. If I did want to push into new ideas or capturing things in a new way, I would have two options. I would either need to capture things in a radically different style, which would likely not be at all appetising. I could shoot my videos using only a fisheye lens pointing at the sky and a tele macro that only frames a single eye of the subject and have a video that cuts back and forward between these two angles at random intervals. New? yes. Desirable? NO. The alternative is to embrace the style, which in my case is on the continuum between Cinéma vérité and the cinematic highlight style of travel or wedding videos. I tend to create a mixture of the two, not showing the parts where the kids whine about everything and their mum gets angry at them, but also not making our activities look like we live a fantasy life where everything is interesting and everyone is always happy (like most travel films tend to). To get my videos anywhere near the level and finesse of the greats in this territory would require many lifetimes dedicated solely to the study of every aspect of creation, as well as doing deep work on myself to enable my own creativity to come forth much less unhindered than it does currently. Meanwhile, I don't worry about it. I have fun, do my best, and enjoy the process.
-
Wow.. someone answered 360+ ! You make a great point about the time to reflect at the end of a project. Just thinking out loud here, but I wonder if there were two kinds of learning from a project. The first is learning what happens when you decide to do something and it either doesn't go well or it goes surprisingly well. If you stuff something up then you're going to notice in post, even if you're just going as fast as you can! And the second one being opportunities for improvement and innovation on things that aren't going noticeably wrong or spectacularly right. This is probably the one that requires the time for reflection. When I got started I used to think that people using phrases like "learning cameras" was about settings and once I learned the exposure triangle and things like composition etc I came to think of it as a really clumsy phrase. Then I got to the point where I started reading about cinematographers doing explore attitude tests, and things like that to understand the sweet spot of the image etc, then I understood that each camera / sensor / codec has its own quirks that you have to learn to navigate to get the best image from the camera, and so the phrase made sense in a new way. I was thinking your blogs might qualify you, as I think I recall one where you had an edit point in there! I guess the logic extends to your role in sound, although if you're not that involved with post-production then the feedback loop isn't as tactile as it is when you do post completely yourself. When I was writing the questions, I began to think of the people making short things for social, and if you were a creator like David Rock at Vayner Media, then I'd be cutting the poll short by not putting in options of 5-10 per day and 10-20 per day! It's funny when you have some people making less than one feature film per year, and others making over 400 or even 1000 times as many pieces of finished content.
-
Oh, and if your film-making took a hit because of COVID, just answer what it was before COVID happened, as that's where you would have been and reflects your involvement with film-making.
-
To qualify as a 'film' it must be edited. No live streams. No single shots, unless that shot was planned in some way (Russian Ark, etc). To qualify as 'published' it must be prepared and be made available to an audience. This can be showing it to your family, or uploading to YT (even if no-one watches it.. spoiler, lots of YT videos never get a single view). I ask this question because I was talking with a friend about wedding videographers, and how they are often shooting with 80Ds and C100s, but are getting better looking images than most of these 4K 6K 8K camera tests. I offered the rationale that they're shooting 12-50+ weddings per year, and so get to learn the nuances of their cameras, how to light, how to get the best angles and how to pose people, and overall, how that must be a continuous crash course in film making, even if for them it's just in one genre. Thoughts?
-
Let me ask the opposite... Do you think you have ever had a new idea or captured an existing idea in a truly new way?
-
🙂 Good plan. I find that by using what you have and then seeing what doesn't work for you in real-world shooting, doing the projects that you do, in the way that you do them, with your own particular expectations and tastes, then you'll end up spending the money on what actually matters to you. There's lots of times when something is needed by someone else, but that doesn't mean you should upgrade. There's also lots of people recommending extra features "just in case" which can create a kind of spec inflation that's not based on reality, especially when people read the just-in-case recommendations and then pass them on to others with their own just-in-case inflation added on.