kye
-
Posts
8,230 -
Joined
-
Last visited
Content Type
Profiles
Forums
Articles
Everything posted by kye
-
Oh, interesting. How do you.... oh, hang on. I look forward with anticipation of the official launch of your new YT channel... CatRidesMan ???
-
...and the people using Canon for video is a drop in the ocean of Canon photographers. ......and the people using Canon for stills is a drop in the ocean of photographers. ..........and the photography market is a drop in the ocean of the electronics market. ..............and...... ???
-
@UncleBobsPhotography @Shirozina I think it depends on what level of lighting variety there will be between shots, the tolerance the OP is willing to take in the final edit, and the level of time, skill, and software capability available for colour matching in post. I've spent a lot of time trying to match different cameras in post (made more difficult than this situation because my cameras also had different colour science and were pretty bad quality cameras) and I've found that it can be really difficult to get acceptable matching, even if you half know what you're doing in grading. Obviously ND filters vary far less than entirely different cameras, but the differences I couldn't overcome were so large that they'd be completely unusable in most commercial settings, so for the OP the difference of NDs might be practically relevant. The fact they're asking about how to do a test, and that their approach is detailed and seems sound would also indicate they might be creating a higher quality product where there is less room for variations. I could be wrong of course - we all obsess over tiny little details that don't much matter in the grand scheme of things (like cameras, colour science, etc!) ???
-
Throwing stones is good I can't comment on the P4K, but I'm in m43 land with my GH5 and I think your summary is about right. FF lenses adapt really well for the longer focal lengths but getting fast/wide/both lenses is the challenge. In case you're not familiar with the options: Voigtlander make an excellent series of f0.95 lenses These come in 10, 17.5, 25, and 42.5mm lengths, which are the equivalents of FF 20mm/1.9, 35mm/1.9, 50mm/1.9, and 85mm/1.9. They're gorgeous to use, and the aperture ring can be adjusted to de-click. I only have experience with the 17.5mm one, which is soft at 0.95 but is almost fully crisp at f2.8 (FF f5.6 equivalent) and for some reason has a strange colour shift at 0.95 that cleans up by 1.4 I use the SLR Magic 8mm F4 (equivalent to a 16mm F8) that is optically good but not great, but ergonomically is a pig because it's designed for drones not a human user. There is a Laowa 7.5mm f2 which is more expensive, but seems to be good optically and is designed for human use, and it popular with vloggers due to the 15mm equivalent FOV. The Sigma 18-35 f1.8 on Metabones adapter is popular and optically and ergonomically nice too, although it's heavier than the M43 lenses. In a sense, I think your criticisms aren't so much that the P4K image isn't great, but rather that the competition is actually really good.. I think we're spending more and more time being overly critical and nit-picky, or making genuine and practically relevant criticisms about cameras that are outputting a level of quality but are a fraction of what equivalent cameras used to cost
-
I was just thinking about how long this might take. Some googling revealed that v15 was released April, had 8 beta versions, and was fully released in August. Version 14 beta 1 was released in April and came out of beta in September, so 4 or 5 months for the last two releases. Both these had entirely new products spliced into Resolve, whereas the Cut page is a different view on existing features, with some extra smarts in the background, so should be far less of a programming challenge. I have no idea how many beta versions and how long it will take, but I'd suggest that although it's probably less than the 4-5 months of previous versions, BM aren't afraid to take their time and release lots of beta versions before considering it ready for 'real use'. I say 'real use' because I think that there are lots of seriously high-end people using it for big budget projects who would wait for the final release and wouldn't even think about using a beta version. Of course, PP seems to be buggy as hell and that's got its fair share of VIP users, so who knows. I am wondering if I should just backup my database and install it The Cut page is seriously tempting.
-
It's probably worth mentioning that a tablet can be really good if you're filming yourself and you use the tablet to control the camera. Some cameras have excellent remote control apps or browser-based apps with touch-to-focus and all the aperture/SS/ISO/etc settings.
-
I don't, but IIRC my sister was using it when she was a Script Supervisor for all her notes and photos for each location/setup/shot/take. I don't know if there was a particular app she was using or if it was just notes and the camera or mixed with paper notes too, but it worked for that really well. I worked out early on that tablets are for consuming content and laptops / computers were for creating content. The fact that the iPad doesn't actually multi-task is a complete deal-breaker for me. On a computer if you have a few applications running then they're all running and if you change away from one and then back again you'd expect it to be the same as when you left, but they actually just make a note of where they were, then when you go back to them they then re-create where they think you were, but mostly get it wrong. If you have bad internet you'll realise that the web browser actually has to re-load the page when you go back to it, too bad for you if the internet is now gone... or they forget where you were through a video or page or whatever, and you have to navigate back to where you were....
-
Yeah. Plus that insert edit which doesn't need the play head to be frame perfect. I suspect there's dozens of little tweaks in here that will all save a lot of time (and probably frustration too!) I have done a bunch of efficiency / process improvement projects in my day job and I suspect that they might have video'd a bunch of professional editors doing this and then analysed every keystroke and mouse movement to classify what they're doing and how long that particular thing adds up to be over an entire editing session. Then you can see that they spend X% of the time zooming, Y% of the time doing whatever else, etc and then just work out how to reduce or eliminate those things completely. If they have taken that approach (which seems logical) then the zooming and the insert edit will be in a long list of many many small improvements they could have made. People that design user interfaces sometimes look at how far away the buttons are from each other (for example if you're moving the mouse from one side of the screen to the other and back a lot) and will rearrange the buttons so there's less mouse movement etc. When Toyota starts with a car assembly plant the assembly line moves slowly at first, and they work out which steps are taking the longest, then they improve them until they've got a bit of spare time, then when every step has a bit of spare time they speed it up a little, then do it all again. Just making these little changes you can make an assembly line go twice or three times as fast as it was originally because all these little changes really add up. Which is absolutely great stuff for us, because we're the ones who benefit
-
Great overview video about why the Cut page is so much faster than the Edit page: I haven't downloaded v16 yet (I don't do beta versions) but this makes me really excited about cutting together an initial assembly. An interesting point from the video is that he mentions you might be cutting together 1000 clips in a day (1000 clips at 2s each is 33 minutes of video so that seems reasonable). I did some maths on this and it works out that if you spend 5 seconds zooming in and out to make and fine-tune the beginning and end clips, which seems about right from my editing experience in Resolve, then that's 83 minutes of zooming! The Cut page shows three different zoom levels simultaneously and you don't need to zoom at all, so that's a huge time-saver just in zooming. There are a bunch of other things that they've fixed too that I noticed are a bit of a PITA when doing this in the Edit page, so it looks like it will be so much easier. I am really excited about this!
-
Aram K commenting on whether there is a big difference between having an external reference display with BM hardware vs the GUI display. (TLDR - not really, as long as you have a good quality monitor and calibrate it). I'm not a huge fan of Aram as his level of technical knowledge isn't the best, but in terms of being able to see colour and comment in it, I think his impressions are probably useful, and considering I've never compared the two it's a useful opinion.
-
I'm no expert, but assuming that you custom-WB and set exposure every time you change anything then that should be a good approach. Changing the aperture is more likely to only test the lens and not the ND I would have thought? Still, it's useful for testing before using that lens for your film. I know lenses that change colour at different apertures, so this is a thing. If you're going to go to the trouble of testing one lens then test each of your lenses, preferably at wide open and at something neutral like 5.6 of 8.0. Considering this is a test you should also ensure you've gotten a steady and high CRI light source, even if you use natural light it can be subject to subtle variation between shots, or even between doing the WB and hitting record. I think if you go back and forward between non-ND and ND and look at Vectroscope and Waveforms then that should tell you everything you need to know. In a sense, as long as the ND isn't too far off neutral then having colour accuracy kind of doesn't matter as long as you're consistent throughout the film (by using the same ND). Colour grading often skews colours, for example cooling the shadows and warming the highlights, and it's more about how the final look matches the emotional tone of your film. You can go pretty far from neutral and still be fine, think about The Matrix or any Soderbergh film, or music videos where coloured lights heavily skew skin tones. Good luck!
-
lol. I'm not sure about that exact situation, but it sure will be interesting times. I saw an interesting interview where the guy said that the first stage of robots/AI taking over is automation and that's been happening throughout the industrial revolution and may be one of the critical drivers behind the rise of nationalism around the world as the people that used to have good factory jobs now don't have jobs, or they have shitty unskilled jobs cleaning the machine that paints the cars instead of painting the cars themselves. There are going to be lots of people saying "I'm glad...." or "I wish.....". We're going to need some form of universal income because otherwise there won't be enough work to go around. Independent artists making a living on YT and Patreon and Etsy are certainly coming up in leaps-and-bounds, but it's nowhere near enough to counter the disappearing middle-class we used to have. In Australia the economy has had decreasing total hours worked for many decades, but it's been partially obscured by taking children out of the labour force and also the 40-hour week, but that trend can't continue indefinitely without resulting in mass unemployment.
-
I agree. Funnily enough, I also have a Computer Science degree Robots and AI are gradually making things faster / easier.. eg, NLEs now automatically scan for faces = work you don't have to do = work you don't have to charge for = less total industry value = less people can afford to survive in the industry. AI won't stop doing this, it'll be gradual but it will be relentless. The trick is to understanding what can be automated and what can't be. IIRC it's about repeatability and predictability, lawyers for example are quite automateable because most of what they do is to know the law and basically regurgitate the relevant bits. Yes, there is judgement and also lateral thinking involved, but lawyers are going to be hit very hard when you can buy a magic box that knows all the law and you can just talk to it and have it quote precedence. Film-makers will have the total value of the industry eroded by AI doing rough-cuts and things like that, but I think there will always be room at the top for the most creative. Not necessarily the 'best' but certainly the least predictable or those with a style that is least popular, so the robots will learn it last. It will take a good long time before the robots are actually operating the camera and sound equipment though, robots aren't very coordinated or agile in the physical world, and teaching them the etiquette of how to be in the face of the couple while being the least disruptive will be quite a challenge. The short-term strategy is to get good so that you're still going to be able to stay in the industry as people are gradually squeezed out of it. And pretty much "quality is the answer" is a good strategy regardless of whatever the hell happens, so it's not like you're going to spend all this time getting great at your craft and it turning out to be a bad strategy
-
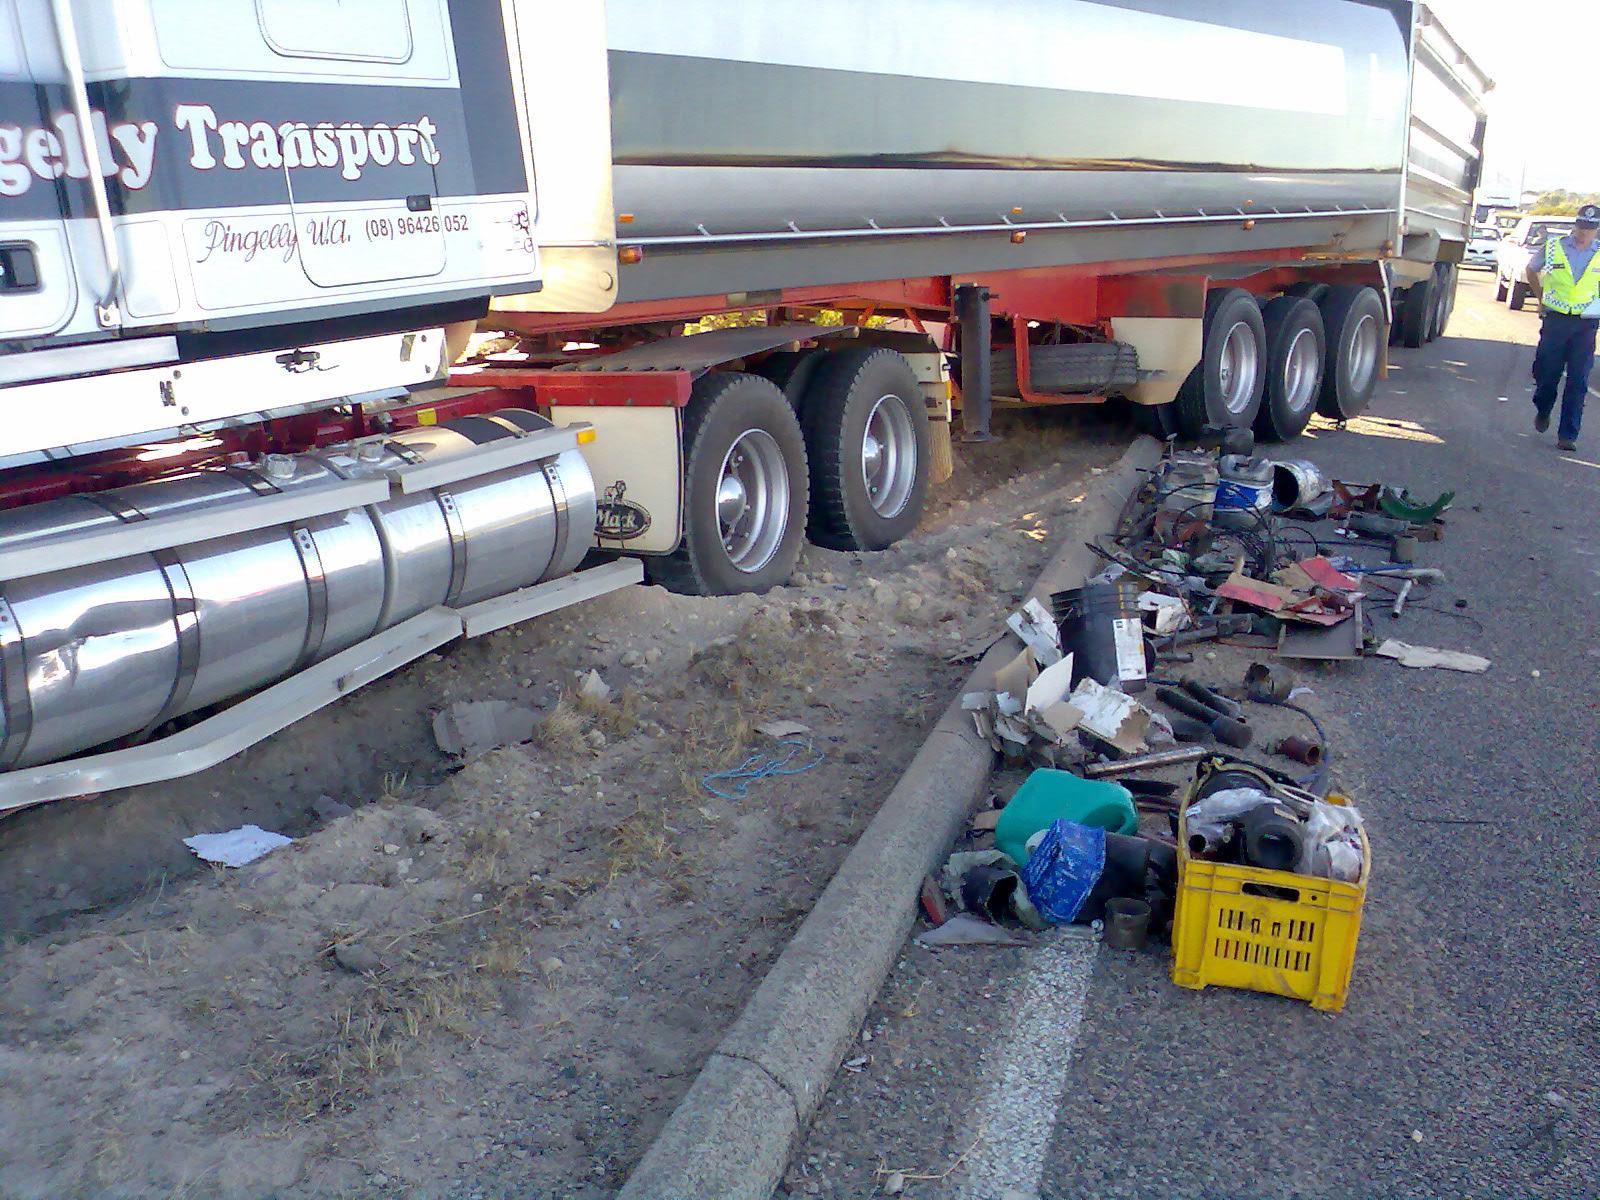
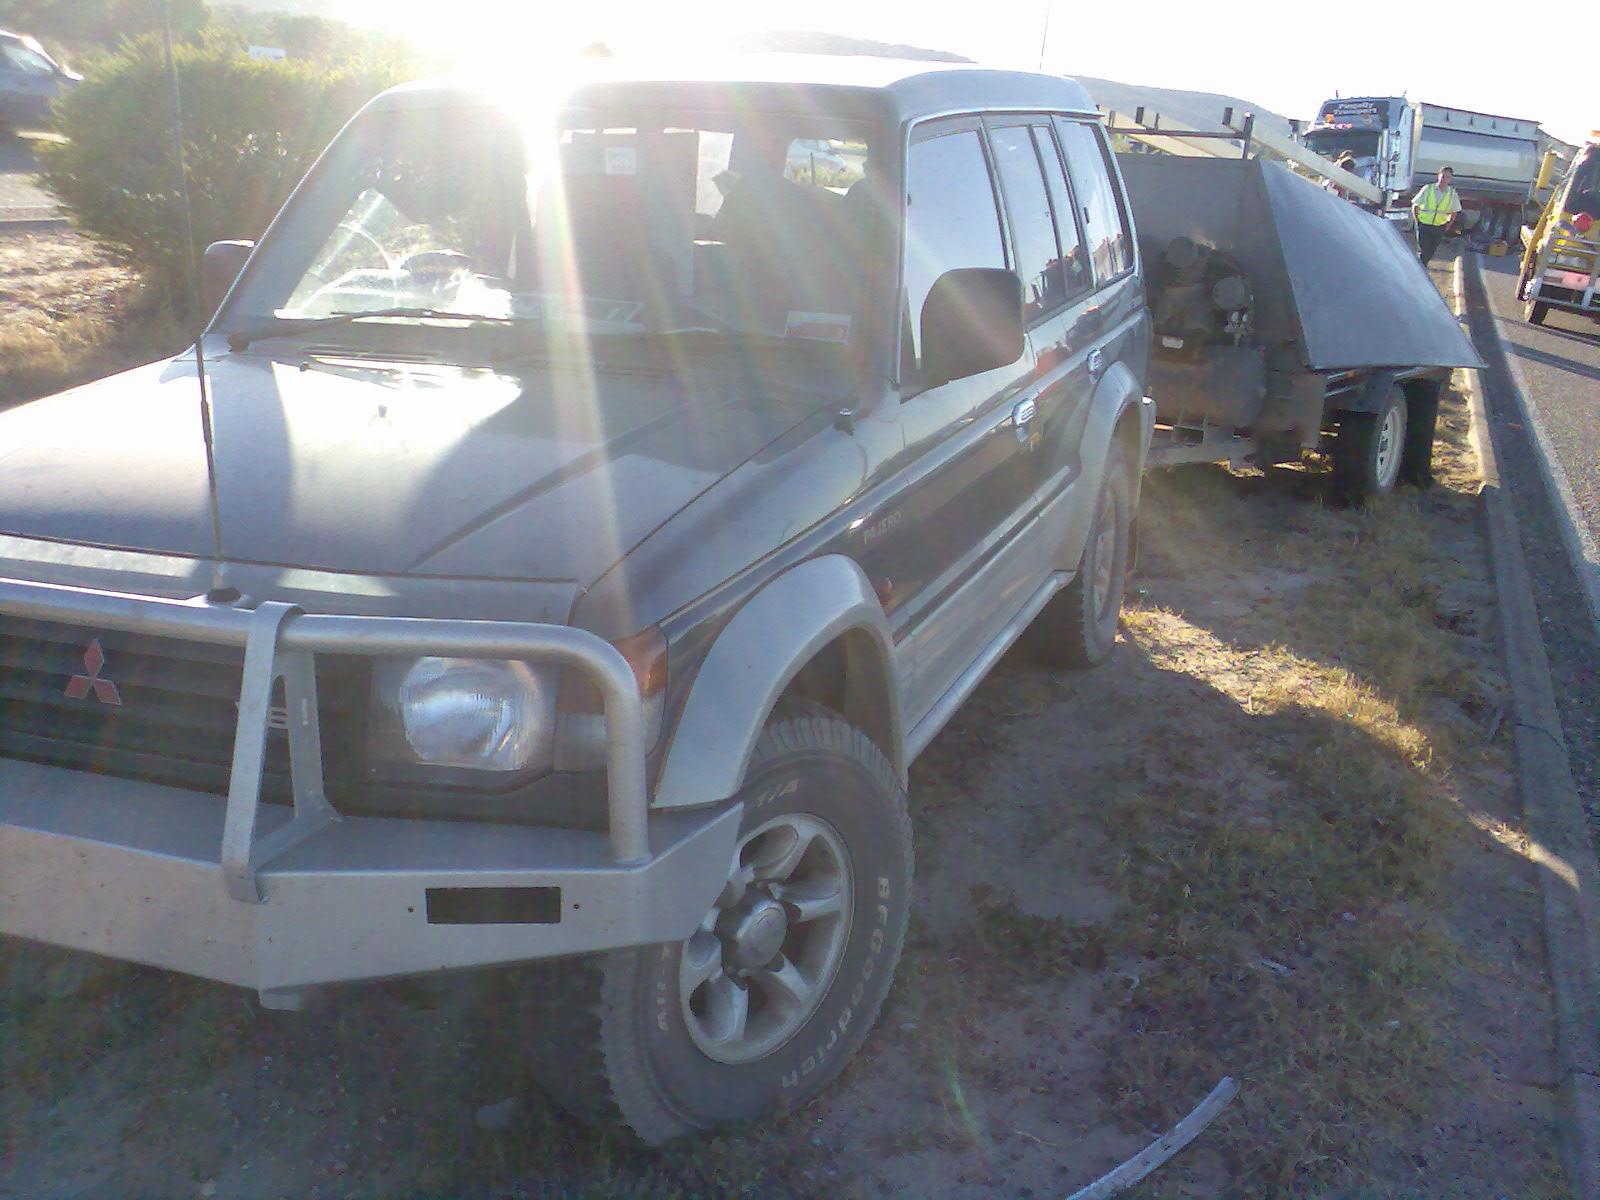
Accidents with semi-trailers? Check! This is how my previous car died... it was borderline write-off before they discovered the chassis was bent. Mine was the blue echo, and the 4wd with trailer went in-between my car and the semi. Traffic was almost stopped and the semi and I were next to each other and the 4wd comes flying up behind me, does an emergency lane change in-between me and the road train. His 4wd fit through the gap but the trailer didn't, and was what caused the damage to my car and the dent in the fuel tank of the semi. For an idea about how much faster he was going than we were, look at how far back the truck (and I) were from where he stopped. If he hadn't have emergency lane-changed I'd probably be living a very different lifestyle right now. It was amazing that no-one was really hurt, but we sure made a mess of the highway for a while!

-
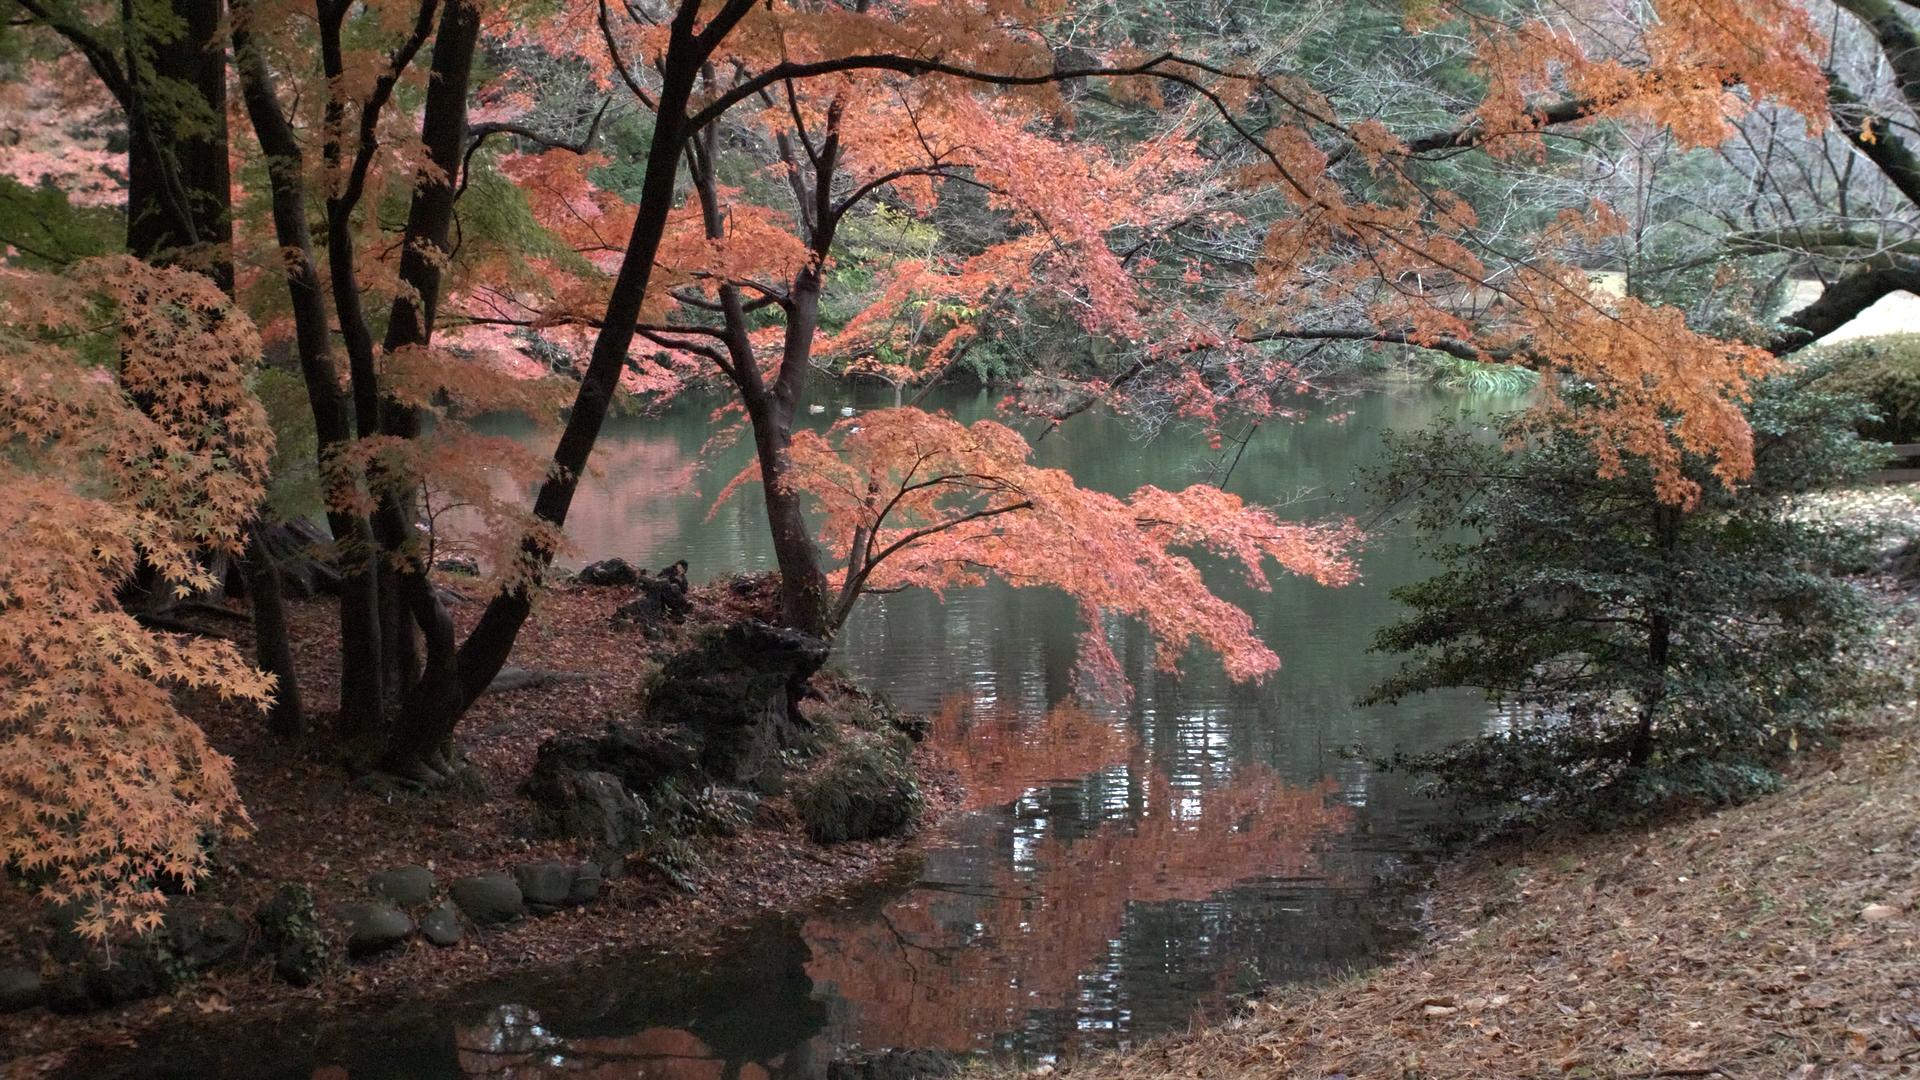
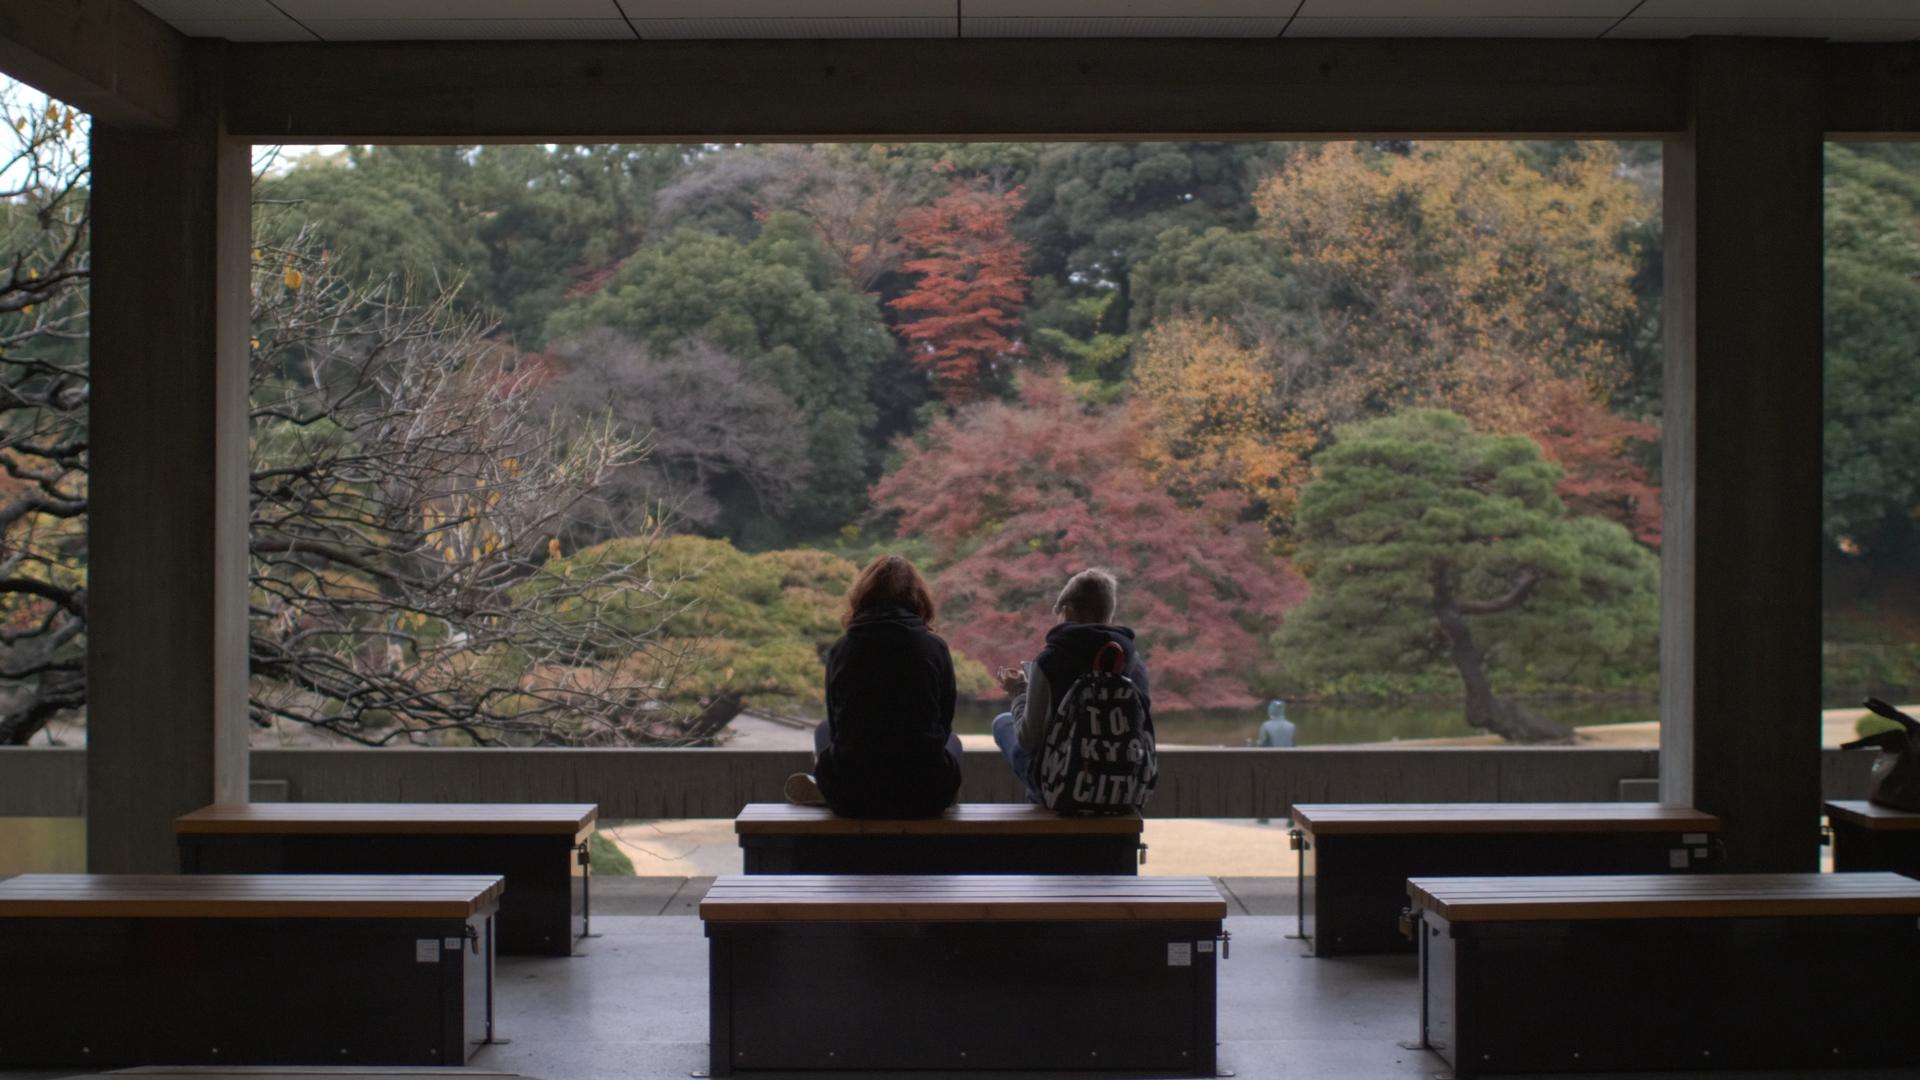
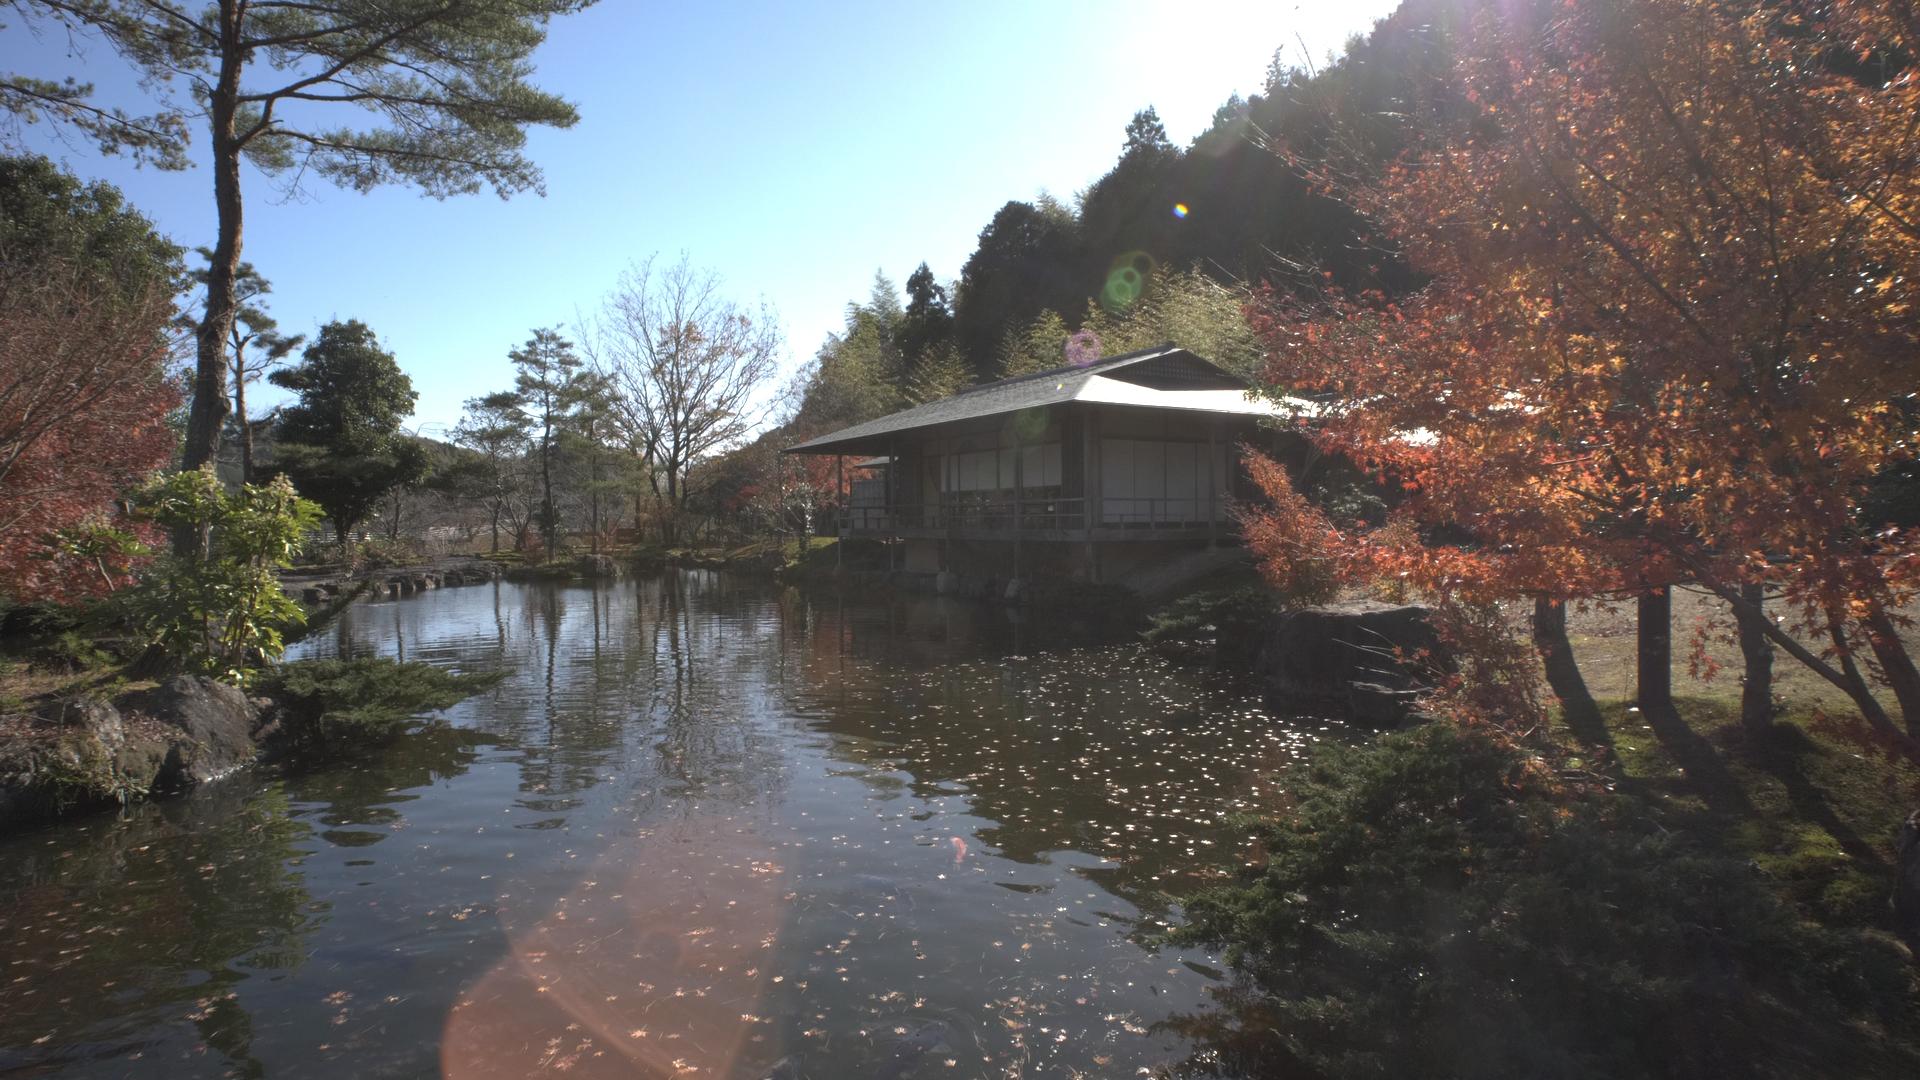
We spent a long time in those gardens and it was a really interesting thing from a composition perspective. The trees were showing autumn colours, but in patches, so getting a good composition was pretty easy, but getting a great one was really tricky. I spent a long time trying different angles, and even moving the camera a little left, a little up, etc. Some compositions were a matter of cm here or there, especially if you were framing something with something else, which the types of trees seemed to lend themselves to. That last shot was a straight out rip-off of another photographer who had been standing there for a couple of minutes with a tripod and just left as I was walking up to the spot so I saw the composition immediately. I suspect a highly skilled individual could have extracted a dozen or more images of that standard or greater, but you know what they say.... good artists copy and great artists steal. So that shot makes me a great artist!! ??? Also, the wife took some absolutely spectacular images from that park with her iPhone - whatever the hell the iPhone colour science was doing was absolutely bang-on for that situation. I've got it in the back of my mind to go through and find some nice shots where we took similar compositions and try and match the Apple processing with my GH5 shot in Resolve. I think it would be a real learning experience because her shots just looked amazingly saturated, clean, contrasty, but not artificial, which is something I haven't been able to achieve.
-
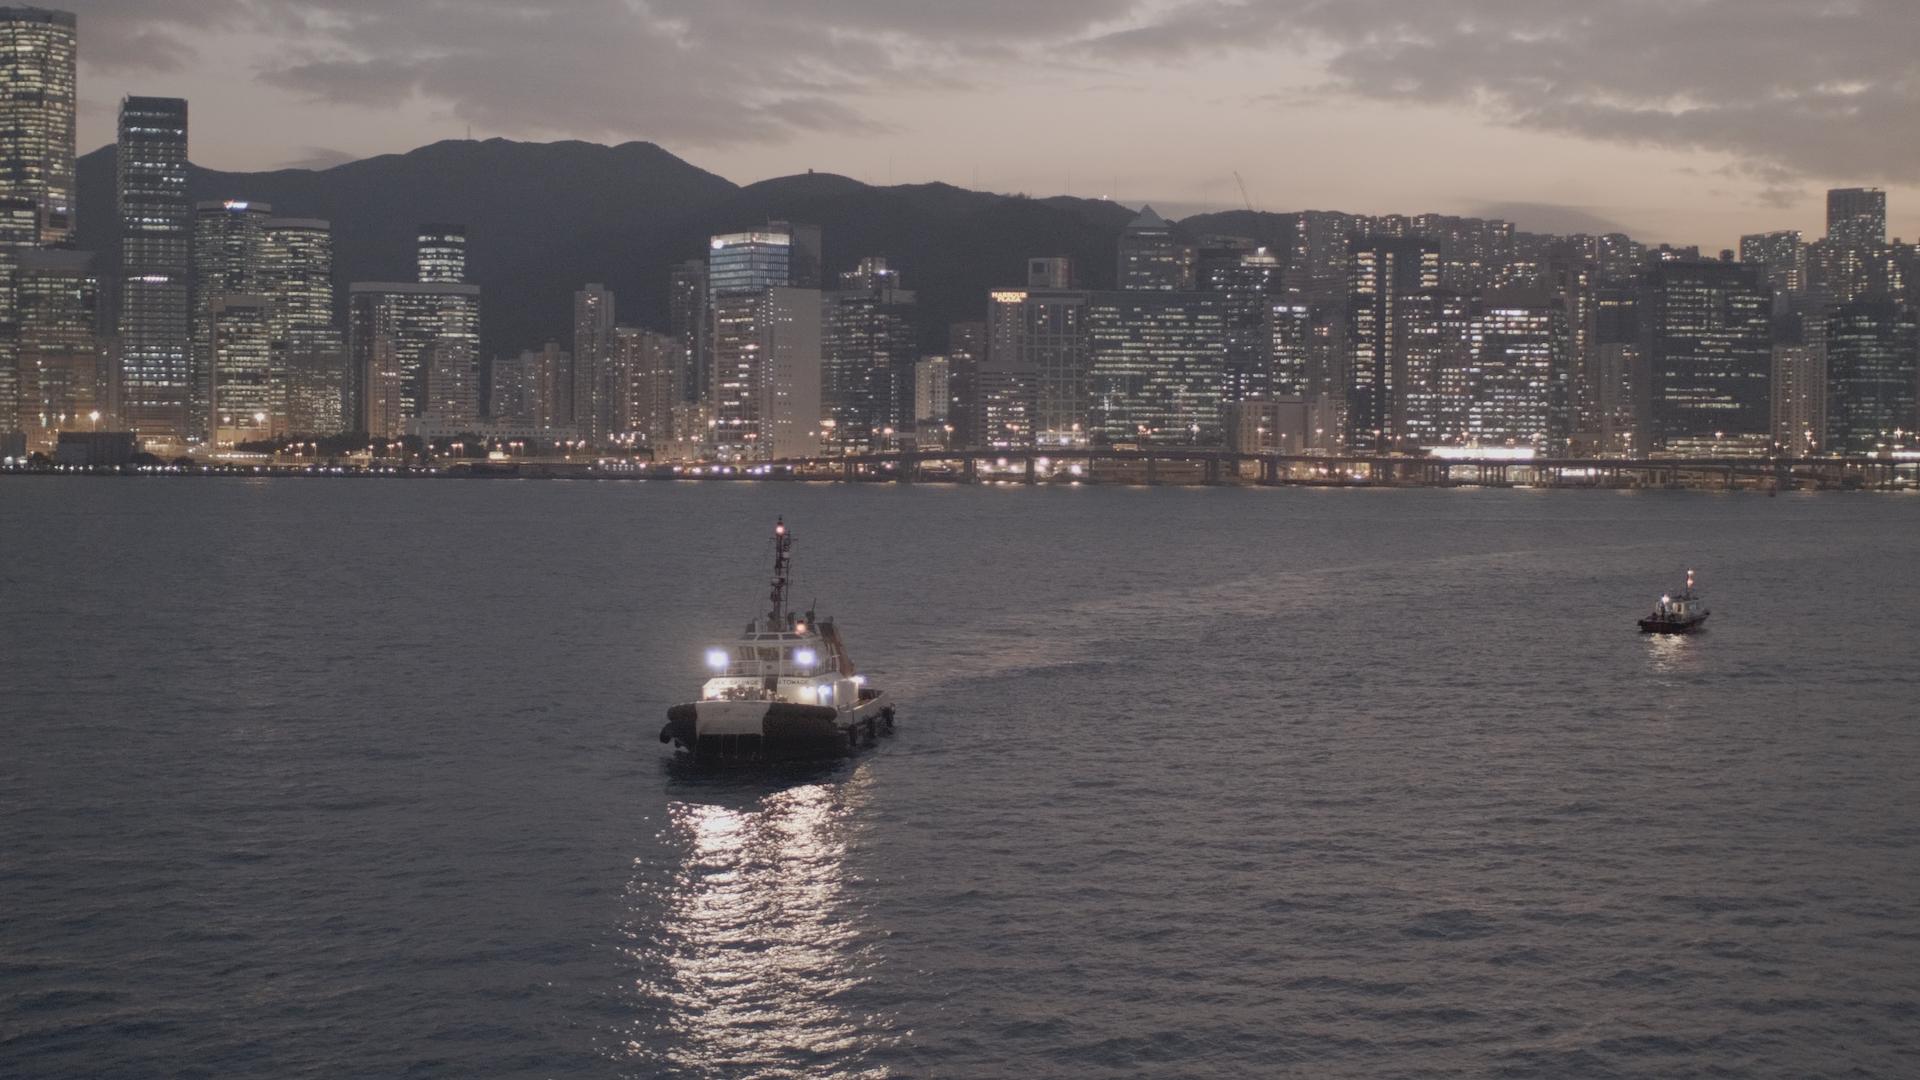
I tell you what, getting that shot of Mt Fuji was an ordeal! We did a day trip that took us to a few unrelated places and then to a beach where you can see the mountain from. Awesome, I thought, great opportunity for a time-lapse with a great composition. We walked about 20 minutes from the bus to the beach and had a limited time there, so I setup a time-lapse, but we mostly couldn't see the mountain because it was covered in cloud, with only a little bit sticking out. Time goes on, Mt Fuji pokes out of the clouds and I realise I'm pointing at the wrong peak. I reset and go again, nothing working because it's still covered in clouds. I'm really pushing things with the time because this is our only opportunity to see the mountain, and it was the one thing the wife wanted to see but we didn't have enough time to do a special day-trip to see it. Wife starts back and I stay to try and catch a glimpse of the mountain. I push for the time we have before needing to be back at the bus, then start jogging back. I'm the last person I recognise and they don't wait for you for long because the ship has to sail. Wife is only a little bit of the way back, and had taken a wrong turn and gotten lost and just found her way back to the path. As she was on the mend from some minor surgery couldn't walk quickly, let alone run, time is now against us completely, but oh my god where are the kids? I thought they were between us and the bus (the route was pretty easy to remember so not really worried) but wife is freaking out and the bus needs to wait for her and if the kids aren't there then we're completely screwed. I run back to the bus, trying not to worry and most concentrating on wishing I was fitter, to discover the clueless kids are back at the bus and are fine, and even though we're late back to the bus, so is half the group. I visit the facilities and try to freshen up considering I'm now half drenched in sweat and we have a long bus ride back. Wife wasn't the last one back, and all stress was unnecessary. Get back to the boat and realise that the mountain is now uncovered from clouds, in full view of the jetty, and by going on board and going to an upper deck you get a great view. I then proceed to take video in 2 minute increments as the light changes in complete comfort, kicking myself for worrying. I also like this shot, which I think was the Helios, but I can't really remember. I tell you what - those gardens we went to were just spectacular - you could be walking with a camera, trip and accidentally hit the shutter, and you'd still be likely to get a good shot!
-
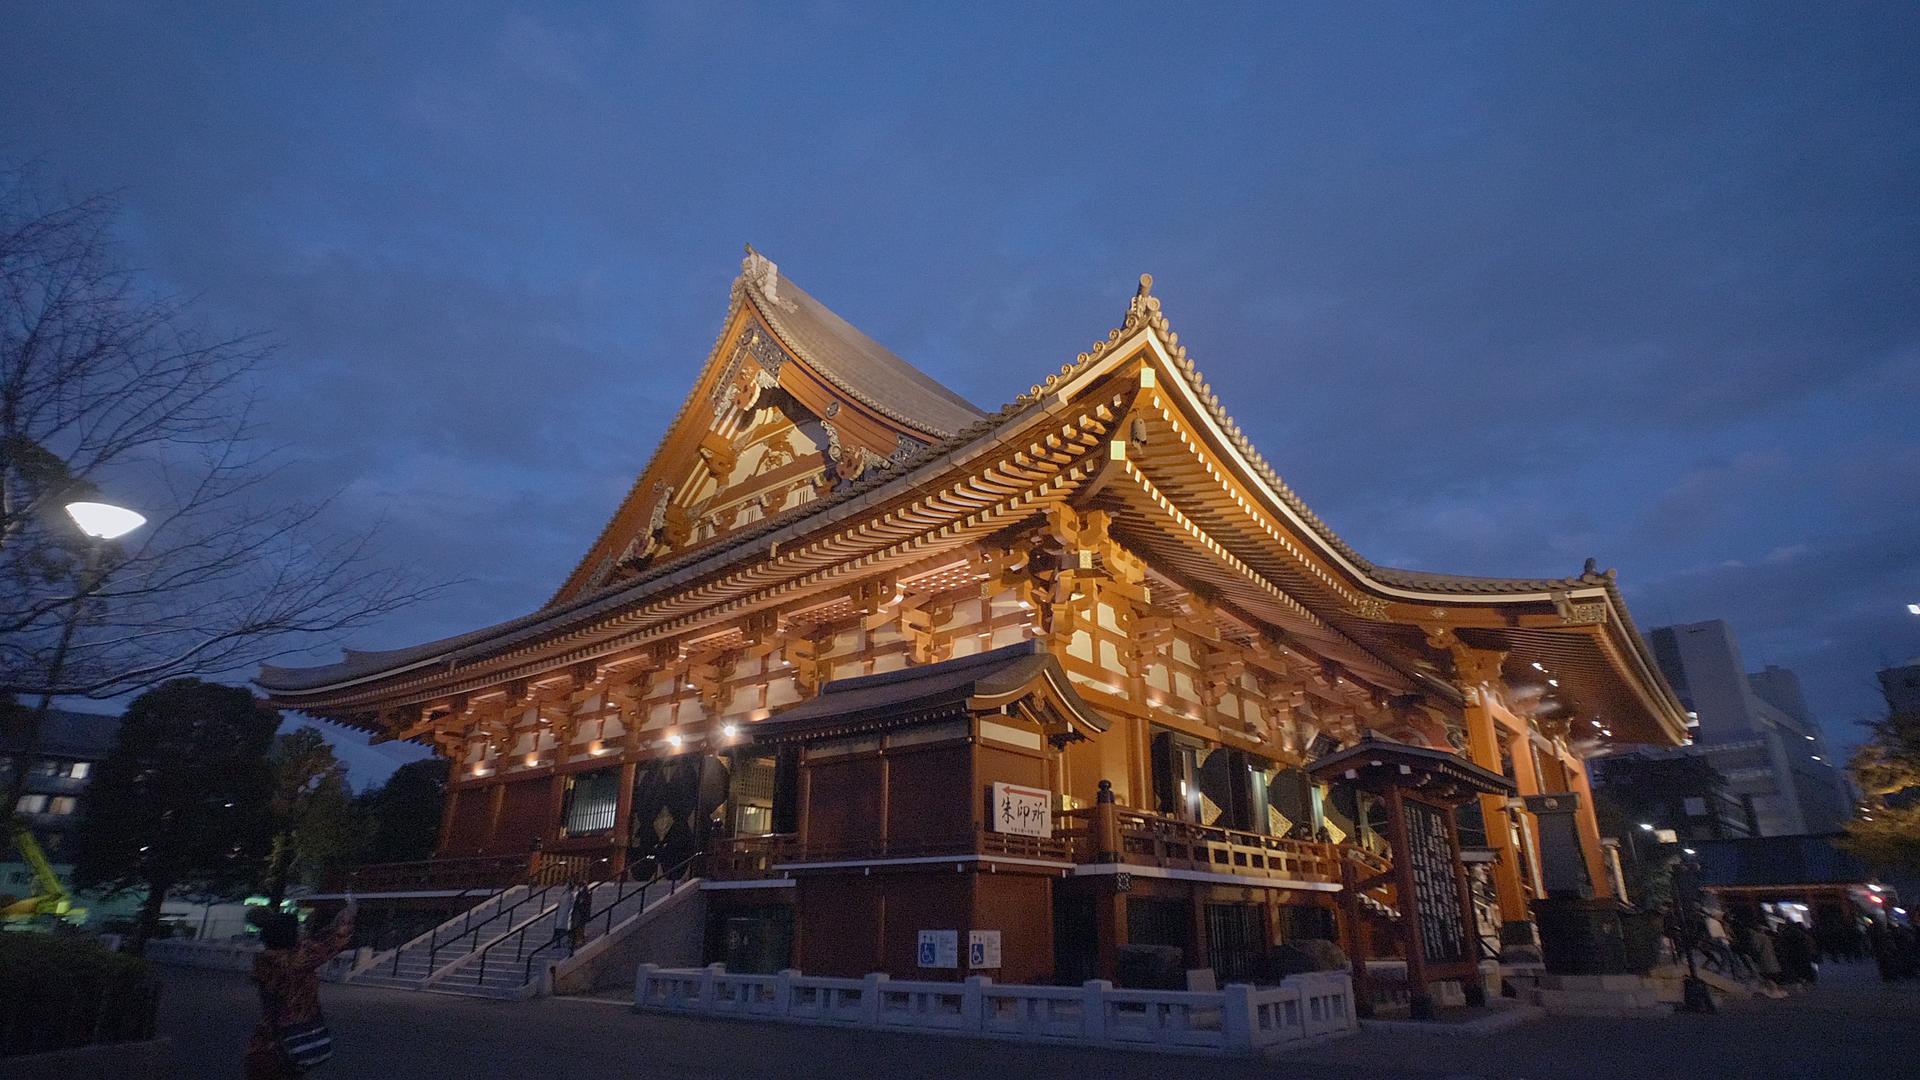
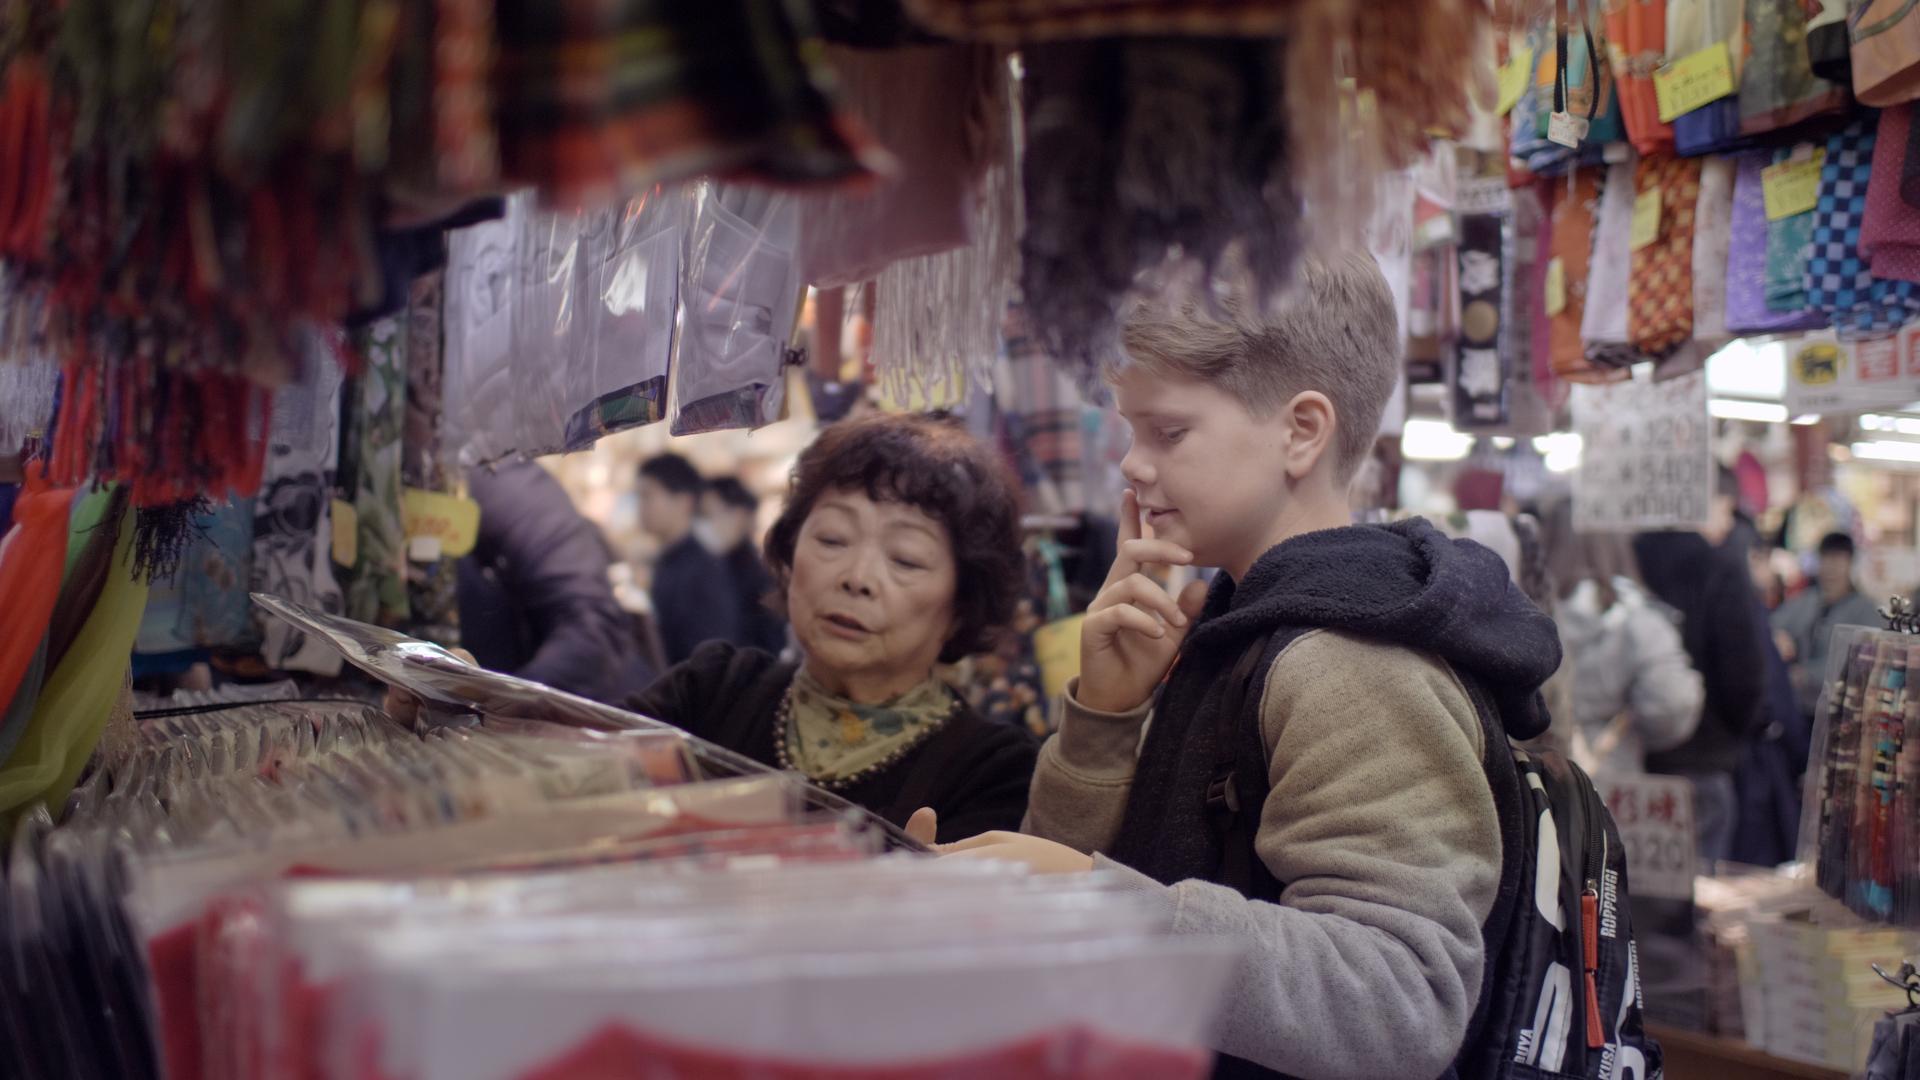
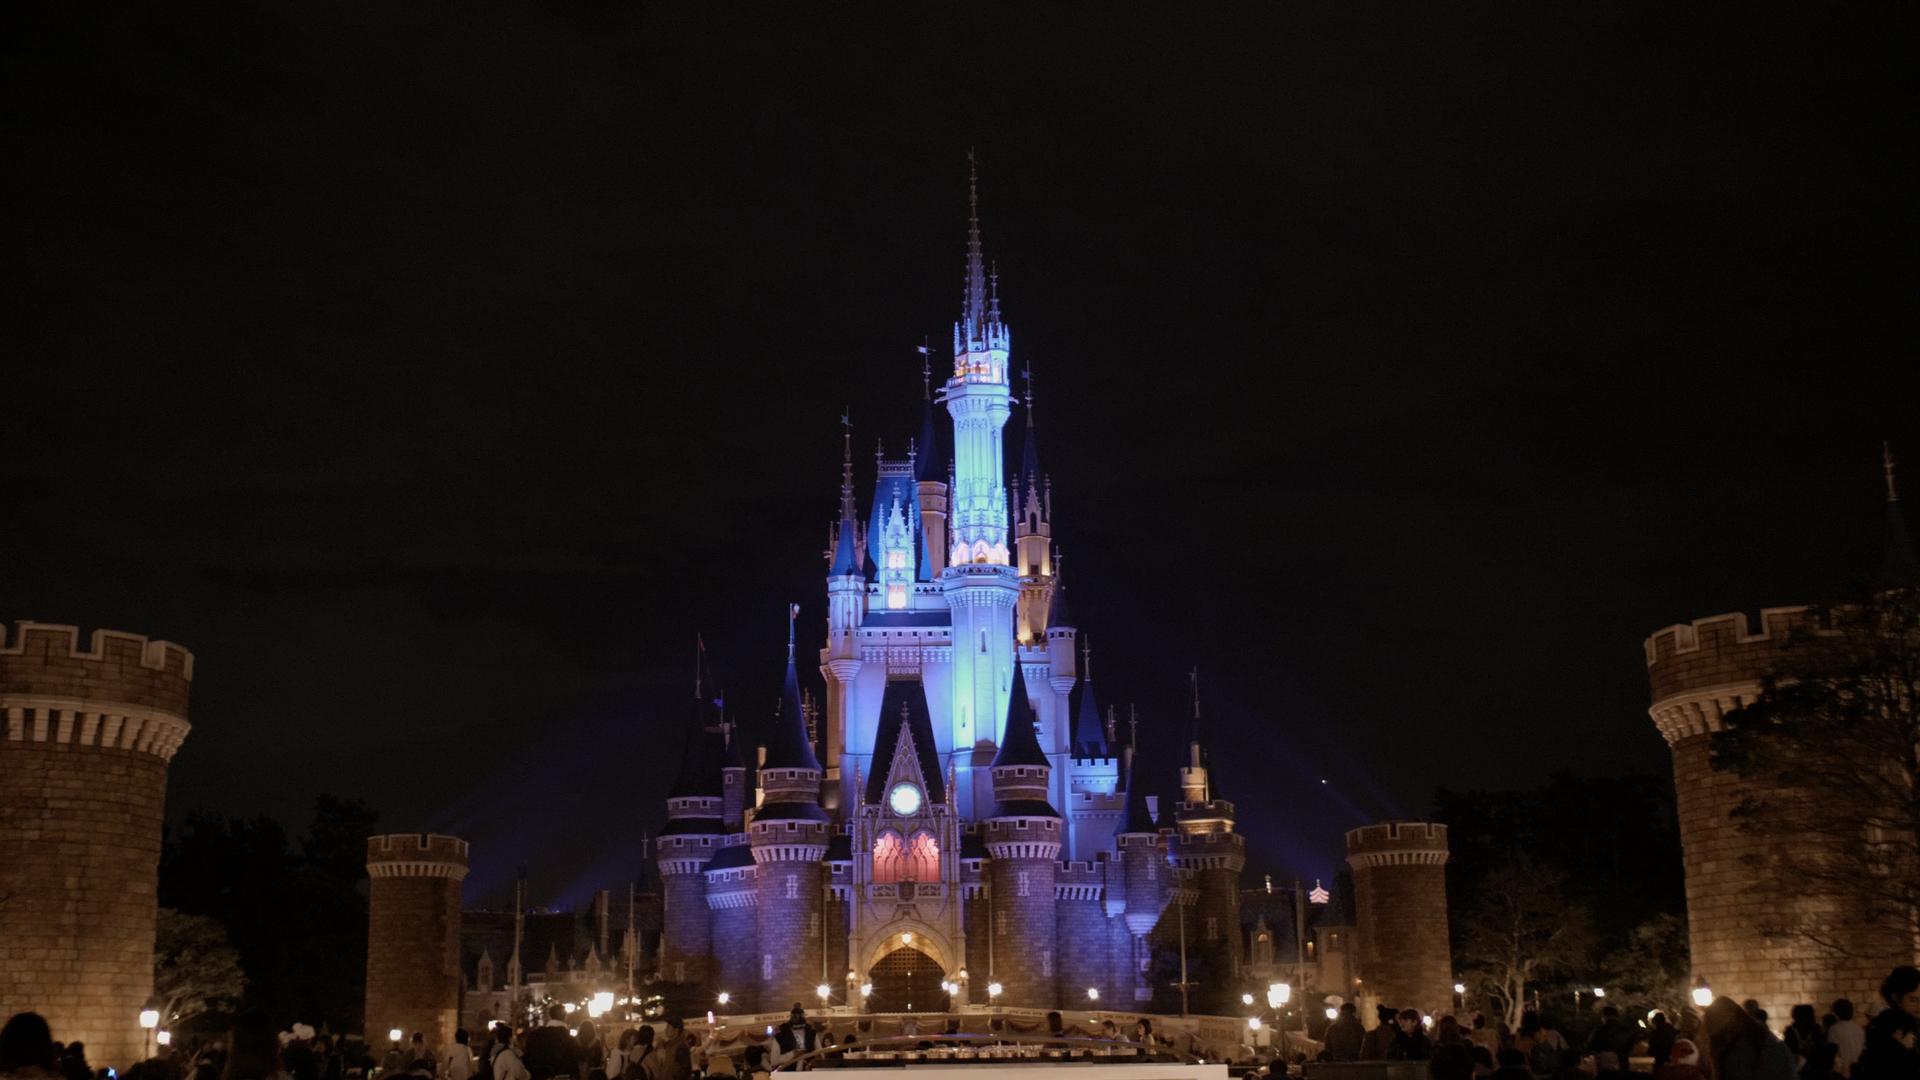
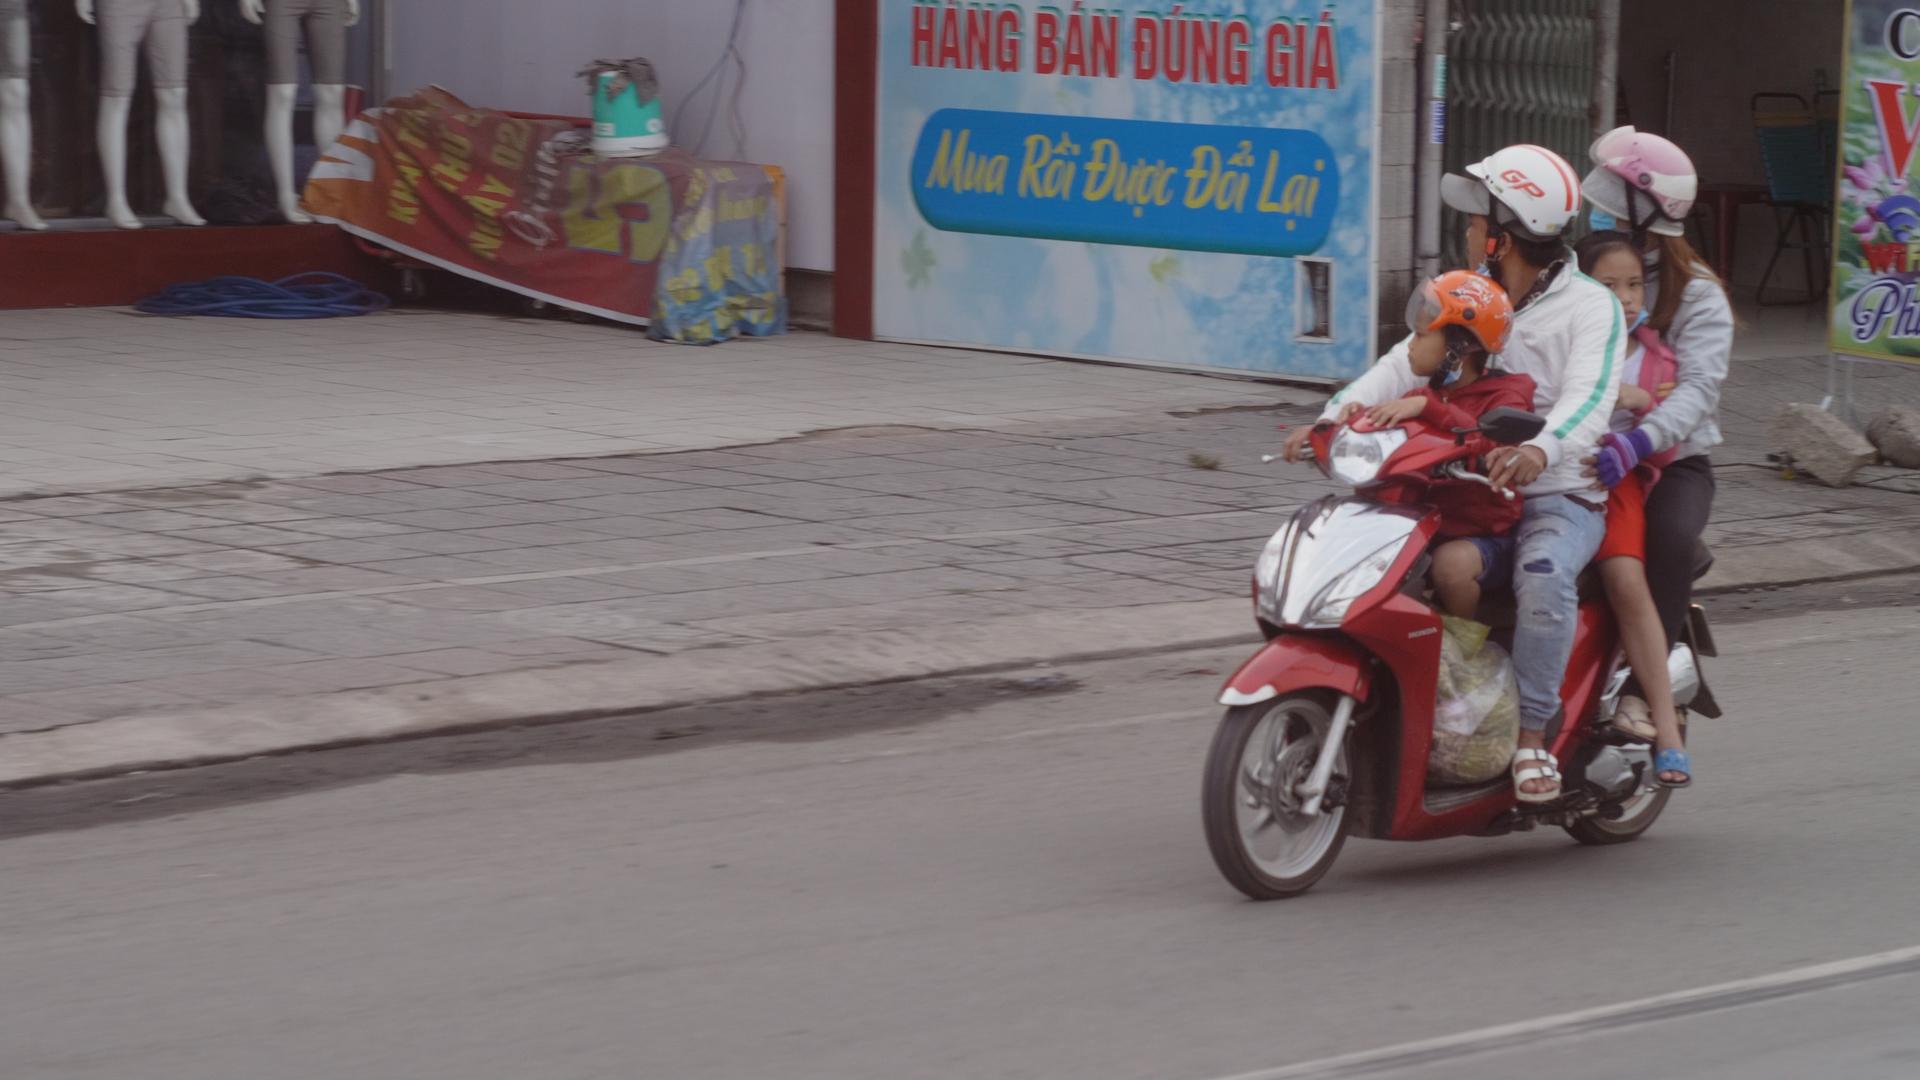
@webrunner5 - I agree, there is something special about 16mm. I think that you can make a great argument that there is something special about every focal length, because in the hands of the masters all are capable of beauty and wonder. I've chosen 16mm, 35mm, and 80mm lengths, but @mercer makes a very strong case for 28mm, and if @BTM_Pix wasn't trying to make every app and gadget not yet on the market I suspect he could make a strong case for basically every other length! You've inspired me to have another look through some footage from our trip through Asia last year and post some stills. Not that I'm anything even in the same universe as a master, but I've managed to luck my way into some nice shots, proving that it's more about what you put in front of the lens than the operator. These are ungraded, apart from some quick WB and contrast, and GH5 10-bit HLG. 16mm equivalent (SLR Magic 8mm f4): I love it because it's wide, but also because it distorts things so things look grander (like the first shot), but you have to be careful not to over-do it: 35mm equivalent (Voigtlander 17.5mm f0.95): I especially like the 35mm for environmental portraits, and having a fast aperture allows great low light performance as well as subject isolation. I also took a 116mm equivalent lens on that trip (58mm Helios) but have since changed my longest length to an 80mm equivalent (Konica Hexanon 40mm f1.8) because 116mm was a bit too far from the 35mm equivalent of the Voigt. 116mm equivalent (Helios 58mm f2): I find the large aperture is useful for low-light, but also for getting shots through glass and defocusing the marks on the window sufficiently (the scooter shot was through a bus window). I'd only contemplate going back if I could only have one lens... fortunately that isn't the case! ???
-
Free beats not-free most of the time. Of course, there's no such thing as free, considering that our time has value, as does the opportunity cost of only getting to shoot something once, but we all trade these things off when we make judgements about what will suit us best. @Emanuel great stuff - keep shooting @webrunner5 nice car!
-
Absolutely. I think it depends on if you tend to work more in-camera or in post. I've been working on the idea of cropping / reframing / stabilising in post for some time now and I must admit that I'm pretty useless at actually shooting wider than what I want so that's a skill I need to work on. I spent so long doing stills photography that I have an unconscious sense of composition - not that I'm great at it, but more that it's something that happens without me really thinking about it, which means I find myself composing in the viewfinder and not shooting wider like I had planned!
-
I agree. I think 8K is more likely to be used as over-capture, in much the same way that 360 video will be, and 48kHz DAT tapes were and DSD bitstream now is for recording music.
-
IBIS / OIS and software stabilisation are completely different things. If you're shooting with a slow-shutter (anything approaching the 180 degree rule) then you will get motion-blur during the exposure that software stabilisation cannot eliminate. You have to basically choose between: 180 degree (or 90, 45, 20, 10) and one or more of IBIS, OIS, gimbal, tripod, shoulder rig, slider, etc Stupidly fast shutter speeds and software stabilisation There's a reason that software-only stabilisation has really only been applied to cameras that are used for outdoor daylight filming and expose with shutter.
-
OUCH! Who knows what damage control really means, unfortunately for some large companies it just means marketing rather than actually fixing the problems. Depending on how difficult it would be to fix various bugs, the Return On Investment (ROI) of just advertising more might be better than the ROI of working out what problems people have, diagnosing the problems, fixing the issues, then having to do the PR to make people aware that things are better. I remember reading somewhere that those companies that used to advertise products on TV in the 80s (like those silver spray-on paint stuff that would stop leaks) basically didn't work and they made money because people couldn't be bothered to return the product. Unfortunately economics sometimes works out in rather disheartening ways. I'm waiting for 16 to come out of beta and then start using the new page to get some edits done. Creating an assembly is the bottleneck of my whole workflow and is the part I dread and stops me from being productive.
-
So, this thread has been on my mind, but being that I'm an introvert who mostly doesn't leave the house, and also that my family aren't interested in being on-camera and neither am I, I've struggled to think of cool ideas for this challenge. The reason that I've been trying to push myself to do more stuff like this is that if you practice when it doesn't matter, you will be better for when you're on a real shoot and it does matter. When I was doing stills photography I joined some photography Meetup groups, and that was really cool, but there aren't equivalent groups for film-making. This video is interesting, talking about how to train as a film-maker, listing a number of 'drills': TLDR: Practice setting up your camera rig, which helps with making sure you can do it quickly and don't forget things Mess up your camera settings deliberately then practice setting them all back to normal Practice manual focus, even if you use AF most of the time, MF is still something you probably need occasionally Practice moving shots, especially if you're hand-held or using a gimbal, but sliders and tripod moves too Practice going into new locations and finding compositions Same as above for lighting Get some work and do it, even if you're working for free it's great because there aren't high expectations, but weddings are also great because you have to do everything well and also quickly Sports people train to get better, so why wouldn't you do that as a film-maker... an hour a day would really help Interesting list of things, with an emphasis on speed (IIRC Matti has a documentary background so he talked about needing to work quickly) which can only be a useful skill.
-
It wouldn't surprise me if Adobe are advertising heavily to people searching for Resolve. I'm not a PP user, but from what I've read here, they are in damage control territory.
-
Tricky question. I'd be torn between the 17.5mm 0.95 on my GH5, vs a fast zoom and having to go to APSC or FF. Even then I'd have trouble choosing between a 24-70 or a 16-35. I really like 16mm, 35mm, and 80mm lengths, and having to choose between 16 with it's 'wow' factor vs something longer than 35mm would be tricky. I'd probably go the 16-35 and then go 8K ASAP to be able to crop in and extend the lens.