Llaasseerr
Members-
Posts
347 -
Joined
-
Last visited
Content Type
Profiles
Forums
Articles
Everything posted by Llaasseerr
-
You're right, they are defined and that's what allows us to transform in and out of them to other colour spaces. It's not like we have to work in linear floating point in ACES gamut, Rec2020 or Alexa wide gamut, but to me working in ACES is a kind of lingua franca where the mathematics behave in a simple predictable way that is the same as the way exposure works in the real world. And under the hood, the Resolve colour corrections are still applied in a log space (ACEScc or ACEScct). I'm not saying it's perfect, but it makes a lot of sense to me. The caveat though is that more often than not, an image that is represented as sRGB or Rec709 has had a linear dynamic range compressed into the 0-1 range not just by doing a transform from linear to sRGB or linear to Rec709, because that would cut out a lot of highlights. So there's some form of highlight rolloff - but what did they do? In addition, they probably apply an s-curve - what did they do? Arri publishes their logC to Rec709 transform which is via their K1S1 look, so this is knowable. But if you transform logC to Rec709 with the CST it will do a pure mathematical transform based on the log curve to the Rec709 curve and it will look different. So basically, to say an image is sRGB or Rec709 isn't accounting for the secret sauce that the manufacturer is adding to their jpeg output to most pleasingly, in their mind, shove the linear gamma/native wide gamut sensor data into the "most pleasing" sRGB or Rec709 container. Sorry if you knew all that, I'm not trying to be didactic. Just as a side note, Sigma apparently didn't do this with the OFF profile, which is both helpful and not helpful (see below). I stated before, that the work Adobe did with CinemaDNG and the way a tool like Resolve and a few more specialized command line tools like oiiotool and rawtoaces interpret the DNG metadata, is based around capturing and then interpreting a linear raw image as a linear-to-light scene referred floating point image that preserves the entirety of the dynamic range and the sensor wide gamut in a demosaiced rgb image. Not that Cinema DNG is perfect, but its aim is noble enough. What you're describing with shooting a chart and devising a profile is what the DNG metadata tags are meant to contain courtesy of the manufacturer (not Adobe), which is why it's a pragmatic option for an ACES input transform in absence of the more expensive and technically involved idea of creating an IDT based on measured spectral sensitive data. If you look in the DNG spec under Camera Profiles it lays out the tags that are measured and supplied by the manufacturer. Separate from that is the additional sauce employed in the name of aesthetics in Lightroom, and above I described the process by which the manufacturers add a look to their internal jpegs or baked Rec709 movies. And what does it matter if there's something extra that makes the photos look good? Well I'd rather have a clean imaging pipeline where I can put in knowable transforms so that I can come up with my own workflow, when Sigma have kind of fucked up on that count. What I will say about sigma's OFF profile that was introduced after feedback, is that as best I can tell, they just put a Rec709 curve/gamut on their DNG image almost as malicious compliance, but they didn't tell us exactly what they did. I mean in this case, they did not do any highlight rolloff, which in some ways is good because it's more transparent how to match it to the DNG images, but also unlike a log curve the highlights are lost. So the most I've been able to deduce is that by inverting a Rec709 curve into ACES that I get a reasonable match to the linear DNG viewed through ACES, but with clipped highlights. But for viewing and exposing the mid range, it's usable to get a reasonable match - ideally with another monitoring LUT applied on top of it for the final transform closer to what you would see in Resolve. And I absolutely don't want to say that we all must be using these mid-range cameras like we're working on a big budget cg movie, thus sucking the joy out of it. But like it or not, a lot of the concepts in previously eye-wateringly expensive and esoteric film colour pipelines have filtered down to affordable cameras, mainly through things like log encoding and wide gamut, as well as software like Resolve. But the requisite knowledge has not been passed down as well, as to how to use these tools in the way they were designed. So it has created a huge online cottage industry out of false assumptions. Referring back to the OG authors and current maintainers pushing the high end space forward can go a long way to personal empowerment as to what you can get out of an affordable camera.
-
Yes, agreed - just protect the highlights and shoot good stuff. Do the work figuring out where the sensor clips, and expose accordingly even if you can't see that while monitoring. But we have been spoiled by being able to monitor a LUT-ted log image so we can see while shooting exactly what we will see in Resolve, if the colour pipeline is transparent. I have that with the Digital Bolex and fundamentally it's the same in that it just shoots raw DNGs. As for imperfect scenarios, I do find that there are so many stressful factors when shooting a creative low budget project with some friends that having to babysit the camera is a real killer to the spontaneity, rather than just being able to confidently know what you're getting. I think what possibly interests me is shooting with an ND and using the exposure compensation to see if that would allow capturing the highlights but at least viewing for the middle. Would need to try it out. I personally don't like the whole ETTR approach because your shots are all over the place and IMO you then really need to shoot a grey card to get back to a baseline exposure, otherwise you're just eyeballing it. To your larger point, this camera really does seem like something that can just spark some joy and spontaneity because it's so small to be carried around in your pocket and whip out and do some manual focus raw recording, with some heavy hitting metrics in comparison to a Red or a Sony Venice. I get that. I do really feel though that Sigma would not have had to do too much work to make it more objectively usable at image capture, and after its announcement I was interested to give feedback prior to the release, but I didn't know how to get my thoughts up the chain to the relevant people. Then when it was released, they seemed to have made all the classic mistakes.
-
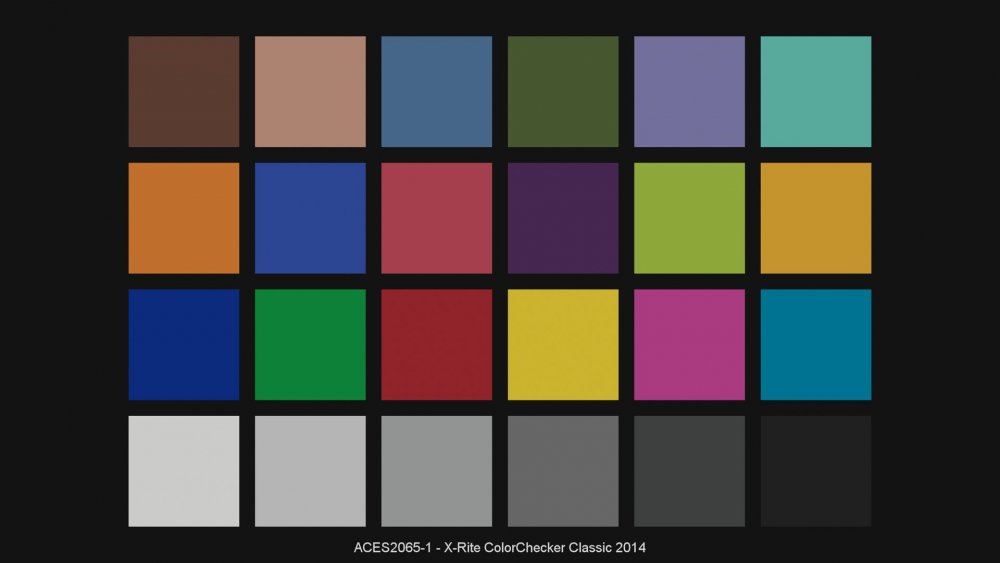
Just as a follow-up, I want to reiterate that I only posted the ACES Rec709 rendering of the colorchecker as a point of comparison to the Rec709 ACES "OFF" image I posted that had the colorchecker in frame, so that people could look at an idealised synthetic version of the colorchecker vs an actual photographed colorchecker in the scene that had gone through the same imaging pipeline. So relative to each other, those two images were able to be compared. There definitely was nothing absolute about the RGB values of that colorchecker I posted.
-
The metadata in the DNG provides the transforms to import a neutral linear image in the sensor native gamut. Anything Adobe adds on top of that is purely their recipe for what "looks good", and in a film imaging pipeline, typically a cg-heavy film, those source image that have been processed through Lightroom will typically need the Adobe special sauce hue twists removed so that the image is true to the captured scene reflectance.
-
Sorry for the misunderstanding, I'm not saying that it's a variable, I'm saying it's a constant. I got the impression that others were saying it was a variable and I'm saying I'm cutting that out. And to be clear, I don't need to know the RGB integer value of middle grey in any of those other color spaces if I know that it's 0.18 in scene linear. Checking exposure is also infinitely easier in linear space because it behaves the same as exposure does in the real world. That's the beauty of scene referred, linear to light imaging. The other values you're talking about are display referred, not just influenced by luminance but also the primaries, that could change the RGB weighting. So there's plenty of room for confusion. I've worked on a lot of very large blockbuster films for Disney, Lucasfilm, etc and helped set up their colour pipeline in some cases, so I know what I'm talking about.
-
You're right, it shouldn't be this difficult, but Sigma have not published any accurate information about the camera's colour science and I don't think they even really know about the camera's spectral characteristics or how to communicate a modern colour science pipeline to a DP even though they claim it's aimed at professional DPs who can use the camera properly since they know what they're doing. It depends on how accurate you want to be and how predictable you want your workflow to be without just twiddling knobs in Resolve on a per-shot basis until it looks good. I'm happy with the baseline accuracy I get with DNG tags being interpreted in as ACES project in Resolve. At least that's why I started posting in this thread, was to tell other people that it was a valid starting point that's not gaslighting you. But then I started being told by other users about the weird inconsitent behaviour with ISO and variance as to how it behaves whether capturing internally or with a Ninja V. Then the fact the false colors don't update in some cases between ISO 100-800, or the fact that the DNGs look different based on whether the colour profile is set to ON or OFF. Also the complete lack of ability to monitor the highlights, I guess unless you underexpose the image with an ND and add a LUT n an external monitor to bring the exposure back up to where it will be in post. Having said all that, it's still a great, intriguing camera. I would really like it if this and the FX3 were smushed together with an extra stop of dynamic range.
-
A note of caution about the Adobe profiles ( I assume you mean the ones that come with Lightroom) is that they apply a hue twist to the DNG metadata to make it "look good". So if the goal is to get a baseline representation of the scene reflectance as captured by the sensor as a starting point to say, transforming to Alexa LogC, then you're going to get a more accurate transform based on as neutral a processing chain as possible. So the linear raw ACES image through the default output transform LUT for the viewing device may look neutral and somewhat unappealing. Although sometimes it looks fucking great with some cameras - IMO the Sony a7sIII/FX3/FX6 just look great through the default ACES IDT/rrt/odt. I mean with this camera, the linear raw ACES image basedon an "OFF" DNG actually looks a tad desaturated. I don't know for sure though, without more tests, if that's really the case. The aim would be to then apply an additional look modification transform if necessarty (additional contrast and saturation, pront film emulation, etc) to get the look that you want. It will also be worth comparing how the interpreted DNG "OFF" image compares to the captured ProRes RAW "OFF" image, ie. are they the same? Did Atomos improve on anything? etc.
-
I got the linear ACES image from the colour-science.org github repository: https://github.com/colour-science/colour-nuke/tree/master/colour_nuke/resources/images/ColorChecker2014 The author and maintainer is one of the core ACES contributors and is also a colour scientist at Weta. There are definitely variables though, yes. For example, I output to Rec709 based on the ACES rrt/odt, so it's been passed through the ACES procedurally generated idealised "film print emulation" which is somehwat like Arri K1S1, but more contrasty. And since the output intent is for Rec709, it's going to be different to your sRGB rendering. Additionally, it would obvously be easier to view these both with or without the borders because that affects perceptual rendering by our eyes. I try to cut out variables such as "what is the value of middle grey" by viewing camera data in linear space and in a common wide gamut - ACES is designed for this. It's meant to be a "linear to light" representation of the scene reflectance. So it cuts out the variables of different gamma encodings and wide gamuts (Adobe, et al) for a ground truth that can be used to transform to and from other colour spaces accurately. While I pasted a Rec709 image, it's a perceptual rendering viewed in an sRGB web brwoser, but I just saw it as a rendering relative to the other Rec709 images on this thread. Ultimately, I would check the colour values in ACES linear space underneath the viewer LUT in Nuke. For example, on my Macbook Pro, I have the ACES output transform set to P3D65 but the underlying linear floating point values never change. To get this scene linear data is why a white paper is necessary from the manufacturer. At minimum it would describe a transform through an IDT, or ideally it would be through measuring the spectral sensitivities for that particular sensor. So since the Sigma fp doesn't have that, the fallback solution of Resolve building an IDT based on the matrices stores in a DNG file is a next-best option compared to a dedicated IDT based on measured spectral sensitivity data. At this stage, the notion that an ACES input transform of a Sigma fp DNG image is accurate is based on Sigma putting accurate metadata there. I'm fairly positive it's solid though, based on the large format DP Pawel Achtel's spectral sensitivity tests comparing favourably against other cameras like the original Sony Venice. I also would not measure a colour in RGB intenger values, but rather floating point values where for example, 18% grey is 0.18/0.18/0.18 as an RGB triplet. I can sanity check my scene exposure and colour rendition by exposing with a light meter and importing the resulting iamge through an IDT, and checking the grey value exposure is close to 0.18. I can then balance the grey value to a uniform 0.18 in each channel, and then see where the other chips fall, to get an idea of what kind of "neutral" image a camera creates as a starting point before applying a "look", such as a print film emulation that requires an Arri LogC intermediate transform. The level of accuracy I'm describing is at a baseline level to get a decent image without too much effort or technical knowledge required - definitely enough for us here!
-
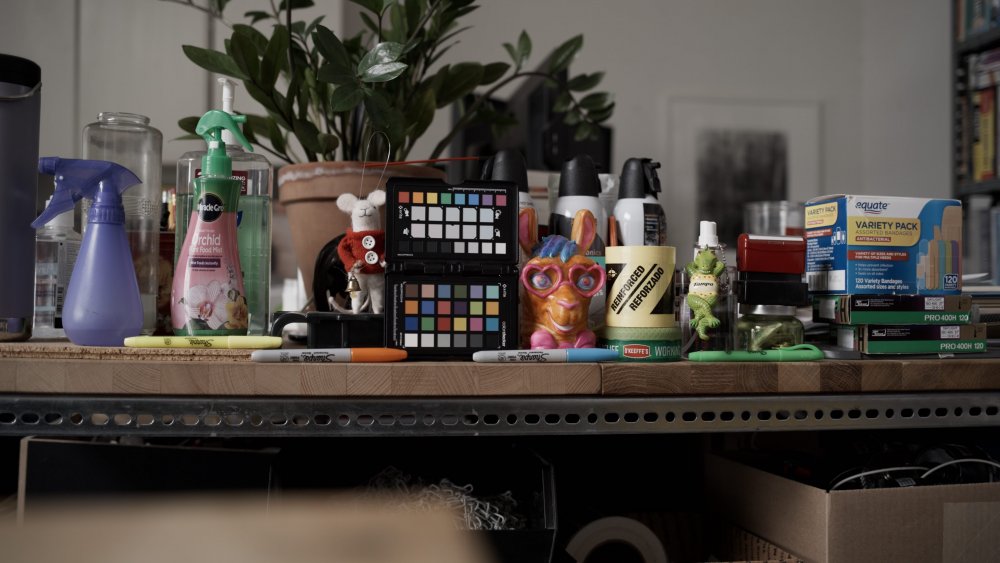
This image shows how an idealised colorchecker chart looks rendered through ACES AP0 with a Rec709 display target.
-
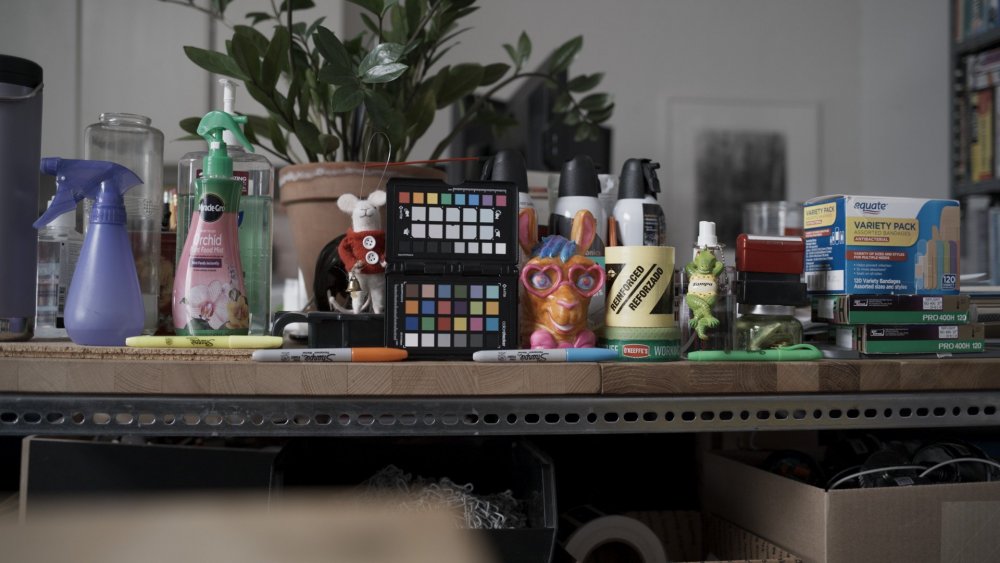
Here's a version of OFF through ACES with a Rec709 target that may not be right for web viewing, but it can be compared a little more easily to what @Ryan Earl is posting. I also did a minor adjustment to exposure based on setting the grey chip closer to 0.18 in the RGB channels.
-
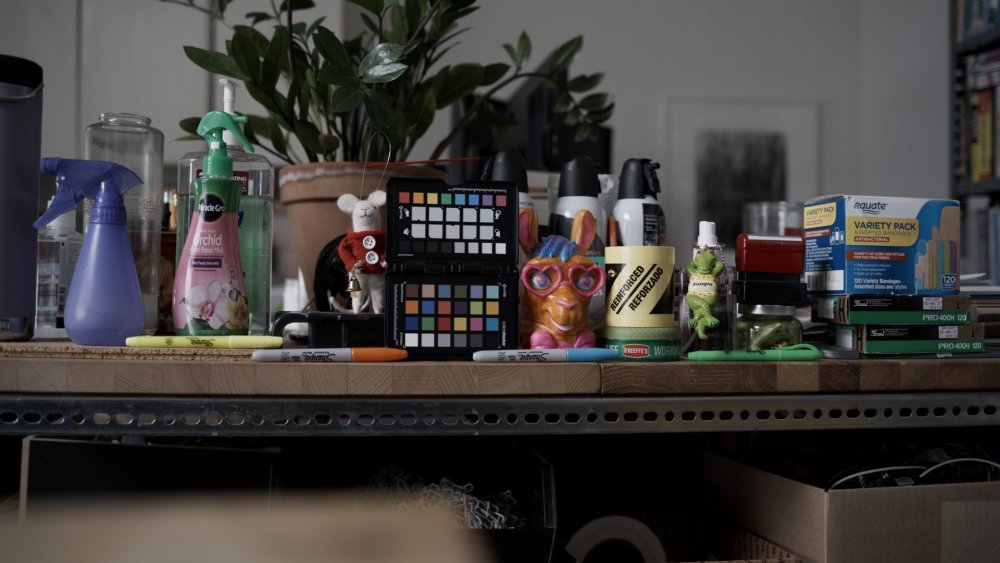
Thanks for the reality check there. I've attached the "OFF" image imported through ACES with the sRGB output transform applied for web viewing, and it is more neutral in its rendition of the Macbeth chart. Note: the exposure isn't quite matching this time, but you get the point. I haven't been able to extensively compare DNG to the internal mov recording when both are set to OFF since I also don't own the camera. But from some comparison images posted a while ago, I was able to get the internal mov and the DNG matching closely by just doing an inverse Rec709 transform on the internal mov. The colors did look slightly desaturated, but that might have been perceptual because the other profiles just have more pop.
-
The methods are quite similar, but ACES is probably more simple to manage if its used in its own project. If I was going to output to Alexa log, I would also start in ACES to get there. It does manage things like the gamut and the highlights more seamlessly. I've been looking at the CIE chromaticity chart a lot more to check what the gamut is doing between operations. It's useful in unmanaged projects especially, to check there's no clipping to a smaller gamut like Rec709 before final output.
-
Setting the RAW to Linear/P3D60 and setting the output transform to Rec709/gamma 2.4 is very close to what ACES is doing when viewing/rendering for a Rec709 intent. The main difference with the underlying linear images is that the ACES gamut is larger than P3. I've attached two screengrabs of the linear image stopped down by -1 stop to see the highlight detail and it looks the same. The P3D60 is the more saturated one. The ACES one looks less saturated without the native gamut transformed to the output device. One thing I've noticed in the "linearP3D60 to Rec709" version vs the "ACES linear to Rec709 ODT" version is that the highlights appear to be clipping because the CST does not provide any highlight rolloff except the tone mapping, which is not quite getting the highest values - whereas the ACES rrt/odt includes an aggressive highlight rolloff. A non-ACES method that preserves the highlights would be to CST transform to Alexa logC/AWG and disable tone mapping, then apply the Alexa 709 LUT. ACES rrt/odt highlight rolloff CST tone map ACES linear -1 stop (for visualisation only) P3D60 linear -1 stop (for visualisation only)
-
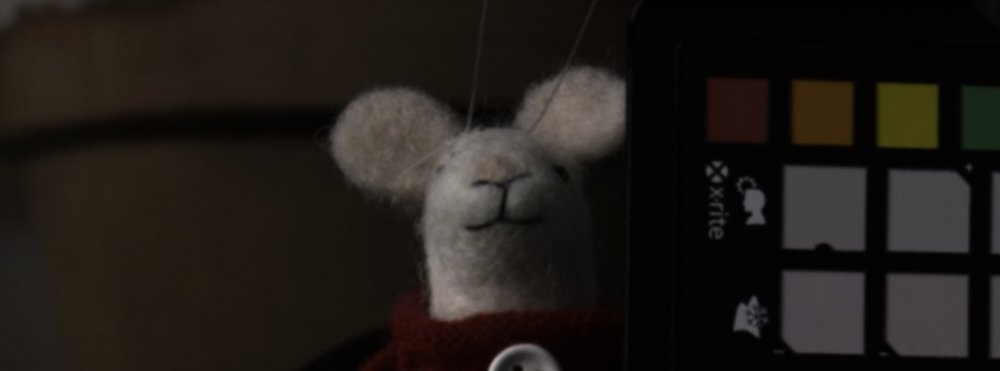
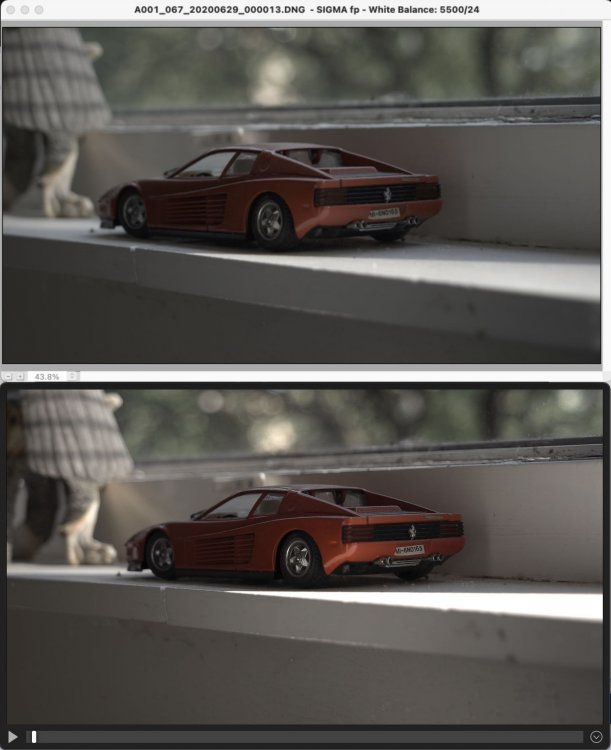
I think you're on to something with this. I think "ON" is better. I think the "OFF" image is displaying a native wide gamut image in "Sigma gamut" and we don't know what the transform is. It doesn't seem like it's accounted for in the DNG metadata when in "OFF" mode. Having said that, the ACES "OFF" version looks to me like the mov "OFF" version that I've seen before (in the toy Ferrari images) with the desaturated color space. So in that sense it's consistent? But not what we wold want. Here are the two images exported as srgb with the default ACES look and output transform. The "ON" version is very close to your "ON" version. There is an issue where the look transform at the end is flattening the highlight detail on the piglet doll's face, but when the file is viewed in linear space, the detail is there. So that could be fixed. OFF ON
-
Okay, you probably stated this already that if it measures the value directly off the sensor then it's not factoring in the ISO push. I guess what is needed is for the false color to work in a CineEI mode where it reflects the preview. Like CineEI on Sony pro cams, it's just the base ISO but the preview can show an adjusted ISO value that is just written as metadata and reflects what you would do in post. It could be done predictably with a false color LUT, probably. Since that would be applied after the preview picture exposure change.
-
Interesting, because Sigma touted "off" mode as the closest profile to the raw DNGs, but maybe you're on to something. I'll admit I'm set in my ways with developing DNGs via ACES and I find DaVinci Color Managed unintuitive and confusing. But I'm used to using ACES on commercial projects and using it with Nuke plus other tools. For a whole film color pipeline, no-one uses DaVinci Color Managed, but for projects contained in Resolve I see how it could be valid. Can you upload these images and I can put them through ACES and post them here?
-
Okay, that is really weird. So visually, as you dialed up the ISO the image got +1 stop brighter on the Ninja V but the false color was still monitoring the underlying base ISO? In my mind, as you increase ISO you increase the highlight clipping point and simultaneously get noisier shadows, assuming ISO invariance. The test you sent me bears that out, but the max highlight value did not increase at a full stop per ISO increase - so that seemed strange. But it's great that you got that consistency and repeatability now, by doing tests with your light meter to sanity check. I will need to come back and read your posts if/when I get the camera so I can fully appreciate it. I mentioned that my existing method for sanity checking has involved a basic light meter reading to set a general exposure for middle grey, and verifying with my grey card that it hits 0.18 when developed to a linear image. And also ideally that the green of the false color hits the grey card when monitoring.
-
Thanks for showing that shift, it looks like a gamut mismatch. I mean, it seems best to rely on the "none" mode. Re: transforming to BMD/BMD Film in the RAW tab, actually it's so long since I looked at it and I see it's not even a log curve any more. It seems to be putting the image into a display space immediately, which is not the result I would expect.
-
That makes some sense, thanks. I saw this dpreview post recently (possibly this is old info here, not sure) and I wasn't sure if it was just applicable to photo mode. I'm referring to the spreadsheet in the first post: https://www.dpreview.com/forums/thread/4556012 I haven't cross checked it with what you posted before, but this seems like a legit source from Photons to Photos.
-
Ok, thanks and I'm sorry for jumping to conclusions. Basically my point with using the ACES input transform is that it will take into account the native sensor color space and embedded metadata to make a more informed colour transform, and that BMD Film is not important in that context. I think people see a linear image in Resolve and it looks blown out and they freak out, but that's because linear is not designed to be viewable. BMD Film is bringing an image into a viewable log range, but for example in ACES (and probably a managed Resolve workflow) you can place a non-destructive view transform on the viewer as a preview, and retain the full linear data. Or transform to log, that's perfectly valid too. My issue with BMD FIlm Gen 1, is did BMD ever publish their log curve and colour gamut? I don't think they did. So in my mind it's better to use something like Alexa logC/AWG. If it's a technically accurate transform from linear toa known log curve with a white paper, and the linear input is a technically accurate transform from the raw, then the image integrity has been maintained and you know where you stand.
-
Do you mean the exposure looks the same on the Ninja V screen? because I understand that 800 image is shot at ISO 100, but in my mind it's pushed +3 stops right? I guess I would understand if it was in front of me. False color aside: My observation about the clipping point of ISO 100 being around 3.5-5 is based on looking at the DNGs, so I was thinking that it would be applicable to the Ninja V recording too - but perhaps not, maybe that is (sadly) apples to oranges. Basically if I pushed an ISO 100 DNG by +3 stops to emulate what you're talking about with ISO 800, the highlights would clip much higher as I mentioned. But this is all theoretical until I have the camera.
-
I believe your criticism is directed at me, lol. I'm not saying they're ruining the colour, I'm saying that they did not have a workflow as to how to monitor and develop the DNG output.
-
It's more simple than that. If you look at a DNG image with the "OFF" profile (I could it "none" before by mistake) in DNG Profile Editor, it's visually very close to a similar mov shot with the "OFF" profile. I'm basing that on some comparison images uploaded a few years ago on this forum. So really, all they did was turn off any image processing and add a Rec709 or sRGB or 2.2 gamma to a linear image and then baked that into the internal .mov files for the "OFF" profile. All BMD have done with offering to view as BMD FIlm is they've allowed a direct translation to their log curve from the RAW tab. But you can transform to any log curve/gamut with an IDT predictably with an ACES project. Admittedly I was not aware that the DNGs looked different when the profile is not set to "off" - how so?
-
No
-
Ok, thanks for confirming that. The difference then would be the PQ vs native for the monitoring mode, but I assume that would not affect the image anyway. For some reason the file I downloaded is saying that the intermediate log curve (oetf) and gamut are Vlog/Vgamut. But ultimately, I think the image is linear gamma/sensor native gamut, because the Vlog reference is just in the metadata. So in that case, assuming accuracy the highlights are clipping at 10.2 as a linear value at ISO 800, which from what I understand form what you said, is ISO 100 pushed 3 stops. So this is only a bit lower than where Sony cams typically clip with Slog3 recordings (11.7). Theoretically, if the highlights clipped at at ~3.5 to 5 as a linear value in an ISO 100 image, then if you pushed it +3 stops then the max value would be somewhere between ~28-40. So I'm not sure if it would be better to try and manually cheat with a -3 ND and shoot at ISO 100 instead. Just thinking out loud though.


