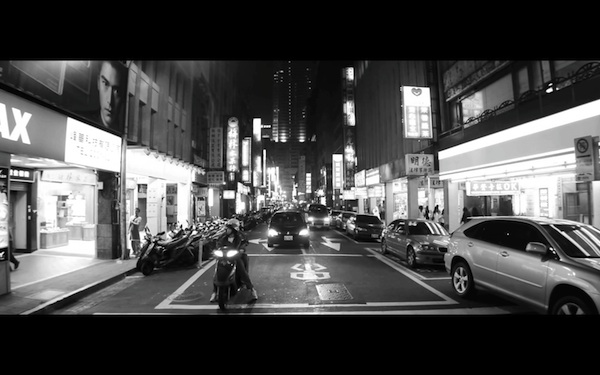
Here at EOSHD I am a bit fan of widescreen cinema. When I shoot, I think of the greats of cinema like Hitchcock and Kubrick, and I not only find it fun to try and get the best out of the GH1 – but to get something unique. The look and feel of super-wide screen shooting with anamorphic lenses is unique, and very very cinematic.
At the moment, normal 16:9 widescreen is ubiquitous and everybody is doing it. So get ready to step away from the crowd and let’s investigate proper cinema widescreen with some real life shooting!
Mastering Aspect Ratios
Anamorphic lenses are simply wide converter lenses (Iscorama, Kowa, Sankor, LA7200) or prime lenses (LOMO 35mm for PL mount), which are wider horizontally than they are vertically.
They squash a wider view into your image horizontally, so when you compress the height down in Final Cut Pro afterwards you can achieve the undistorted widescreen aspect ratio of 2:35 which the lens was designed to do.
The GH1’s video mode is 1920×1080 in a 16:9 aspect ratio. If we want true 2:35 from a 16:9 sensor, we need an amamorphic lens.
Normal Widescreen TVs have been around for ages now, and nearly everybody is accustomed to watching TV and DVDs in 16:9 widescreen. This format, termed with a ratio (16:9) took over from the standard none-widescreen 4:3. But the cinema standard has always been wider than 16:9. Typical cinema widescreen is termed 2:35 and that’s why we need anamorphics on our 16:9 cameras. Lovely!
Anamorphic lenses are not just a way of getting a wider image out of your camera, they have their own unique stylistic attributes like horizontal lens flare.
The GH1 has an advantage over the usual image sensors, like the Micro 4/3rd chips (4:3 ratio) found in the G1 or GF1 or even 3:2 aspect ratio sensors like in the 5DMkII – in that the shape of it’s sensor extends wider, to accommodate true 16:9 widescreen video recording and at the same time being tall enough to fit in true 4:3 and 3:2 for stills as well! This capability is also available in stills mode so you can take photographs in widescreen 16:9.
With an 1.33x anamorphic lens therefore, we can convert the GH1’s 16:9 capability into TRUE 2:35 cinema widescreen.
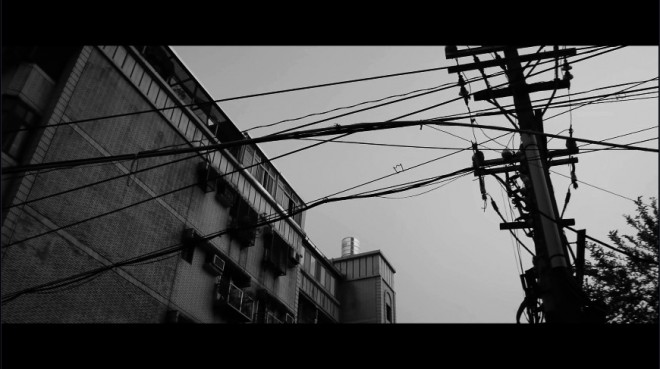
There are more expensive options around – pairing a 3:2 Canon 5DMkII full frame sensor to a 1.5x Iscorama is very nice indeed but has two disadvantages:
– Not as flexible. You have to focus both lenses (the Iscorama and camera prime) to achieve focus – so slow!- Due to that, you cannot rack focus (adjust focus during a shot to shift attention from one part of the frame to another)- You lose more resolution with a 1.5x anamorphic lens (see below)- Expensive. Iscorama and 5DMkII plus a decent prime would set you back over $8000.
The wider the anamorphic lens, the more resolution you have to loose because you squash the height of the image more and more to return the image to undistorted proportions. So the wider your aspect ratio, the narrower (less tall) your vertical resolution will be. 1080p can suddenly become 540p. 1.33x indicates how much wider the anamorphic lens is width wise. So to avoid low vertical resolutions and to squash less, use a 1.33x or 1.5x anamorphic. 2x is pretty extreme – can look nice – but I feel it’s more of a novelty for the one off project. I have a 2x anamorphic Panavision lens on it’s way from Los Angeles which is designed for 16mm film cameras, and I will be testing this soon.
An anamorphic lens is only wider in the horizontal direction and the angle of view from top to bottom remains the same. The Panasonic LA7200 adapter I have for the purposes of this article is 1.33x, while other options such as the Iscroama is 1.5x and the Sankor / Kowa lenses are 2x.
An added bonus of having an anamorphic lens on the GH1 is related to still photography – you can turn taller 4:3 images into 16:9 (with the usual DSLR format of 3:2 lying in between).
Using The Panasonic LA7200
So with the ground knowledge out of the way, lets bolt on our lens and see how it performs.
The LA7200 was designed for the DVX100 4:3 aspect ratio DV cam of yesteryear. A good camera with a nice look. This lens was designed to convert the 4:3 aspect ratio into 16:9 widescreen. Because the DVX100 was a small chip camera, it didn’t have as much shallow depth of field as the GH1 or 5DMkII are capable of. Therefore you’ll find that shallow depth of field is best avoided when shooting anamorphic footage. You can still achieve a sharp image, it’s just that the out of focus areas of the image to the left and right look a little bit smeared and odd.
I am using as my main lens – a Canon 10-22mm EF lens at F3.5 – I set this to 15mm to avoid bringing the edges of the anamorphic lens into view. When an anamorphic lens vignettes, you get black side bars – and at extremes, curved top and bottom black bars like in the EOSHD logo!
The Sankor and Kowa anamorphic lenses which are popular alternatives to this and the Iscorama are designed for 16mm lenses and will vignette more easily than the Panasonic LA7200.
All the accounts of the LA7200 I’ve found say that the lens cannot focus closely. I have found this isn’t true, with the Canon 10-22mm lens. You can get really close – almost macro, 2 inches and achieve perfectly sharp focus. Good for close up / portrait shots and no need to fit a diopter like on the focussing anamorphic lenses, such as the Iscorama (and unfit when not needed!! What a hassle).
Now, not wanting to inflate eBay prices to high!! I am in the early days of shooting with this lens, so I cannot yet give a true picture of it’s strength. Can it produce Iscorama + 5D rivalling 2:35 widescreen footage? I am encouraged so far, but the footage and verdict will come later in part 2.
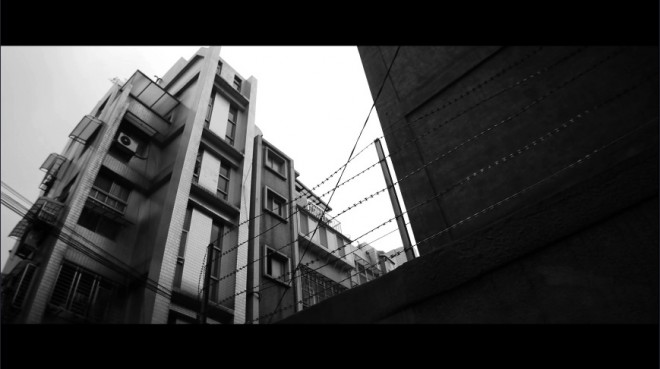
As for fitting the lens… the only tricky part is finding a filter where you can take out the glass and any metal ridges which petrude into the centre of the filter to hold the glass. You need a long front thread to grab the strangely recessed thread on the LA7200. It won’t screw directly onto your main camera lens because of this. I used a Kenko Softon II (A) 72mm filter with the glass removed and took out the inner fixing ring (be VERY careful! – I cut my finger despite being quite careful – this glass is very sharp when broken). One generous shop here in Taiwan gave me a broken B+W filter to play with. This was an expensive filter with already broken glass, but it was no good – they had a decent build of ring which was strengthened by an inner ridge moulded to the rest of the outer alloy ring. This gets in the way of the lens, shortening the ‘grabbing’ part of the front thread. No good.
Choose a cheap Kenko filter but be prepared to try more than one if it doesn’t suit first time out.
The aim is also to get the back of the anamorphic lens as close to the main camera lens as possible, meaning you can achieve as wide a focal length as possible. I had a little compromise here:
The anamorphic lens needs to be screwed on, and where the filter thread tightens up is not always within the range of the rotating front of the anamorphic lens which allows you to straighten it up. Only rotates through approx. 45 degrees!
Through pure luck, the Kenko thread tightened on my Canon lens thread at the wrong point and I wasn’t able to get the lens straight without loosening the lens by unscrewing it back slightly. Not ideal, as I’d knock the lens off straight in the middle of handling it. I’d rather get it within the rotating window of the built in LA7200 mechanism, and use the thumbscrew at the side to fix it in place. It’s important to have the anamorphic lens on straight (and the orientation!) otherwise vertical lines will be diagonal!
So I simply tried my luck again and screwed on a 2nd filter ring with no glass – that B+W one – and this time, with a compromise (the LA7200 was now further away from the camera lens so had to go from 15mm to 16mm to avoid seeing the dark edges into view) I now had a tight lock but the rotating of the lens was within the 45 degree motion of the LA7200’s built in correction mechanism.
The LA7200 looks cool. You loose some stealthiness, the GH1 now looks like a cinema camera rather than a point and shoot DSLR for stills!
It allows auto-focus with the kit lens – no problem – and a wide focal length.
It’s versatile and very adaptable, and when I find an acceptable way of shooting below F3.5 at fast apertures it could even be useful for night shooting too.
All in all – it’s a similar deal with the GH1 versus 5D. What you may loose slightly in image quality ends up being virtually not noticeable if handled right, but you gain tons of useful ergonomics, flexibility and practicality – and in real life shooting away from staged actors and sets it’s quicker to get the shot you might otherwise miss.
I will post part 2 along with my first short video shot with the LA7200, so stay tuned in the coming weeks!
