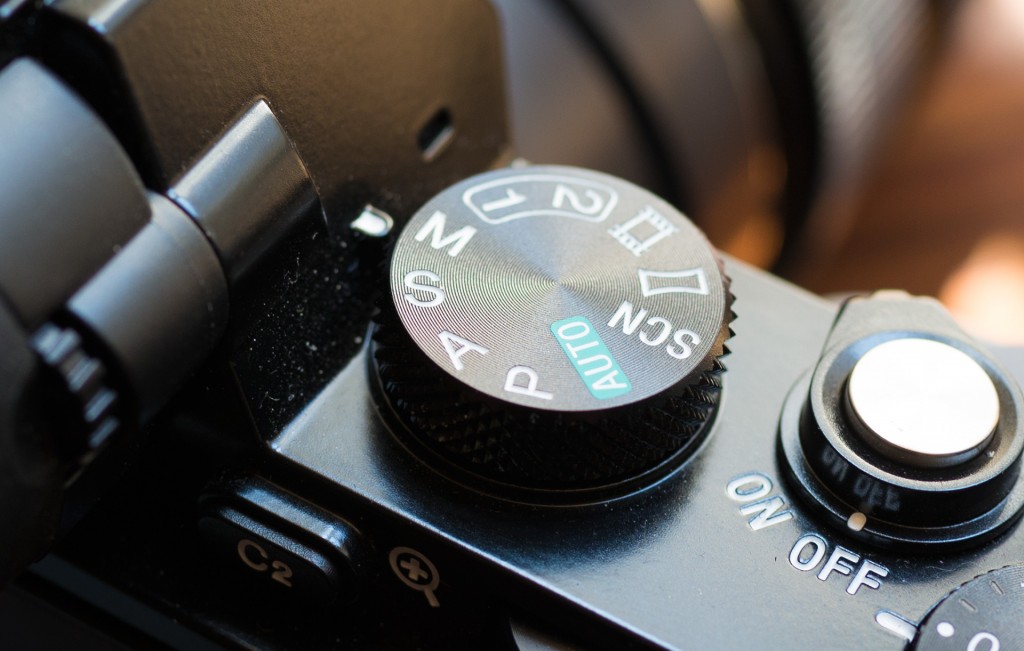
After a while now shooting with the Sony A7S (final part of my review coming soon, review part 1 here) I have found it’s better to shoot video outside of the Sony movie mode on the dial. Here’s how to set up the M stills mode on the dial for movie recording and get two important advantages over Sony’s movie mode.
The movie mode on the A7S has two quirks that I find quite limiting. For a start you can’t take stills! Occasionally I’d like to reel off the odd 4K raw version of my scene. I could be shooting stills and video on one assignment as a journalist or as a filmmaker I might want a still shot for sharing on social media or for high resolution promotional material. The stills shutter button is disabled in movie mode. This isn’t the case on other cameras like the 5D Mark III.
I also like to be able to focus! Seems a strange request to camera companies, but I really like being able to get a sharp picture!! I find manual focus assists universally slow or bad on stills cameras, because in the era of AF it almost seems like an afterthought-feature for the odd balls who still use manual focus. For filmmaking of course manual focus is the de-rigueur. The zoomed manual focus assist in movie mode on the A7S is practically unusable. Way too soft and lots of weird pixilated false detail. Switching to stills mode on the dial gives you a much sharper one and when display quality is set to high, peaking works better as well. You maintain a high resolution live view feed, though it still isn’t as good as having an external EVF or field monitor with very fine, high res peaking.

To get the right framing for movies you need to set the stills mode to 16:9. Raws can be processed as 3:2 in Photoshop by selecting the crop tool on the Adobe Camera Raw toolbar and extending the top and bottom edges.
You can still shoot S-LOG, XAVC-S, 24p, etc. in stills mode. S-LOG is not 100% optimal for raw stills as these should be exposed for lower ISOs than 3200 in bright light. However even with S-LOG 2 and 16:9 enabled, reeling off a raw still very quickly works just fine for the end result, I’d say 90% optimal. If you want the 100% best for a stills shoot simply switch these options to 3:2 and PP to off. By default S-LOG 2 is PP7 in the picture profiles menu.
In stills mode to monitor in S-LOG 2 with the correct histogram and exposure, you have to disabled Silent Shutter. If you have S-LOG 2 selected in movie mode and Silent Shutter enabled in stills mode you can monitor with a standard picture style and when you hit record, ISO will go to 3200 and S-LOG 2 will kick in. Some might find this useful but I don’t because S-LOG really requires a different exposure and for you to keep an eye on the histogram, which a standard picture profile changes dramatically. It isn’t a raw histogram on the A7S. I prefer to just work in S-LOG 2 all the time and to keep the histogram peaks in the middle, ignoring the exposure meter which usually claims I’m 2 stops over exposed. Then I simply disable S-LOG 2 when I’m doing a long run of stills. I have set zebra to 100%.
With S-LOG enabled, raw stills at ISO 3200 don’t really have a noise problem, just a very slight grain noticeable compared to the inky smoothness of ISO 200 and a slower shutter speed – but in bright light at F2 you usually need 1/8000 for a still shot at ISO 3200 with S-LOG 2 enabled so right on the limit of the shutter. This can be a major issue so to get those lower ISOs and exposing appropriately is still an advantage for raw. I’ve assigned the picture profiles to a function button so I can easily switch S-LOG on or off. I’ve also assigned aspect ratio 3:2 / 16:9 to a function button for when I am mainly shooting stills.
Everything you have in movie mode works in stills mode, like APS-C crop mode for example. However raw stills shot in APS-C crop mode cannot be extended to a full frame composition in post. You are stuck with the 5MP. Since the main reason you’d use APS-C mode is for a lens that only covers the smaller sensor area, this limitation is perhaps a sensible one. But if you’re using it as a lossless zoom for 1080p video and forget to change out of it for stills, you are losing a lot of resolution.
For various reasons it’s better to use the main movie mode if recording externally via HDMI. For internal recording, quality is the same as in the main movie mode, if it wasn’t t wouldn’t recommend using it! The final thing to be aware of is that in stills mode when shooting full frame stills and video, the correct framing for 720/100/120fps only kicks in when the recording starts. When APS-C crop mode is enabled the framing stays constant as this mode uses an APS-C portion of the sensor to record from.
I am happy with the workaround. To get the shutter button reeling off the occasional still and to get that better quality focus zoom is really useful. I shouldn’t really have to though, if only Sony had done a better implemented movie mode. A firmware update to allow the function of the shutter button to be changed would be a start. 3 options – disabled, movie start / stop trigger, stills capture. Simple! Give us the choice. A high quality focus assist zoom to rival the 5D Mark III is needed too where the sensor switches mode to a proper windowed 1:1 crop with no false detail and it needs to be quicker to move around the frame.
Stay tuned for the final part of my A7S review on Monday 8th September 2014.


