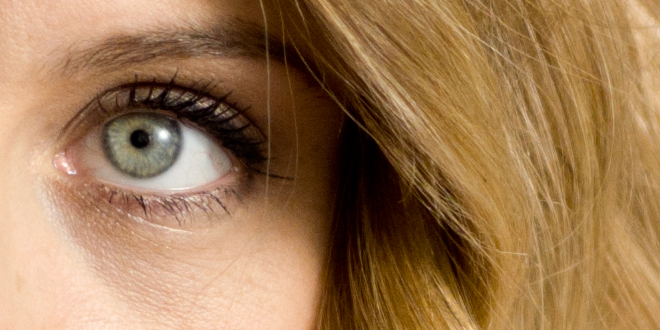
Above: my first go at grading the Blackmagic Cinema Camera raw output
The above frame is scaled to 660 pixels wide for the blog. Click here to view the full 2400 x 1350 frame in your browser and another full frame here
John Brawley and Blackmagic Design today released the first raw DNG files from the camera.
Here’s my take on how the raw camera stands up.

Click here for the larger version
I don’t think anyone will be disappointed.
Not much has lived up to the cliche ‘game changer’ recently and only having seen snippets of the Blackmagic via compressed Vimeo footage I was beginning to have my doubts.
These CinemaDNG files sweep any doubts into the gutter.
Resolution is superb. Best I have ever seen for the price. Better than the C300 and better than the GH2. At per pixel level from the 2.5K raw, it is sharp no question.

Any doubts that this isn’t a sharp camera now? Wow.
Noise isn’t really noise like we’re used to it on DSLRs. On DSLRs we have those blotchy patches and brightly coloured red speckles, or blueish fizz. That noise is very destructive.
Here on the Blackmagic Cinema Camera it looks like someone brought out the Gorilla Grain plugin. It looks that nice.
I wouldn’t even call it noise. It is closer to real film grain.
The exposure below is a 1:1 crop rated for ISO 1600. As you can see, it has the fine grain of an Olympus OM-D raw still.

Also may I add that is pretty damned clean for ISO 1600. Of course this is raw, so ISO 1600 is not a gain boost applied on the sensor itself but to the raw data after it comes off the sensor. If you set ISO 1600 in-camera the sensor’s native ISO remains the same but the image is lifted like you would lift the exposure of a raw still in Photoshop. With raw you set ISO for monitoring purposes but it isn’t baked into the footage like with a DSLR so effectively you set your real ISO in post.
One thing I did notice with the grain – and you have to look VERY closely at a still frame for this is that certain non-random patterns are over some areas of grain texture. But I honestly don’t think anyone will actually notice this.
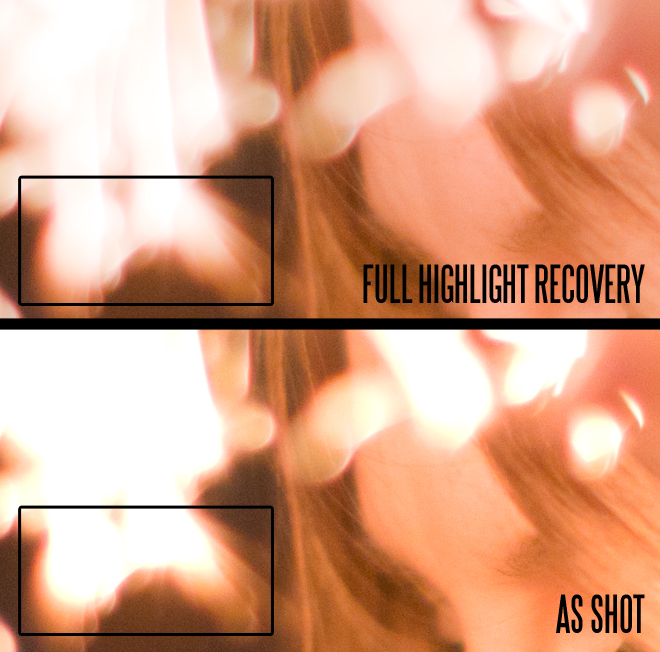
The roll off to highlights is far and away the best I have ever seen for $3000 as well.
Pay special attention to the black box below…

The bottom one is what your highlights usually look like on a DSLR, FS100 or even C300. These are sparks – very bright and high contrast.
I was able to soften the highlights and make the roll off incredibly smooth considering how extreme the highlights are in this shot.

In terms of colour, I don’t find anything odd with the camera either. Reds are as saturated or as muted as you want them to be and when you push the saturation in post it doesn’t fall apart, though you can get some plastic ‘fake tan’ skin tones if you push saturation too much with a warmer white balance.
Speaking of which this is actually a great camera for skin tones because of the 12bit raw output. I’ve never seen actors look more life-like and I’ve never had so much flexibility to make them look better. The 5D Mark II had a good go of skin tones. But the Blackmagic takes it to a new level of realism.
The Blackmagic Cinema Camera is so close to being an actor’s makeup artist, it is going to be loved by crew and stars alike.
Here’s an example of how I tried to ‘fix’ skin in my first go at grading. You can go for the ultra revealing look, putting contrast and detail into every pour and wrinkle of a face, or you can be much kinder to people and give their skin a smooth Hollywood glow by reducing the contrast, recovering some highlights to remove that plastic look and add a cooler white balance.
First revealing then soft and pale


So what is CinemaDNG? Essentially it is just a file format like raw on DSLRs, with each frame stored in a separate file as if using a DSLR burst mode but at 24fps.
The files are 12bit, 2400 x 1350 and can be opened in Photoshop or a professional video orientated grading package like DaVinci Resolve 9 which, amazingly, will ship with the camera.
You can try DaVinci Resolve 9 Beta 3 Lite for free by downloading it here.
Unfortunately playing back and editing CinemaDNG raw even on the highest end Macbook Pro is extremely demanding on your system and with my SSD packing, i7 quad core 8GB MacBook I couldn’t get above 1fps in Premiere CS5.5. Although CinemaDNG is actually an open standard it is created by Adobe themselves and yet their support in Premiere for it is really incredibly ropey! You can download the plugin to allow DNG files to be opened in Premiere CS5.5 from here, but I don’t recommend it because the noise looks really odd, shadows and highlights are crushed and it has a very ‘8bit’ feel, which you cannot grade accurately from.
You will not be editing Blackmagic Cinema Camera raw footage natively in Final Cut Pro, FCP X or Premiere CS5.5 / CS6 just yet.
Instead it is best to do your grading work in Resolve, then export to ProRes and edit in your NLE of choice. Of course you can also skip Resolve altogether and record in ProRes in-camera which is a great feature, and then just do light grading work with the Fast Color Corrector in Premiere. So that faster workflow for tight deadlines is still there if you need it. And if you want the best possible grading experience then raw obviously takes a lot longer.
All in all, John’s DNGs have swept away any doubts I have about this camera being anything other than spectacular. I cannot wait to get my hands on this $3000 piece of raw cinema, in a box.
[vimeo]http://vimeo.com/47933090[/vimeo]Don’t forget to head over to John’s site and have a go at grading the raw CinemaDNG frames yourself – it can be done in Photoshop to give you an idea of what the camera is capable of, without any Resolve skills.


