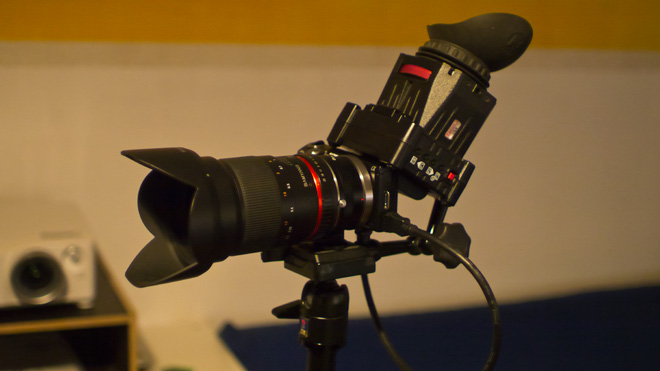
The NEX 5N is a tiny camera but it starts to really look the part when you add a chunky lens and monitor. The only problem is how do you mount a large lens to a small camera without damaging the mount, and how do you mount a monitor without a hotshoe or a rig?
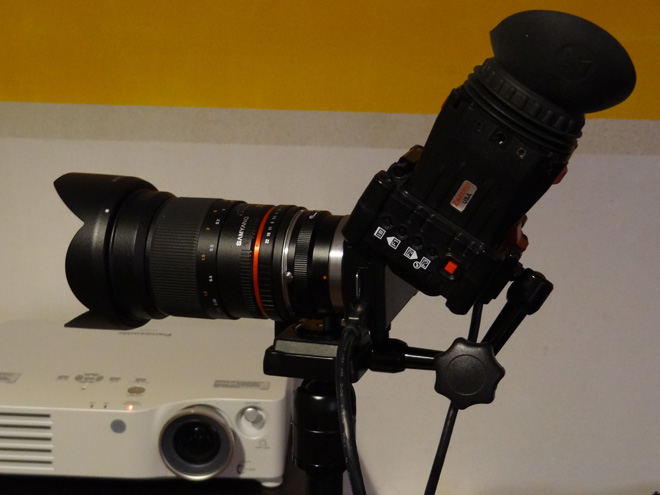
I wanted to create a mini FS100 here not a ginormous DSLR rig that defies the point of having such a small camera in the first place.
The secret to maintaining a small size and something which can mount on a tripod without stressing the mount is – believe it or not – the cheapest bit. If you buy a lens adapter with a tripod mount on the adapter itself it allows you to attach the monitor via an articulated arm to the Camera’s tripod mount. This also solves one of the biggest weaknesses of the small NEX for pros – it raises the camera far enough away from the quick release plate that you can access the battery compartment and swap SDs whilst it’s on a tripod.
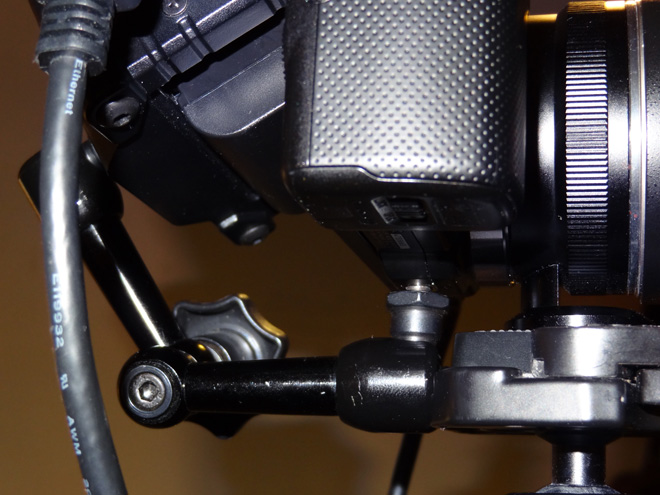
Added to that the camera seems to maintain the same gamma on the HDMI output between live view and record, which it doesn’t do on the built in display. I need to test this more but it certainly seems to be the case – much more accurate exposure and colour.
You can also take this off the tripod and use it handheld. Even the lens adapter tripod mount unscrews leaving the barrel round and smooth all the way back to the camera body, which is almost completely invisible between the lens and the EVF! People seeing you shoot with this will take ages to work out that it is a Sony NEX! It looks more like a pro cinema camera albeit a small one.
I have never felt so comfortable or at home with this rig. Plus it has one big advantage over the FS100 – far fewer buttons!!
Parts list
- Pixco Canon EOS lens adapter to Sony NEX ($50 – Buy It Now
)
- Samyang 35mm F1.4 Canon (US $562 – Buy It Now
and UK £329 – Buy It Now
)
- Zacuto EVF Flip Pro (includes Z-Finder Pro 2.5x $1000 – Buy It Now)
- Articulated monitor arm ($30 – Buy It Now
)
I’ve positioned the EVF far enough from the controls for it not to get in the way, since the cabling exits on the right. Even if you have big hands like me you can still get to everything unobstructed, and because the arm is articulated you can move the EVF so it’s offset to the left if you prefer. Though I like it central in line with the front of the lens.
It gives the sensation of looking directly through the lens.
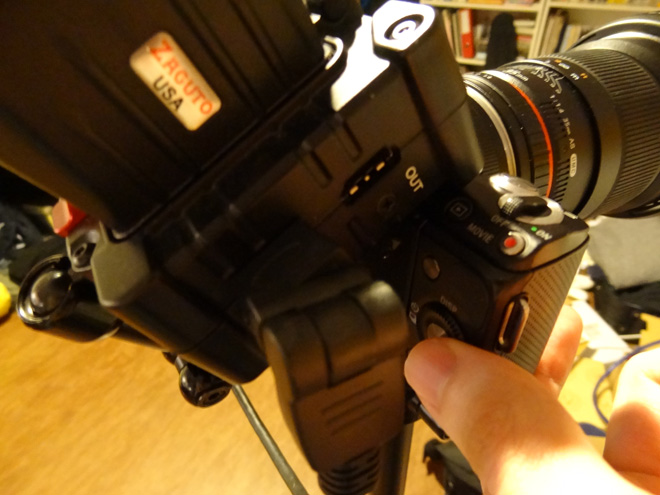
This is now the perfect B-cam and stealth video shooting kit.
Compared to a standard lens adapter and mounting the camera the usual way onto a tripod the list of advantages is surprisingly long from such a simple setup.
Advantages
- More monitoring options on the EVF, better peaking than the one built into the Sony
- No stress on the camera body or hotshoe
- Saves your camera battery, EVF takes over the screen duties
- Easier manual focus with the magnification of the Z-Finder
- Image visible in bright sunlight
- Still very compact and lightweight
- Access the SD card and battery whilst on a tripod
- Much more affordable than an FS100 or VG20!
- Looks far more professional not like a toy
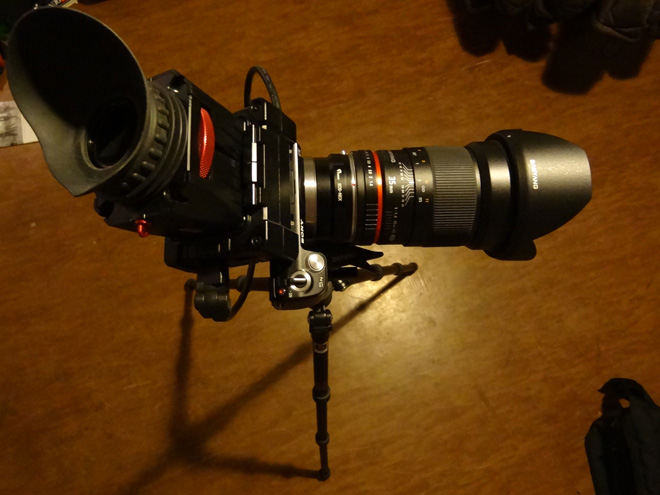
In use this feels very solid and stable. When you flip the Z-Finder up on the EVF Flip you feel like you can do so with a fair wack and not hurt anything. This isn’t a flimsy spidery Frankenstein rig – I hate those kinds of DSLR setups! This one can take a bit of abuse since all the mounting pressure goes through the lens adapter and a tough steel arm, not the camera chassis or lens mount. The tripod mount on the NEX 5N is of course metal in a magnesium alloy body and the Zacuto EVF is very light so there’s no issues there.
And if the lens adapter dies just get a new one. They’re $50 on eBay.
The big brother FS100 isn’t this simple, small or elegant and it doesn’t cost a combined total of $1800. Rock on!
